How to Replace a Rear Differential
To replace a rear differential, first, lift the vehicle, drain the fluid, remove the bolts, and install the new unit. Rear differentials play a crucial role in the proper functioning of a vehicle’s drivetrain system.
Over time, they may wear out or develop issues that require replacement. By following a few simple steps, you can replace a rear differential and ensure your vehicle maintains optimal performance. In this guide, we will walk you through the process of replacing a rear differential, highlighting key steps and considerations to keep in mind.
Whether you are a seasoned DIY mechanic or a car enthusiast looking to learn more about vehicle maintenance, this guide will provide you with the necessary information to tackle this task effectively.
Step 1: Gather The Necessary Tools And Materials
In this guide, we’ll walk you through the process of replacing the rear differential, a crucial task when it comes to maintaining optimal vehicle performance. The first step is to gather the necessary tools and materials. This preparation is vital to ensure a smooth and efficient replacement process.
List Of Required Tools
- Jack and jack stands
- Ratchet and socket set
- Phillips and flathead screwdrivers
- Breaker bar
- Torque wrench
- Oil drain pan
- Safety goggles and gloves
- Shop towels
List Of Required Materials
- New rear differential
- Differential fluid
- Gasket or RTV sealant
- Threadlocker
- Cleaner/degreaser
- Marker or paint for labeling

Credit: www.motortrend.com
Step 2: Prepare The Vehicle
Park The Vehicle On A Level Surface
- Find a flat area to park the vehicle securely
- Turn off the engine and shift to park or 1st gear
Engage The Parking Brake
- Pull the parking brake handle firmly
- Ensure the vehicle stays stationary
Step 3: Remove The Rear Differential
Before proceeding with this step, ensure you have safely elevated the vehicle off the ground.
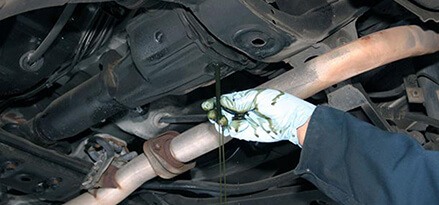
Drain The Differential Fluid
- Locate the differential fluid drain plug.
- Place a drain pan beneath the plug.
- Unscrew the plug to drain the fluid completely.
Disconnect The Driveshaft
- Locate the bolts connecting the driveshaft to the rear differential.
- Using a socket wrench, unscrew the bolts and remove them.
- Gently disconnect the driveshaft from the rear differential.
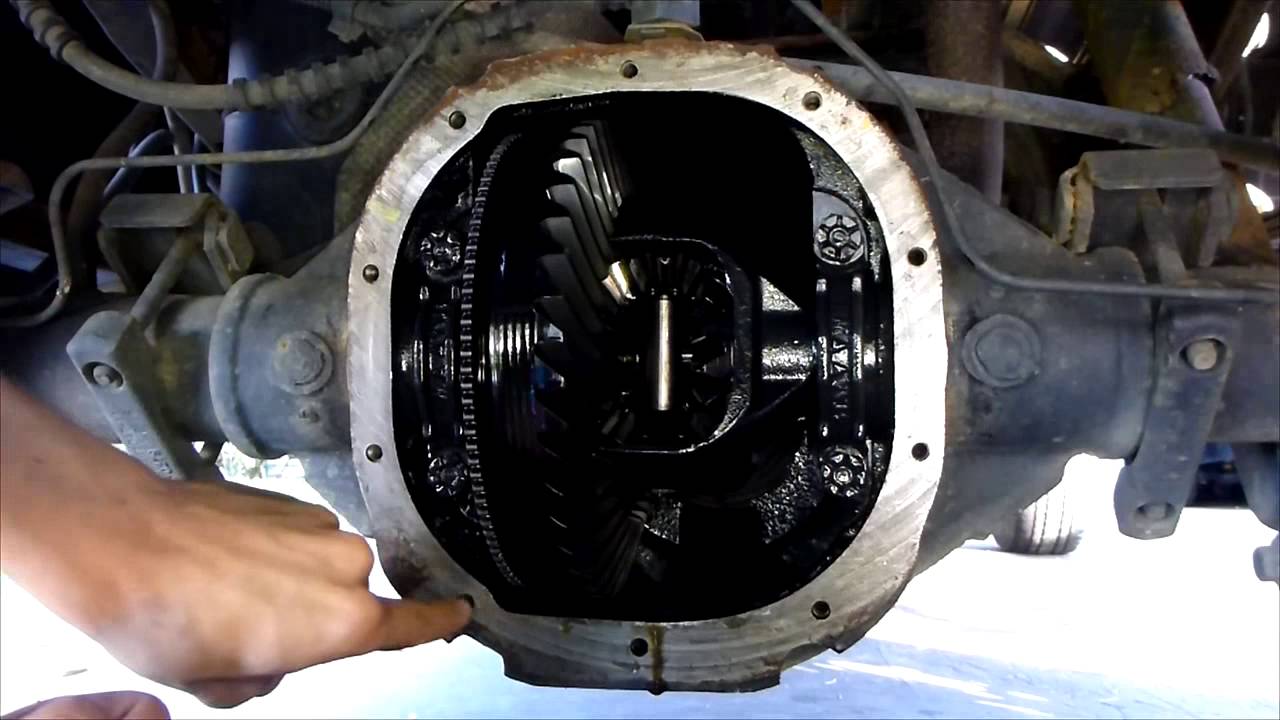
Remove The Rear Differential Assembly
| Steps | Actions |
|---|---|
| Step 1 | Identify and remove the rear differential mounting bolts. |
| Step 2 | Support the weight of the differential and carefully lower it from the vehicle. |
| Step 3 | Ensure all connections are detached before fully removing the differential. |
Remember to keep track of the bolts and components you remove for reassembly.
Credit: www.mobil.com
Step 4: Install The New Rear Differential
Replacing the rear differential on your vehicle is a crucial task and an essential part of proper maintenance. Step 4 in this process is to install the new rear differential. This step requires precision and attention to detail to ensure the proper functioning of your vehicle’s drivetrain. Here, we will guide you through the sub-steps involved in installing the new rear differential.
Position The New Rear Differential
1. Carefully position the new rear differential beneath the vehicle, ensuring that it aligns correctly with the mounting points.
2. Use the appropriate tools to secure the differential in place, ensuring that it is level and properly aligned with the driveshaft and suspension components.
Reconnect The Driveshaft
1. Slide the driveshaft back into position, aligning the universal joints carefully to ensure a proper connection.
2. Tighten the driveshaft bolts to the manufacturer’s specified torque requirements to secure the connection.
Fill The Differential With New Fluid
1. Locate the fill plug on the rear differential housing and remove it using a wrench or socket.
2. Fill the differential with the appropriate type and amount of new fluid, as recommended by the manufacturer.
3. Replace the fill plug and tighten it to the specified torque to prevent leaks and ensure proper fluid retention.
Step 5: Test And Finalize The Installation
Congratulations! You’re almost done replacing the rear differential. Now it’s time to make sure everything is in proper working condition. Follow these steps to test and finalize the installation:
Test Drive The Vehicle
Put your vehicle into gear and take it for a test drive to ensure the rear differential is functioning correctly. Pay close attention to any abnormal noises, vibrations, or handling issues. Take it for a spin around the block or on a quiet road to give it a real-world test.
Check For Leaks
After the test drive, park your vehicle on a clean and flat surface. Inspect the rear differential area for any signs of leaks. Look for dripping fluids or wet spots around the differential or axles. Leaks can indicate a problem with the installation or a faulty seal. If you notice any leaks, address them immediately before continuing.
Make Any Necessary Adjustments
If everything checks out during the test drive and there are no leaks, proceed with making any necessary adjustments. This includes tightening any loose bolts or connections and ensuring all components are properly aligned. Refer to the manufacturer’s instructions or consult a professional mechanic if you’re unsure about any specific adjustments.
By following these final steps of testing and finalizing the installation, you can have confidence in your rear differential replacement. Your vehicle will be ready to hit the road once again, performing at its best.
Credit: m.youtube.com
Frequently Asked Questions On How To Replace A Rear Differential
How Hard Is It To Replace Rear Differential?
Replacing a rear differential can be a complex task requiring professional expertise. It involves removing the old differential and installing a new one, ensuring precise alignment and proper gear ratios. It is best to consult a qualified technician for this job.
How Much Does It Cost To Replace A Rear Differential?
The cost to replace a rear differential can range from $1,500 to $2,500. Factors like car make and model, labor costs, and parts availability influence the final price. It’s best to consult a professional for an accurate estimate.
How Long Does It Take To Change A Rear Differential?
It typically takes 2-4 hours to change a rear differential, depending on vehicle make and model.
Can You Still Drive With A Bad Rear Differential?
Driving with a bad rear differential can be dangerous and cause further damage to your vehicle. It’s best to get it repaired before driving.
Can I Replace A Rear Differential On My Own?
Yes, you can replace a rear differential on your own with the right tools and knowledge.
What Are The Signs That My Rear Differential Needs Replacement?
Signs that your rear differential needs replacement include whining or clunking noises, leaks, and difficulty turning.
How Much Does It Cost To Replace A Rear Differential?
The cost to replace a rear differential can range from $500 to $2000, depending on the make and model of your vehicle.
Conclusion
Replacing a rear differential is a manageable task that can be completed with the right tools and preparation. By following the outlined steps and safety precautions, you can maintain the functionality and longevity of your vehicle. Don’t hesitate to seek professional assistance if needed, as ensuring proper installation is crucial for optimal performance.