How To Fix Hole In Garage Wall
Are you tired of staring at that unsightly hole in your garage wall every time you park your car? Don’t worry, fixing it yourself is easier than you think. With the right tools and materials, you can patch up that hole in no time and regain some peace of mind.
Before we dive into the steps for fixing a hole in your garage wall, it’s important to assess the size and location of the damage. Is it small enough to be fixed with just a bit of spackle or will you need to cut out a larger section and replace it with new drywall? Once you have determined the extent of the damage, gather all necessary tools and materials such as joint compound, sandpaper, a putty knife, and paint. With these items at hand, let’s get started on repairing that pesky hole.
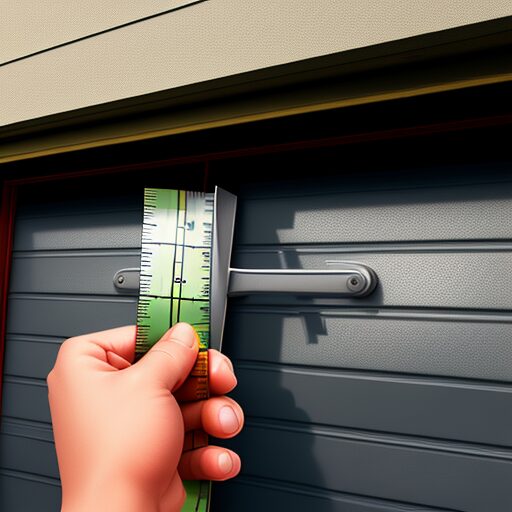
Assess the Size and Location of the Hole
@ Midjourney AI Image Prompt: /imagine prompt:Create an image showing a person using a measuring tape to assess the size of a hole in a garage wall. Show the location of the hole using arrows or circles. No text or words in the image. –v 5 –ar 3:2 (Note: Use –v 4 if you do not have a paid Midjourney account)
You’ll want to take a step back and assess just how big and where exactly the damage is located. This will help you determine the best approach for repairing the hole in your garage wall. Measuring accurately is key here, so grab a tape measure or ruler and get to work.
Once you’ve determined the size of the hole, consider its location on the wall. If it’s near an edge or corner, you may need to use additional support when patching it up. You can use a template, such as a piece of cardboard or paper cut to fit around the damaged area, to ensure that your repair job blends seamlessly with the rest of your garage wall.
Now that you know just how big and where the damage is located, it’s time to start planning your repair strategy. Whether you’re patching up small holes with spackle or replacing larger sections of drywall altogether, taking accurate measurements and using templates can make all the difference in achieving a seamless finish.
Gather the Necessary Tools and Materials
@ Midjourney AI Image Prompt: /imagine prompt:Create an image of a person holding a drill, spackle, putty knife, sandpaper, and a patching kit, standing in front of a garage wall with a hole. Show each tool and material clearly and labeled. –v 5 –ar 3:2 (Note: Use –v 4 if you do not have a paid Midjourney account)
Before you start fixing the hole in your garage wall, ensure that you have all the necessary tools and materials. Choosing the right materials is crucial to ensure a seamless patching job. You will need joint compound, drywall tape or mesh, sandpaper, a putty knife, a utility knife, and primer.
Tips for efficient patching:
- Opt for setting-type joint compound instead of ready-mixed ones as they are more durable and shrink less.
- Use fiberglass mesh tape instead of paper tape as it adheres better to the wall and prevents cracks from reappearing.
- Apply multiple thin layers of joint compound rather than one thick layer. This method ensures consistency and reduces drying time.
Once you have gathered all the essential tools and materials needed, you can start repairing the hole in your garage wall. Remember to wear safety goggles and gloves while handling any sharp objects like knives or sandpaper.
Incorporate these tips into your repair process to ensure an efficient patching job that lasts.
Prepare the Wall Surface
@ Midjourney AI Image Prompt: /imagine prompt:Create an image of someone sanding and wiping down a garage wall with a damp cloth, preparing the surface for patching a hole. Show the texture of the wall and the tools being used. –v 5 –ar 3:2 (Note: Use –v 4 if you do not have a paid Midjourney account)
Before fixing the hole in your garage wall, you need to prepare the surface properly. Start by removing any loose debris around the area of damage. Next, use sandpaper to gently sand the area around the hole to create a smooth surface for patching. Finally, clean the surface with a damp cloth to ensure good adhesion of any filling materials that will be used. By following these steps, you’ll be well on your way to successfully repairing your garage wall.
Remove Loose Debris
Clearing away any loose debris is an essential step in fixing a hole in your garage wall. Start by using a putty knife or scraper to remove any loose paint, plaster, or drywall material around the damaged area. Be sure to wear gloves and eye protection to keep yourself safe from any sharp edges or dust particles that may fly up during this process.
Once you have removed all of the loose debris, use a vacuum cleaner with a brush attachment to clean up any remaining dust or debris from the area. This will ensure that there are no bumps or uneven surfaces left behind, giving you a smooth surface to work on. Taking these steps will ensure that your repairs stay intact and do not crumble under stress over time.
Sand the Area Around the Hole
Now it’s time to smooth out the rough edges and make the area around the damage look as good as new. Grab some sandpaper and get ready to give that spot a little TLC, so it can blend in seamlessly with the rest of your space. Before you start sanding, be sure to take some safety precautions. Wear gloves and protective eyewear to prevent any debris from getting into your eyes or skin.
When choosing sandpaper grit, remember that coarser grits are used for larger holes or rougher surfaces while finer grits are used for smaller holes or smoother surfaces. You may need to use multiple types of sandpaper depending on how deep the hole is or how much repair work was done beforehand. If you’re unsure which type of sandpaper to use, consult with an expert at your local hardware store. With a little patience and attention, you’ll have a perfectly smooth surface in no time!
Clean the Surface
You’ll want to make sure everything is looking squeaky clean before moving onto the next step. The importance of surface cleaning cannot be overstated when it comes to fixing a hole in your garage wall. Any dust, debris or grease on the surface will prevent the patching material from sticking properly, and may cause it to fall off later on. Therefore, take some time to thoroughly clean the area around the hole with a damp cloth or sponge.
In addition to using water, you may also consider using some of the best cleaning products for prepping walls. Some good options include trisodium phosphate (TSP), which is great for removing grease and grime, or denatured alcohol which can remove any stubborn stains. Just be sure to read all instructions carefully and follow proper safety precautions when using these products. By taking this extra step to clean the surface before patching up the hole, you can ensure that your repair job looks professional and lasts for years to come.
Cut the Patch Material
@ Midjourney AI Image Prompt: /imagine prompt:Create an image of a person measuring and cutting a piece of drywall to fit the hole in a garage wall, with a saw and measuring tape visible. –v 5 –ar 3:2 (Note: Use –v 4 if you do not have a paid Midjourney account)
Get ready to slice the patch material like a pro! When it comes to fixing a hole in your garage wall, cutting the patch material is an essential step. First, select the type of patch material that matches the existing wall texture. You can choose from various options such as drywall patches or mesh patches. Once you have selected the right material, measure and mark the size of the hole on it.
Cutting technique plays a crucial role in fixing a hole in your garage wall. Use a utility knife or scissors to cut along the marked lines accurately. If you are using mesh patches, make sure to cut them slightly larger than the size of the hole. This will help in creating a secure bond between the patch and wall surface.
After cutting out the patch material, clean up any excess debris around it using sandpaper or a sanding sponge. Ensure that there are no visible bumps or rough edges on both sides of your patch before proceeding further with repairing your garage wall. With these simple steps, you can now move forward towards repairing your garage wall and achieving that desired freedom from worry about holes in your home’s walls!
Apply the Patch
@ Midjourney AI Image Prompt: /imagine prompt:Create an image that shows a person applying spackle to a hole in a garage wall. The person should be holding a putty knife and smoothing out the spackle. The surrounding area should be clean and free of debris. –v 5 –ar 3:2 (Note: Use –v 4 if you do not have a paid Midjourney account)
Now it’s time to apply the patch. Start by centering it over the hole and securing it in place with screws or drywall adhesive. Then, use a putty knife to spread joint compound over the edges of the patch, feathering it out so that there are no visible seams. Smooth out any rough spots with sandpaper or a damp sponge for a seamless finish.
Apply Joint Compound
Well, looks like we’ve got ourselves a little bit of a situation here. Time to bust out the old trusty spackle and give this baby a smooth finish, if you catch my drift. Now that the patch is in place, it’s time to apply joint compound. This will help create a seamless finish on your garage wall.
First things first – make sure your tools are ready for action. You’ll need a putty knife and some joint compound. Start by applying a thin layer of joint compound over the entire patch with your putty knife, making sure to cover any rough edges or uneven areas. Then, use your putty knife to scrape off any excess joint compound before it dries. Repeat this process until you achieve the desired level of smoothness on your garage wall. With these techniques for smoothing and tips for applying joint compound, you can be sure that your garage wall will look as good as new in no time!
Center the Patch
To ensure a seamless finish, you’ll want to center the patch over the damaged area and use your putty knife to press it firmly into place. This is especially important when patching larger holes in your garage wall. By centering the patch, you can avoid any lumps or bumps that may occur if it’s not properly aligned with surrounding walls.
Another tip for patching larger holes is to use a level to ensure a flush patch. You don’t want your newly patched area to stick out like a sore thumb! By placing the level on top of the patch and adjusting as necessary, you can guarantee that the repaired section will blend in seamlessly with the rest of your garage wall. So take your time, be patient, and follow these tips for a professional-looking repair job!
Smooth Out the Edges
You can achieve a polished finish by using your putty knife to smooth out the edges of the patch, blending it seamlessly with the surrounding area. This step is crucial in making sure that the hole in your garage wall will be unnoticeable. To do this, apply a small amount of spackle along the edges of the patch and use your putty knife to feather it out towards the surrounding area. Be sure to keep your putty knife at a 45-degree angle while doing this technique for blending colors.
After you have smoothed out the edges, it’s time to choose the right paint finish. The goal is to match the existing texture on your garage wall as closely as possible. If you’re unsure about what type of finish to use, consider asking for help from professionals or visiting a hardware store for advice. Additionally, techniques like using primer before painting and applying multiple coats can also help ensure that your patch blends perfectly with its surroundings. With these tips and tricks up your sleeve, you’ll be able to fix any hole in your garage wall like a pro!
Let the Patch Dry
@ Midjourney AI Image Prompt: /imagine prompt:Create an image of a hand holding a putty knife smoothing out a patch of spackling compound on a garage wall. The patch should be slightly raised and textured, with a small fan blowing on it to aid in drying. –v 5 –ar 3:2 (Note: Use –v 4 if you do not have a paid Midjourney account)
Now that the paste is applied, just wait for it to dry completely before proceeding to the next step; you’ll have plenty of time to catch up on your favorite TV show or check your Insta feed. Drying time is crucial in ensuring a successful patch job. Rushing through this process may result in uneven surfaces or worse, the entire patch falling off once painted.
Importance of patience cannot be stressed enough when dealing with hole repairs. The drying time varies depending on the type of paste used and the size of the hole. Generally, it takes around 24 hours for the patch to dry completely. However, it’s best to refer to manufacturer instructions for specific drying times.
During this waiting period, avoid touching or applying any pressure on the patched area as this can cause cracks and irregularities. Once fully dried, inspect if there are any bumps or rough edges that need sanding down before painting over them. Remember that taking your time during this stage will lead to a more polished and professional-looking fix in your garage wall.
Sand and Smooth Out the Patch
@ Midjourney AI Image Prompt: /imagine prompt:Create an image of a gloved hand using sandpaper to smooth out a patch of spackling on a garage wall, with dust particles visible in the air. –v 5 –ar 3:2 (Note: Use –v 4 if you do not have a paid Midjourney account)
Ready to give your patch job a polished finish? Sanding and smoothing out the dried paste will ensure a professional-looking result that you’ll be proud to show off. To achieve this, here are some techniques for sanding and tools for smoothing that you can use:
-
Sandpaper: Use fine-grit sandpaper (220 grit or higher) to smooth out any rough edges or bumps in the patch. Hold the paper firmly and move it in circular motions until the surface is even.
-
Sanding Block: For larger areas or more stubborn patches, a sanding block can provide better leverage and control over the sandpaper. Hold the block at an angle and apply firm pressure as you move it back and forth.
-
Putty Knife: A putty knife can help remove excess drywall compound from around the patch area. Run it along the edges of the patch to create a smooth transition between the patched area and surrounding wall.
-
Tack Cloth: After sanding, wipe down the patched area with a tack cloth to remove any remaining dust particles before painting.
Remember to start with light pressure when sanding and gradually increase as needed, being careful not to over-sand or damage surrounding areas of your garage wall. With these techniques for sanding and tools for smoothing, your garage wall will look good as new in no time!
Apply a Second Coat of Joint Compound
@ Midjourney AI Image Prompt: /imagine prompt:Create an image of a person applying a second coat of joint compound to a garage wall, using a putty knife to smooth it out and fill in any remaining holes or cracks. Show the person wearing gloves and protective gear. –v 5 –ar 3:2 (Note: Use –v 4 if you do not have a paid Midjourney account)
Smoothly spread a second coat of joint compound over the previously patched portion to seamlessly blend it with the rest of the surface. This step is crucial in achieving a flawless finish. Before applying the second coat, make sure that the first coat has completely dried. Use a putty knife to apply and spread the joint compound evenly. Make sure to feather out the edges of your patch to prevent noticeable ridges or bumps.
Tips for sanding joint compound: Wait until the joint compound has fully dried before sanding it down. Start off with coarse-grit sandpaper and gradually work your way up to finer grits. Be careful not to oversand as this can damage or create holes in your patchwork. After sanding, use a damp cloth to wipe away any dust and debris.
Choosing the right patch material is also important in fixing holes in garage walls. For smaller holes, you can use spackling paste or lightweight joint compound while larger holes may require mesh tape reinforcement before applying joint compound. It’s essential to choose materials that are compatible with each other and will stick well on your wall surface for a long-lasting repair.
Incorporating these tips when applying a second coat of joint compound can help you achieve professional-looking results when fixing holes in garage walls. Remember to take your time and be patient throughout the process as rushing through it may lead to unsightly patches that will only need more repairs later on.
Sand and Prime the Wall
@ Midjourney AI Image Prompt: /imagine prompt:Create an image showcasing the steps of sanding and priming a garage wall to fix a hole. Show the wall being sanded with a sanding block, followed by a primer being applied with a paintbrush. –v 5 –ar 3:2 (Note: Use –v 4 if you do not have a paid Midjourney account)
To achieve a flawless finish, you’ll need to sand down the joint compound using coarse-grit sandpaper and work your way up to finer grits before wiping away any debris with a damp cloth and priming the surface. Sanding is an essential step in the repair process as it smooths out any bumps or ridges created by the joint compound. Make sure to use a sanding block or electric sander for even pressure and coverage.
Choosing the right type of primer is also crucial for achieving a professional-looking repair job. Depending on the material of your garage wall, you may need a specific type of primer that adheres properly and provides adequate coverage. For example, if your wall is made of drywall, you should choose a drywall primer that helps seal porous surfaces and prevents moisture from seeping in.
Finally, don’t underestimate the importance of proper sanding techniques when repairing holes in your garage wall. Take your time to ensure that each layer of joint compound has been sanded down smoothly before moving on to the next step. By following these steps and taking care during each stage of the repair process, you can create a seamless patch that blends seamlessly into your existing wall.
Paint the Wall to Match the Surrounding Area
@ Midjourney AI Image Prompt: /imagine prompt:Create an image of a garage wall with a hole patched up and painted to match the surrounding area, using a paintbrush and paint. Show the blending of colors and texture in the image. –v 5 –ar 3:2 (Note: Use –v 4 if you do not have a paid Midjourney account)
Now that your garage wall has been sanded and primed, it’s time to paint the wall to match the surrounding area. This step is important because if the color doesn’t match, it will be noticeable and can detract from the overall appearance of your garage. To ensure a seamless finish, we’ll cover some color matching techniques and professional painting tips.
When it comes to color matching techniques, you have a few options. The first is to take a sample of the existing paint to your local hardware store and have them custom match it for you. Another option is to use a color-matching app or tool online that can help you find an exact or close match based on a photo or description of the existing paint. Whichever method you choose, make sure to test the paint in a small inconspicuous area before painting the entire wall.
Once you have your paint matched, it’s time to start painting! Professional painters recommend using high-quality brushes or rollers for best results. Be sure to apply multiple thin coats instead of one thick coat as this will prevent drips and give you better coverage. Also, don’t forget to properly clean up after yourself by washing your brushes or rollers with soap and water when finished.
As you can see, painting a garage wall isn’t rocket science but there are definitely some tricks of the trade that can make all the difference. By following these color matching techniques and professional painting tips, your garage wall will look as good as new in no time!
Frequently Asked Questions
How much time will it take to complete the repair?
Oh, boy. You’re asking about estimating duration and time management for a home repair project? That’s like trying to predict the weather in Texas – you might have some general ideas, but it’s mostly a crapshoot. However, there are some things you can do to make sure the process goes as smoothly as possible. First, take inventory of all the tools and materials you’ll need – that way you won’t waste time running back and forth to the hardware store. Next, break down the project into smaller tasks with specific timelines. This will help keep you on track and prevent overwhelm. Finally, be realistic about your expectations – Rome wasn’t built in a day (or even a week). It might take longer than you think to complete the repair, but if you manage your time effectively and stay focused on each individual task, you’ll get there eventually. Good luck!
Can the same process be used for repairing holes in drywall?
Drywall repair is a common task that most homeowners encounter at some point. Fortunately, wall patching techniques for drywall are relatively simple and can be done with just a few tools. To begin, you’ll need to assess the size of the hole and gather your materials – typically joint compound, drywall tape, sandpaper, and a putty knife. Depending on the size of the hole, you may also need to cut out a piece of new drywall to fit into the opening. Once you have everything you need, it’s simply a matter of applying layers of joint compound over the hole until it’s filled in smoothly and evenly. Be sure to let each layer dry completely before sanding down any rough spots or applying another layer. With these simple steps in mind, you’ll be able to tackle any drywall repair with ease and restore your walls to their former glory!
How much will it cost to repair the hole?
Looking to repair a hole in your garage wall but concerned about the cost? Like trying to navigate through a dense forest without a map, estimating the cost of professional services can be overwhelming. Depending on the size and severity of the hole, prices can vary greatly. While it may be tempting to go with the cheapest option available, remember that you get what you pay for. A skilled professional will not only provide a lasting solution, but also save you money in potential future repairs. Don’t let fear of cost hold you back from getting quality work done – do your research and invest in a trusted expert who will help guide you through the process.
Will the repaired area look different from the surrounding wall?
When repairing a hole in your garage wall, it’s important to consider blending techniques and paint matching. The repaired area may look different from the surrounding wall if these steps are not taken into account. To ensure a seamless repair, start by sanding the edges of the hole and cleaning the area with a damp cloth. Apply spackle to fill in the hole, making sure it’s level with the surrounding wall. Once dry, sand the spackle until smooth. Use paint matching technology or bring a sample of your existing paint to a hardware store to find an exact match for your garage wall. Apply the paint carefully using blending techniques such as feathering outwards from the repair site to create a gradual transition between old and new paint. By following these steps, you can achieve a professional-looking repair that blends seamlessly into your garage wall and gives you back your sense of freedom in knowing that everything looks just right again.
Can the hole be filled without removing the damaged drywall?
Don’t make a mountain out of a molehill! You don’t have to tear down the entire drywall in order to fix that hole in your garage wall. There are alternative solutions that can save you time and effort. One option is to use spackling compound, which is easy to apply and dries quickly. However, keep in mind that this method may not be as durable as replacing the damaged drywall altogether. Another alternative is to use mesh tape and joint compound, which can provide a stronger repair but requires more time and skill. Ultimately, the pros and cons of each solution depend on your specific situation and needs. So before you start fixing that hole, weigh your options carefully and choose the one that works best for you. With these alternatives in mind, you’ll have more freedom to focus on other things instead of worrying about a small hole in your garage wall.
Conclusion
Congratulations! You have successfully fixed the hole in your garage wall. Now, take a step back and admire your handiwork. Not only have you saved money by DIY-ing this repair, but you have also gained valuable skills that can be applied to future home improvement projects.
Did you know that according to a survey conducted by HomeAdvisor, the average cost of repairing drywall is $250? That’s no small chunk of change! By following these steps and fixing the hole yourself, you’ve saved yourself some serious cash.
Remember to always assess the size and location of any holes before starting repairs. Gather all necessary tools and materials before beginning the process. Prepare the surface, cut the patch material, apply it smoothly, sand it down, apply a second coat of joint compound if needed, prime it and paint it. With these tips in mind, you’ll be able to tackle any future wall repairs with confidence and skill.