How To Replace Garage Roof
Are you tired of dealing with leaks and water damage in your garage? It may be time to replace your garage roof. While it can seem like a daunting task, with the right materials and a bit of know-how, replacing your garage roof is a DIY project that anyone can tackle.
Before you start, it’s important to assess the condition of your current garage roof. Look for signs of damage such as missing or cracked shingles, holes, or rusted metal. Once you’ve determined that it’s time for a replacement, it’s important to choose the right materials for your climate and budget. With these key steps in mind, let’s dive into how to replace your garage roof and give yourself the freedom from worry about potential water damage.
Assess the Condition of Your Current Garage Roof
@ Midjourney AI Image Prompt: /imagine prompt:Create an image of a person on a ladder inspecting their garage roof for cracks, holes, and wear and tear. Show tools, such as a flashlight, measuring tape, and gloves, nearby. –v 5 –ar 3:2 (Note: Use –v 4 if you do not have a paid Midjourney account)
You’re standing in your driveway, looking up at the top of your old structure and noticing how the shingles are curling up and peeling away from the wooden frame. It’s clear that you need to replace your garage roof before it becomes a bigger problem. The first step is to assess the condition of your current roof.
Assessing techniques can vary depending on the type of roof you have. If you have an asphalt shingle roof, look for missing or damaged shingles, as well as any signs of water damage or leaks. For metal roofs, check for rust or corrosion, and inspect seams for any gaps or openings where water could seep in. Flat roofs require a closer inspection since they tend to accumulate standing water that can lead to leaks.
Once you’ve determined the extent of damage, consider repair options versus replacing the entire roof. While minor repairs can prolong the life of your garage roof temporarily, it’s often more cost-effective to invest in a new one altogether if there are multiple issues present. With a solid assessment under your belt, you’ll be able to make an informed decision about what steps to take next towards replacing your garage roof for good!
Choose the Right Materials
@ Midjourney AI Image Prompt: /imagine prompt:Create an image of a person holding different roofing materials, such as asphalt shingles, metal sheets, or rubber tiles, while standing in front of a garage roof. Show the person comparing the materials and making a decision. –v 5 –ar 3:2 (Note: Use –v 4 if you do not have a paid Midjourney account)
Pick the perfect products to protect and preserve your property’s peak by choosing the right materials for your garage roof replacement. When selecting materials, cost comparison is a crucial factor to consider. You’ll want to choose options that fit within your budget while also providing long-lasting durability. Consider materials like asphalt shingles, metal roofing, or even flat roofing systems made of rubber or PVC.
Another essential consideration when choosing materials for your garage roof replacement is its environmental impact. Look for eco-friendly options that reduce energy consumption and minimize waste. Metal roofing, for example, can be recycled at the end of its lifespan, making it an excellent choice for those who want to make sustainable choices. Additionally, some roofing materials come with reflective coatings that help reduce heat absorption and keep your garage cooler in hot weather.
Most importantly, consult with a professional contractor before making any decisions on which material to use for your garage roof replacement project. An experienced contractor can provide valuable insight into what would work best based on their knowledge and experience working with different types of roofs. Remember that investing in high-quality materials upfront will ultimately save you money in the long run by reducing maintenance costs over time.
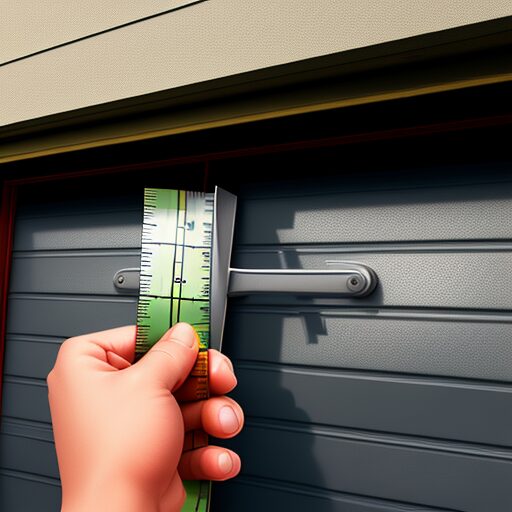
Measure Your Garage Roof
@ Midjourney AI Image Prompt: /imagine prompt:Create an image showcasing a person using a measuring tape to measure their garage roof. The person should stand on a ladder, with the measuring tape stretched across the roof. The image should be detailed and specific, with no text or words. –v 5 –ar 3:2 (Note: Use –v 4 if you do not have a paid Midjourney account)
Before taking on the next step in your project, make sure to accurately measure the dimensions of your garage roof to ensure a seamless and secure installation. Measuring accuracy is crucial in determining how much material you need. Start by measuring the length and width of your garage roof using a tape measure or measuring wheel. Measure from one end to the other, making sure to account for any overhangs or extensions.
Once you have measured the length and width of your garage roof, calculate the total area by multiplying these two measurements together. This will give you an estimate of how much roofing material you will need for proper coverage. Keep in mind that it’s always better to order slightly more than what you think you’ll need, just in case there are any miscalculations or unexpected issues during installation.
Calculating cost estimates can be done once you have determined how much roofing material is needed for your garage roof replacement project. The cost will depend on several factors such as the type of roofing material chosen, labor costs, and any additional materials needed for proper installation. Be sure to budget accordingly so that unexpected expenses don’t derail your project midway through completion. With accurate measurements and careful planning, replacing your garage roof can be a successful DIY project that adds value and function to your home without breaking the bank.
Remove the Old Roof
@ Midjourney AI Image Prompt: /imagine prompt:Create an image depicting the step-by-step process of removing an old garage roof. Show tools, debris, and the roof being lifted off. No text. –v 5 –ar 3:2 (Note: Use –v 4 if you do not have a paid Midjourney account)
Before you start removing the old roof, it’s important to take some safety precautions. Wear protective gear, such as gloves and a hard hat, and make sure to secure the ladder before climbing up. You’ll also need some tools for the job, including a hammer, pry bar, roofing shovel, and possibly a power saw. Once you’re ready to begin, start by removing the shingles one at a time with your tools, being careful not to damage the underlying structure or yourself in the process.
Safety Precautions
It’s important to take safety seriously when tackling any home improvement project, like replacing your garage roof. Did you know that falls from ladders account for over 100,000 emergency room visits each year in the United States? Before starting the project, make sure you have the necessary equipment such as a sturdy ladder or scaffolding system, slip-resistant shoes, and a safety harness.
When working on the roof, always use caution and never rush. Make sure to secure all tools and materials to prevent them from falling off the roof. It’s also important to wear protective gear such as gloves and eye goggles to protect yourself from debris. By taking these precautions seriously, you can ensure a safe and successful replacement of your garage roof.
Tools Needed
To tackle this project, you’ll need a few essential tools to ensure safety and efficiency. Here are the Top 5 Must Have Tools for Replacing a Garage Roof:
- Safety Gear: Start by investing in safety gear, including goggles, heavy-duty work gloves, and slip-resistant shoes. This gear will protect you from potential hazards like falling debris while working on the roof.
- Power Drill: A power drill is a must-have tool for replacing a garage roof. It will help you quickly and easily remove old screws and secure new ones in place.
- Ladder: You’ll need a sturdy ladder that can reach your garage’s roof safely. Make sure the ladder is placed on level ground, secured at the top, and extend at least three feet above the roofline.
Tips for Using Power Tools Safely During Garage Roof Replacement:
- Wear Eye Protection: Always wear protective eyewear when using power tools to prevent eye injuries from flying debris or dust.
- Use Proper Extension Cords: Ensure that all extension cords used with your power tools are rated for outdoor use and have no cuts or damage.
- Follow Manufacturer Instructions: Never operate power tools without reading the manufacturer’s instructions carefully. Following these guidelines will keep you safe during garage roof replacement.
By having these essential tools and following proper safety measures, you’ll be able to replace your garage roof efficiently and safely.
Removing Shingles and Nails
Now that you have all the necessary tools, it’s time to start removing the old shingles and nails from your garage roof. This is a crucial step in replacing your roof, as any remaining debris can damage the new roofing material.
First, you’ll need to dispose of the old shingles properly. You can either rent a dumpster or contact your local waste management company for disposal options. Once that’s taken care of, you can begin removing the nails from the old shingles with a pry bar or nail puller. Be sure to remove any protruding nails as well, as they can cause issues when laying down new roofing material. There are various techniques for nail removal, such as pulling them out at an angle or using a hammer and punch to push them through the underside of the roof deck. Find what works best for you and continue until all nails have been removed. With these steps done, you’re now ready to move onto installing your new garage roof!
Install the Underlayment
@ Midjourney AI Image Prompt: /imagine prompt:Create an image of a person laying down underlayment on a garage roof. The person should be wearing gloves and using a hammer tacker to secure the underlayment to the roof. Show the edges of the underlayment being folded over the roof’s edge. –v 5 –ar 3:2 (Note: Use –v 4 if you do not have a paid Midjourney account)
Now that you’ve removed the old roof, it’s time to install the underlayment. The purpose of underlayment is to provide an additional layer of protection against water and other elements that may seep through your new roof. There are different types of underlayment available depending on your roofing material and climate conditions. In this discussion, we’ll cover the purpose of underlayment, types of underlayment, and the installation process.
Purpose of Underlayment
You may not realize it, but the underlayment is a crucial component of any roofing system, as it can prevent up to 95% of water infiltration in your home. The benefits of underlayment are numerous and cannot be ignored when replacing or installing a new garage roof. Not only does it provide an extra layer of protection against moisture, but it also acts as a barrier against the wind and other external elements.
There are different types of underlayment materials available, including asphalt-saturated felt, rubberized asphalt, and synthetic materials like polypropylene. Each type has its own unique features and benefits that cater to specific roofing needs. For instance, if you live in an area with high winds or storms, you may want to consider using a rubberized asphalt or synthetic material for added durability and strength. Ultimately, choosing the right type of underlayment will ensure that your garage roof lasts longer and provides better protection for your home.
Types of Underlayment
When selecting underlayment for your roofing system, it’s important to consider the different types available and their specific benefits. High quality underlayment offers a number of advantages over lower quality options. For example, high quality synthetic underlayment is more durable than traditional felt paper, providing better protection against moisture and weather damage.
In addition to durability, synthetic underlayment is also easier to install than traditional felt paper. It comes in rolls that are lighter and more flexible, making it easier to carry up onto the roof and lay down smoothly. This means that using high quality synthetic underlayment can save you time and money on installation costs while still providing superior protection for your garage roof. When comparing different types of underlayment options, be sure to weigh the benefits of each option carefully so that you can choose the best one for your needs.
Installation Process
Installing high quality synthetic underlayment is a straightforward process that can save time and money on installation costs. This type of underlayment is easy to work with, and many contractors report up to a 50% reduction in installation time when using it. If you’re replacing your garage roof yourself, following these steps will ensure a successful installation:
- Calculate the cost: Before beginning the installation process, make sure you have an accurate estimate of how much the project will cost. This includes the cost of materials, tools, and any professional help you may need.
- Prepare the surface: Make sure your garage roof is clean and free from debris before beginning installation.
- Hire professionals if necessary: If you don’t feel confident in your ability to install the underlayment yourself, consider hiring professionals to do the job for you.
By following these steps, you can be confident that your new garage roof will be installed properly and efficiently, without breaking your budget or sacrificing quality.
Install the New Shingles
@ Midjourney AI Image Prompt: /imagine prompt:Create an image of a person using a hammer to secure new shingles onto a garage roof. Show the individual carefully aligning each shingle and nailing it into place. –v 5 –ar 3:2 (Note: Use –v 4 if you do not have a paid Midjourney account)
Laying down the fresh shingles is an exciting step in the process of replacing your garage roof. But before you start, make sure to choose the right shingle options for your garage. There are different materials and colors available, so pick one that suits your style and budget.
Once you have your shingles ready, it’s time to install them properly. Make sure to follow the proper installation techniques to ensure a long-lasting and durable roof. Start at the bottom edge of the roof and work your way up, overlapping each row slightly with the previous one. Use roofing nails to secure each shingle in place.
As you lay down each shingle, take care not to damage or break them. You want a smooth and uniform surface that will protect your garage from rain, wind, and other elements. With patience and attention to detail, you can successfully install new shingles on your garage roof and enjoy a fresh and updated look.
Install the Ridge Cap Shingles
@ Midjourney AI Image Prompt: /imagine prompt:Create an image showcasing the installation of ridge cap shingles during a garage roof replacement. Show the shingles being nailed down with a hammer and secured in place with roofing cement. –v 5 –ar 3:2 (Note: Use –v 4 if you do not have a paid Midjourney account)
Now it’s time to add the finishing touch by installing the ridge cap shingles, sealing off any gaps and creating a sleek silhouette for your shelter. The ridge cap design is crucial in preventing water from seeping into the roof’s joints. It also adds an extra layer of protection against harsh weather conditions. Before starting the installation process, ensure that you have all the necessary tools and materials.
To begin with, lay out the ridge cap shingles on a flat surface to ascertain that they fit well together. Next, carefully remove any excess granules or debris from each shingle to avoid clogging up your gutters during rainfall. After this, take a chalk line and mark where each ridge cap will go before setting them in place one by one using roofing nails. Installing these shingles requires precision and attention to detail; thus, be patient and take your time.
In conclusion, the installation techniques for ridge cap shingles are simple yet intricate enough to require professional guidance if you’re not confident about handling them yourself. However, with proper research and preparation beforehand, anyone can achieve satisfactory results when replacing their garage roof’s shingles. Remember always to prioritize safety while working on your rooftop to avoid accidents or injuries on-site.
Install the Flashing
@ Midjourney AI Image Prompt: /imagine prompt:Create an image of a person wearing work gloves and using a hammer to secure a metal flashing onto the edge of a garage roof. The person should be standing on a ladder, with shingles visible in the background. –v 5 –ar 3:2 (Note: Use –v 4 if you do not have a paid Midjourney account)
To ensure your shelter stays watertight, it’s important to add flashing along the edges and joints of your new shingles. Flashing installation techniques vary depending on the type of roof you have, but generally involve placing metal or plastic strips under the shingle layers and over the seams. This creates a barrier that prevents water from seeping through and causing damage to your home.
When installing flashing, it’s important to avoid common mistakes that could compromise its effectiveness. One mistake is using materials that are not compatible with your roofing system. For instance, if you have an asphalt shingle roof, using aluminum flashing may cause corrosion over time. Another mistake is improper placement, such as installing flashing too high or too low on a slope. This can cause water to pool in certain areas and eventually lead to leaks.
By following these flashing installation techniques and avoiding common mistakes, you can ensure that your garage roof replacement will be successful in keeping out unwanted moisture for years to come. Remember to take your time during this step of the process, as it is crucial for protecting your investment. With proper installation and maintenance, you can enjoy a secure and dry garage space that gives you the freedom to pursue all of your hobbies without worry!
Clean Up and Inspection
@ Midjourney AI Image Prompt: /imagine prompt:Create an image of a person on top of a garage roof, sweeping away debris and inspecting for any damage. Show a pile of discarded materials to one side and tools on the other. –v 5 –ar 3:2 (Note: Use –v 4 if you do not have a paid Midjourney account)
Now that you’ve finished installing the flashing, it’s time to clean up and inspect your new garage roof. Start by removing any debris left behind from the installation process, such as nails or shingles. Once the area is clear, take a thorough look at your new roof to make sure everything is in place and there are no visible defects or damages that could cause problems in the future. Remember, a properly installed and maintained roof can last for decades, so it’s important to take the time to do this final inspection before calling it a job well done.
Removing Debris
Before you can start fresh, it’s time to clear out all the old junk and sweep away any traces of the past. This is an important step in replacing your garage roof because you don’t want any debris or clutter getting in the way of your work. Here are four things you should do when removing debris:
- Start by emptying out the entire garage. Take everything out so that you have a clean slate to work with.
- Use a broom and dustpan to sweep up any loose debris like dirt, leaves, and cobwebs.
- Gather all of the old roofing materials like shingles and nails into large garbage bags. You will need to dispose of these properly according to your local regulations.
- Consider renting a dumpster for larger items like old furniture or appliances that may be taking up space in your garage.
By following these steps, you’ll be able to create a clean and safe environment for replacing your garage roof without anything getting in your way or causing potential hazards during construction.
Inspecting the New Roof
As you lay your eyes on the shiny new materials that will soon be covering your shelter, a sense of anticipation fills the air. But before you start installing the new roof, it’s important to inspect it thoroughly. Inspecting techniques may vary depending on the type of roofing material you have chosen, but there are some general guidelines to follow.
Firstly, check for any damages or defects in the roofing materials. Look for cracks, dents or scratches that could compromise its durability and longevity. Secondly, compare the quality of your new roofing materials with those of other brands in terms of strength and resistance to weather conditions. This will help ensure that you have made an informed decision when choosing your roofing materials and that they will last for years to come. By taking these steps during inspection, you can rest assured that your investment is well-protected and ready to withstand whatever nature throws at it.
Maintenance and Longevity
@ Midjourney AI Image Prompt: /imagine prompt:Create an image of a person removing old shingles from a garage roof with a pry bar and hammer. Show the underlying plywood and insulation being inspected for damage and replaced as needed. –v 5 –ar 3:2 (Note: Use –v 4 if you do not have a paid Midjourney account)
To extend the life of your new roofing system, you’ll want to keep up with regular maintenance tasks like cleaning gutters and inspecting for damage after severe weather. Long term care is crucial in preventing damage and keeping your garage roof in top shape. Make sure to remove any debris that may accumulate on the roof, as this can cause water pooling and eventually lead to leaks.
In addition to regular maintenance tasks, it’s important to consider factors that can affect the longevity of your garage roof. For example, choosing high-quality materials and proper installation techniques can go a long way in ensuring a durable roofing system. You may also want to invest in reflective coatings or insulation materials that can help regulate temperature and prevent premature aging due to exposure to extreme heat or cold.
Overall, taking care of your garage roof is an investment in its longevity and your peace of mind. By staying proactive with maintenance tasks and considering all aspects that influence its durability, you can ensure that your new roofing system will provide reliable protection for years to come.
Frequently Asked Questions
How much does it typically cost to replace a garage roof?
Replacing a garage roof can be a costly but necessary investment. The cost can vary depending on several factors, such as the roofing material options and the size of your garage. Asphalt shingles are often the most affordable option for homeowners, while metal roofs tend to be more expensive but offer better durability and longevity. Other factors that affect the cost include labor costs, the condition of your current roof, and any additional features you may want to add. If you’re looking for an experienced roofing contractor who can provide detailed information and guidance on your options, it’s essential to do your research and compare prices before making a decision. In short, replacing a garage roof is like investing in new tires for your car – it may seem pricey at first, but ultimately worth it in terms of safety and longevity.
Can I install a new garage roof myself or do I need to hire a professional?
When it comes to replacing your garage roof, the decision of whether to do it yourself or hire a professional will ultimately come down to your skill level and comfort with DIY projects. While hiring a professional can ensure that the job is done correctly and efficiently, it can also come with a hefty price tag. On the other hand, tackling the project yourself can save you money but may require more time and effort on your part. It’s important to weigh the cost comparison between hiring a pro and doing it yourself before making a decision. If you have experience with roofing projects or are confident in your abilities, DIY may be a viable option for you. However, if you’re unsure or lack experience, it may be best to leave it to the professionals. Ultimately, the choice is yours and should be based on what makes sense for your budget and skill level.
How long can I expect a new garage roof to last?
Hey there! You’re probably wondering how long you can expect your new garage roof to last. Well, the expected lifespan of a garage roof varies depending on different factors such as maintenance and weather resistance. If you take good care of it and choose a durable material option, your garage roof can last from 20-30 years or even more. However, it’s important to note that extreme weather conditions may shorten its lifespan. That being said, regular maintenance is key to keeping your new garage roof in tip-top shape for as long as possible. So make sure you keep an eye on any damages and fix them promptly to prevent further damage. Additionally, when selecting a roofing material option, consider ones that are known for their weather resistance properties such as metal or asphalt shingles. By taking these precautions, you’ll be able to enjoy the freedom of not having to worry about replacing your garage roof anytime soon!
Are there any special tools or equipment needed to replace a garage roof?
When it comes to replacing a garage roof, there are certainly some tools and equipment that you’ll need to have on hand. First and foremost, you’ll want to make sure that you have all of the necessary safety equipment, including hard hats, goggles, gloves, and sturdy work boots. In terms of specific tools needed for the job, it will depend on the type of roofing materials you’re using. For example, if you’re working with asphalt shingles, you’ll need a hammer, roofing nails, a utility knife or roofing cutter, and a chalk line. On the other hand, if you’re working with metal roofing panels or tiles, you may need tin snips or sheet metal shears in addition to standard roofing tools. Regardless of what materials you choose or what tools are required for your particular project, safety should always be your top priority throughout the process.
How do I ensure proper ventilation in my garage after replacing the roof?
When it comes to ensuring proper ventilation in your garage after replacing the roof, it’s essential to keep two things in mind: insulation and potential mold growth. Proper insulation is critical to maintaining a comfortable temperature in your garage, particularly during extreme weather conditions. Without adequate insulation, you may find that your garage becomes uncomfortably warm during the summer or freezing cold during the winter months. Additionally, poor insulation can lead to moisture buildup, which can create an environment where mold can thrive. To avoid these issues, make sure that you choose high-quality insulation materials and install them correctly.
To promote ventilation and prevent mold growth, consider installing vents or fans in your garage. These will help circulate air throughout the space and prevent moisture from building up over time. You may also want to invest in a dehumidifier to keep humidity levels low and reduce the risk of mold growth even further.
Overall, ensuring proper ventilation in your garage is crucial for maintaining a healthy living space and preventing costly repairs down the line. By taking steps to insulate effectively and promote airflow throughout your garage, you’ll be able to enjoy a comfortable and safe environment for years to come.
Conclusion
Congratulations on successfully replacing your garage roof! By following the steps outlined in this guide, you have not only improved the functionality of your garage but also increased its overall value.
One interesting statistic to note is that according to a study conducted by Remodeling Magazine, a new roofing project can recoup up to 62.9% of its cost in added home value. This means that not only have you made necessary repairs, but you have also made a smart investment in your property.
Remember to perform regular maintenance and inspections on your new garage roof to ensure it lasts for many years to come. By doing so, you will continue to reap the benefits of your hard work and investment. Great job!