How To Fix Bent Garage Door Track
Do you have a garage door that is difficult to open or close? Does it make strange noises when you try to operate it? One common problem that could be causing these issues is a bent garage door track. But don’t worry, fixing a bent track can be done with some basic tools and a little bit of know-how.
In this article, we will guide you through the process of fixing your bent garage door track step by step. With our help, you’ll soon be able to enjoy the freedom of effortlessly opening and closing your garage door once again. So let’s get started!
Signs of a Bent Garage Door Track
@ Midjourney AI Image Prompt: /imagine prompt:Create an image of a garage door track with a visible bend, showing the track detached from the wall and misaligned with the rollers. Use contrasting colors to highlight the bend. –v 5 –ar 3:2 (Note: Use –v 4 if you do not have a paid Midjourney account)
You might not realize it, but if your garage door is making unusual noises or seems to be moving unevenly, there’s a good chance something is off with the pathway it runs on. One of the most common culprits for this type of issue is a bent garage door track. Bent tracks can cause serious problems for your garage door, including slowing down its operation and even causing damage to the door itself.
There are a few different causes of bent garage door tracks. Sometimes they occur due to normal wear and tear over time, while other times they may be caused by accidental impact. Regardless of the cause, a bent track can lead to some serious consequences if left unchecked. For example, it can cause your garage door to become stuck in one position or even fall off its tracks entirely.
If you’re experiencing issues with your garage door track being bent, you might wonder whether you should try fixing it yourself or hire a professional. While DIY solutions can be tempting due to their cost-effectiveness, it’s important to keep in mind that repairing a bent garage door track requires specialized tools and knowledge that most homeowners don’t have access to. Hiring a professional ensures that the problem will be fixed correctly and efficiently without causing further damage.
In summary, if you suspect that your garage door track is bent, don’t hesitate to take action. Ignoring this issue could lead to serious consequences for both your property and safety. Consider hiring a professional for help with repairing or replacing your damaged tracks so that you can enjoy smooth and safe operation of your garage doors once again.
Tools You Will Need
@ Midjourney AI Image Prompt: /imagine prompt:Create an image of a toolbox with a hammer, pliers, wrench, and level laid out next to a bent garage door track. Show the tools being used to fix the track. –v 5 –ar 3:2 (Note: Use –v 4 if you do not have a paid Midjourney account)
To get started, make sure you’ve got all the necessary gear at your disposal. One of the most important tools you’ll need is a pair of safety glasses to protect your eyes from debris and metal shavings. You’ll also need a few different types of lubricants, including WD-40, lithium grease, and silicone spray.
Using the right lubricant is crucial for fixing a bent garage door track. WD-40 can be used to loosen rusted bolts or nuts that may be hindering the movement of the track. Lithium grease can help reduce friction between moving parts and prevent future damage. Silicone spray is another great option for lubricating metal surfaces without leaving behind any residue.
Before you begin working on your garage door track, it’s important to take proper safety precautions. Make sure to turn off power to the garage door opener and unplug it from its electrical source before starting any repairs. Additionally, wear sturdy work gloves and avoid wearing loose clothing or jewelry that could become tangled in moving parts. By following these safety guidelines and using the right tools and lubricants, you can successfully fix a bent garage door track without putting yourself at risk of injury or further damaging your property.
Disconnecting the Garage Door Opener
@ Midjourney AI Image Prompt: /imagine prompt:Create an image of someone manually disconnecting the garage door opener from the bent track. Show the person reaching up to unhook the opener from the track, while the bent section is visible in the background. –v 5 –ar 3:2 (Note: Use –v 4 if you do not have a paid Midjourney account)
Now it’s time to disconnect your opener so you can safely work on the problem without risking damage or injury. Before doing so, make sure to unplug the unit from the power source. This will prevent any accidental activations while you are working on the track.
It is important to note that some openers may have a manual release handle that needs to be pulled in order to disconnect them from the door. Refer to your owner’s manual for specific instructions on how to do this. Once disconnected, use caution when manually operating the door as it may be heavier than expected without the assistance of the opener.
After completing repairs, make sure to reconnect your opener properly before using it again. Check all connections and ensure everything is securely in place before plugging back in and testing out your newly repaired door. By taking these safety precautions, you can avoid potentially dangerous situations and enjoy a fully functioning garage door once again.
Removing the Garage Door Panels
@ Midjourney AI Image Prompt: /imagine prompt:Create an image of a person removing the garage door panels to access the bent track. Show the person using tools, such as a screwdriver or pliers, to carefully remove the panels to avoid damaging them. –v 5 –ar 3:2 (Note: Use –v 4 if you do not have a paid Midjourney account)
As you start removing the panels, it may be helpful to have a friend assist you in holding them steady while unscrewing the bolts. Safety precautions should always be taken when performing this task, as garage door panels can be heavy and unwieldy. Make sure to wear gloves and safety goggles to protect your hands and eyes from any potential harm.
Here are some tips for removing garage door panels:
- Use a ladder or step stool to reach the top panel.
- Start by removing the hinges at the bottom of each panel first.
- Once all of the hinges have been removed, lift up on the panel and pull it out of its track.
- Repeat these steps for each panel until they are all removed from the track.
- Keep all screws and hardware organized so that they can easily be put back in place when reassembling.
Garage door panel removal is an important part of fixing a bent track. While it may seem like a daunting task, with proper safety precautions and careful attention to detail, anyone can do it. Remember to take your time and work slowly to avoid damaging any parts or injuring yourself during the process. With these tips in mind, you’ll be well on your way to freeing your garage door from its bent track.
Removing the Bent Track
@ Midjourney AI Image Prompt: /imagine prompt:Create an image of a person removing a bent garage door track with pliers and a wrench. Show the track being pulled away from the wall and the person’s determined expression. –v 5 –ar 3:2 (Note: Use –v 4 if you do not have a paid Midjourney account)
Removing the damaged piece may seem like a simple solution, but have you considered how to remove and replace the metal rail that guides your garage door’s movement? The bent track is an essential component of your garage door system, responsible for keeping the door aligned and secure. Before attempting any repairs, it’s vital to assess the extent of damage and determine whether you need professional assistance or can handle it yourself.
If you’re confident in your DIY abilities, removing the bent track typically involves unscrewing bolts or tapping out rivets that hold it in place. However, be sure to disconnect any cables or springs first and take precautions not to damage other parts during removal. Once removed, inspect the area for additional damage or wear on adjoining components before installing a new track.
While repairing a bent garage door track may seem like an easy fix, it’s important to weigh repair costs against potential risks. While DIY solutions can save money upfront, they could lead to further issues down the line if not done correctly. If you’re unsure about how best to proceed with fixing a bent garage door track or don’t have experience working with garage doors in general, it might be best to consult with professionals who can offer guidance and ensure proper installation.
Installing the New Track
@ Midjourney AI Image Prompt: /imagine prompt:Create an image portraying the step-by-step process of installing the new garage door track. Include clear visuals of tools, screws, and the track being securely attached to the ceiling and wall. –v 5 –ar 3:2 (Note: Use –v 4 if you do not have a paid Midjourney account)
Ready to install the new rail? Let’s get started! First, you need to choose an appropriate track that matches your garage door. Look for a track that has the same length and width as your old one. Make sure that it is made of durable materials, such as steel or aluminum, and has a warranty.
Before you start installing the track, make sure that you follow safety precautions. Wear protective gear such as gloves and safety goggles to protect yourself from any potential injuries. Also, ensure that the area around the garage door is clear of any clutter or debris.
Now it’s time to install the new track! Begin by placing one end of the track onto the vertical bracket on one side of the garage door opening. Then, attach it securely using bolts and screws. Repeat this process on the other side of the opening until both ends are firmly in place. Finally, use a level to ensure that both tracks are even and aligned properly with each other.
Remember, installing a new garage door track can be dangerous if not done correctly. Always prioritize safety precautions when working on your garage door. By choosing an appropriate track and following proper installation techniques, you will have a fully functioning garage door in no time!
Reinstalling the Garage Door Panels
@ Midjourney AI Image Prompt: /imagine prompt:Create an image of a person reattaching the garage door panels to the newly straightened track. Show the process step-by-step, with clear visuals of the screws, hinges, and panels. –v 5 –ar 3:2 (Note: Use –v 4 if you do not have a paid Midjourney account)
Now it’s time for you to put the puzzle pieces back together, like a game of Jenga, stacking each panel onto the newly installed rails. Make sure to align each panel correctly with the track and ensure that they are level with one another. This will help prevent further damage and keep your door running smoothly.
Once you have all of the panels in place, it’s important to lubricate the tracks. This will help reduce friction between the rollers and tracks, making it easier for your garage door to open and close. Use a high-quality lubricant that is specifically designed for garage doors, and apply it generously along both sides of each track.
Lastly, check the alignment of your garage door panels one final time before testing out its functionality. If everything looks good, go ahead and test out your newly repaired garage door by opening and closing it a few times. With proper maintenance and care, your garage door should continue to function properly for years to come!
Reconnecting the Garage Door Opener
@ Midjourney AI Image Prompt: /imagine prompt:Create an image of a person holding a garage door opener and reconnecting it to a straightened track. Show the track and opener clearly and use arrows to guide the viewer’s eye. –v 5 –ar 3:2 (Note: Use –v 4 if you do not have a paid Midjourney account)
It’s time for you to get your hands dirty and start reconnecting the opener so that you can enjoy the convenience of opening and closing your garage with just the touch of a button. Here are some tips to help you troubleshoot errors and adjust sensitivity as needed:
- Check power source: Make sure your opener is properly plugged in and powered on.
- Reconnect wires: Ensure all wires are correctly connected from the opener to the track.
- Adjust sensitivity: Test your opener by opening and closing it a few times. If it doesn’t respond, adjust sensitivity until it does.
- Lubricate moving parts: Keep all moving parts lubricated using silicone spray or WD40 to reduce wear and tear on your machine.
- Call a professional: If your opener still isn’t working, consider calling a professional who can diagnose any more complicated issues.
With these tips, you’re well on your way to getting back into the swing of things. Troubleshooting errors can be frustrating, but persistence pays off in the long run. Remember that adjusting sensitivity may take time and patience – don’t rush through this step! Once everything is set up properly, sit back, relax, and enjoy the freedom that comes with having an operational garage door opener.
Testing the Garage Door
@ Midjourney AI Image Prompt: /imagine prompt:Create an image of a person using a level to test the alignment of the garage door track. The person should be standing next to the garage door and the level should be placed on the track. The image should be in black and white. –v 5 –ar 3:2 (Note: Use –v 4 if you do not have a paid Midjourney account)
As you prepare to put your garage door opener to the test, imagine yourself as a captain of a ship, navigating through rough waters and keeping a steady hand on the wheel. Testing your garage door is essential after fixing its bent track. You want to ensure that it works properly and safely before going back to using it regularly.
To begin testing, make sure the area around the door is clear of any debris or obstacles. Then, stand inside your garage and use the remote control to open and close the door several times. Observe if it’s moving smoothly or if there are any unusual sounds or movements.
Aside from visual observation, there are other testing techniques you can do such as manually opening and closing the door using its emergency release handle. This will help you gauge if there’s enough tension in the springs or if they need adjusting. Remember to always prioritize safety precautions when conducting these tests such as wearing protective gear and never standing under a moving garage door. With these steps done, you’re now ready to enjoy hassle-free access to your garage once again!
Preventing Future Damage
@ Midjourney AI Image Prompt: /imagine prompt:Create an image of a garage door track being reinforced with a steel bracket bolted onto the wall, with a sturdy roller wheel attached to the door. –v 5 –ar 3:2 (Note: Use –v 4 if you do not have a paid Midjourney account)
To prevent future damage to your garage door, there are a few key things you can do. First and foremost, regular maintenance is important. This includes lubricating moving parts and checking for wear and tear on the track system. Upgrading to a stronger track system can also help prevent future bending or warping of the tracks. Finally, scheduling professional inspection and repair on a regular basis can catch any potential problems before they become major issues. By taking these steps, you can ensure that your garage door stays in good working condition for years to come.
Regular Maintenance
You’ll want to make sure you’re taking good care of your garage door system to avoid any unexpected issues down the line. Regular maintenance can help prevent costly repairs and keep your garage door functioning smoothly for years to come. Here are some benefits of regular maintenance and DIY maintenance tips to keep in mind:
- Benefits of regular maintenance: Regular maintenance can extend the life of your garage door, improve its performance, enhance safety features, and save you money on repairs.
- DIY maintenance tips: You can perform simple tasks such as cleaning the tracks, lubricating moving parts, tightening bolts and screws, checking cables for wear and tear, testing safety sensors regularly.
Performing these simple tasks on a regular basis can help ensure that your garage door stays in excellent condition. Not only will it save you money in costly repairs down the road but it will also give you peace of mind knowing that your garage door is operating smoothly and safely. So take a few minutes each month to check on your garage door system – it’s well worth the effort!
Upgrading the Track System
Now that you know how important regular maintenance is for your garage door track, it’s time to explore upgrading the track system. There are different track material options available in the market such as steel, aluminum, and vinyl. Each material has its advantages and disadvantages, so it’s essential to choose a material that suits your specific needs.
Before choosing a new track system, make sure that it is compatible with your garage door type. Some doors require specific tracks due to their size or weight. Upgrading your track system can improve the overall operation of your garage door while preventing any future bending or damage. So if you want to ensure that your garage door operates smoothly and lasts longer, consider upgrading your track system with materials and designs suitable for your unique requirements.
Professional Inspection and Repair
You can ensure the safety and longevity of your garage door by having a professional inspect and repair any issues with its components. When it comes to fixing a bent garage door track, hiring a professional is highly recommended. They have the expertise, knowledge, and tools necessary to complete the job quickly and efficiently.
Here are some reasons why you should consider hiring a professional for this task:
- They have experience repairing garage doors of all types.
- Professional repairs come with warranties that can give you peace of mind in case anything goes wrong.
- Attempting DIY options may lead to further damage or injury.
- The costs involved in hiring a professional are worth it in the long run as they can prevent more expensive repairs down the line.
While DIY options may seem like an attractive alternative due to cost savings, it’s important to weigh up the risks involved. Garage doors are heavy and complex systems that require specific knowledge and skill sets to repair correctly. It’s always better to be safe than sorry when dealing with something as important as your garage door. So don’t hesitate to call in professionals who can fix your bent garage door track safely and effectively.
Frequently Asked Questions
How much will it cost to fix a bent garage door track?
If you’re wondering how much it will cost to fix a bent garage door track, the answer isn’t straightforward. The Garage door track repair cost can vary depending on multiple factors, such as the severity of the damage and whether you hire a professional or do it yourself. While hiring a pro may seem like the easiest option, DIY garage door track fix is entirely possible if you have some experience working with tools and are comfortable following instructions. Of course, fixing your garage door track yourself means that you’ll save money on labor costs but may spend more time researching and repairing. Ultimately, whether you decide to hire a professional or tackle the project yourself depends on your budget and level of expertise.
Can a bent garage door track be repaired or does it need to be replaced?
When dealing with a bent garage door track, the decision between repair and replacement depends on the severity of the damage. In some cases, a professional repair may be sufficient to fix minor bends or dents in the track. However, if the damage is extensive or compromises the structural integrity of the door, replacing the entire track may be necessary. While DIY repairs can save money, it’s important to consider safety precautions and potential complications that could arise from attempting to fix it yourself. Ultimately, consulting with a professional garage door technician can provide peace of mind and ensure that your garage door operates safely and smoothly for years to come.
How long will it take to fix a bent garage door track?
If you have a bent garage door track, it’s important to know that the time it takes to fix it can vary depending on several factors. Possible causes of a bent track include accidental damage or wear and tear over time. To prevent future issues, make sure to regularly inspect your garage door tracks for any signs of damage and address them promptly. It’s also recommended to hire a professional to perform regular maintenance on your garage door system. While fixing a bent track may seem daunting, with the right tools and experience, it can typically be completed in just a few hours.
Is it safe to attempt to fix a bent garage door track on your own?
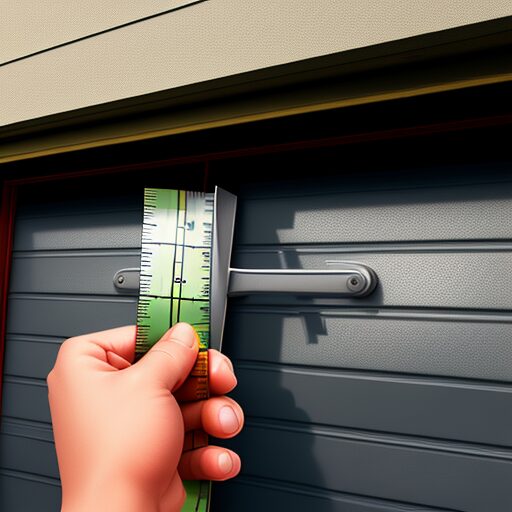
You’ve probably heard the phrase "measure twice, cut once" before. It’s a good reminder to take your time and be sure of what you’re doing when attempting any DIY project. When it comes to fixing a bent garage door track, the same principle applies. While it may seem tempting to save money by doing it yourself, there are important safety precautions that need to be taken into consideration. A professional repair can guarantee the job is done correctly and safely, without risking injury or damage to your property. Don’t let your desire for freedom cloud your judgement – leave this task to the experts and enjoy peace of mind knowing it’s been done right.
What are some common causes of bent garage door tracks?
To prevent a bent garage door track, it’s important to take some preventive measures. One of the most important things you can do is to regularly inspect your garage door tracks for signs of wear and tear. Look out for any cracks or dents in the metal, as these can cause the track to warp over time. You should also make sure that your garage door is properly balanced and aligned, as an unbalanced door can put extra stress on one side of the track and cause it to bend. By taking these steps, you can help ensure that your garage door tracks stay in good condition and avoid having to deal with expensive repairs down the line.
Conclusion
Congratulations! You have successfully fixed your bent garage door track. Not only did you save money by doing it yourself, but you also gained some valuable knowledge and experience in the process.
Remember to always be cautious when working with garage doors and follow safety protocols. Regular maintenance and inspection can prevent future damage to your garage door track. As the saying goes, "an ounce of prevention is worth a pound of cure."
As you stand back and admire your newly repaired garage door, take pride in knowing that you tackled a challenging task and came out victorious. Keep this momentum going as you continue to tackle other DIY projects around your home. After all, there’s no better feeling than accomplishing something on your own.