How to Change Honda Odyssey Battery
To change the Honda Odyssey battery, first, turn off the engine and disconnect the negative terminal. Then, remove the battery tie-down bracket, disconnect the positive terminal, and replace the battery with a new one.
Changing the battery in your Honda Odyssey is a simple task that can be done with a few basic tools and minimal effort. By following these steps, you can ensure that your vehicle starts smoothly and runs efficiently. Regularly changing your Honda Odyssey’s battery will help maintain its performance and prevent unexpected breakdowns while driving.
Keep your vehicle running smoothly by replacing the battery as needed to avoid any inconvenience on the road.
Credit: www.remodelandolacasa.com
Preparation
Before changing the Honda Odyssey battery, gather essential tools like wrenches and gloves. Park the car in a safe, flat area, turn off the engine, and locate the battery under the hood. Ensure to read the vehicle manual for specific instructions before proceeding.
Gathering The Tools
The first step in preparing to change the battery in your Honda Odyssey is to gather all the necessary tools. You don’t want to find yourself halfway through the process and realize you’re missing something!
Here’s a quick checklist of the tools you’ll need:
- Safety goggles: To protect your eyes from any debris that may come loose during the battery replacement process.
- Gloves: Keep your hands clean and protected from any chemicals or corrosion you may encounter.
- Wrench or socket set: Depending on your specific Odyssey model, you’ll need either a wrench or socket set to remove the battery terminals.
- Battery cleaning solution: Use this solution to clean the battery terminals and prevent corrosion.
- Wire brush: A wire brush will come in handy for scrubbing away any existing corrosion on the battery terminals.
- Battery terminal protectors: These protectors can be applied to the battery terminals after cleaning to prevent future corrosion.
Make sure you have all these tools on hand before you proceed with the battery replacement.
Locating The Battery
Once you have your tools ready, the next step is to locate the battery in your Honda Odyssey. Thankfully, Honda has kept things relatively simple when it comes to the battery’s placement.
To find the battery, follow these steps:
- Open the hood of your Honda Odyssey and secure it in place using the prop rod.
- Look for a rectangular plastic cover on the passenger side of the engine bay. This cover typically has a “+” sign on top.
- Remove the cover by loosening the screws or clips holding it in place.
- Once the cover is removed, you’ll see the battery nestled inside a battery tray.
Now that you’ve located the battery, you’re ready to move on to the next step of the battery replacement process.
Credit: m.youtube.com
Removing The Old Battery
Before we dive into removing your Honda Odyssey’s old battery, it’s crucial to prioritize safety. Following the proper procedures and precautions ensures a smooth and secure battery replacement process.
Safety Precautions
- Ensure the engine is off and the key is out of the ignition.
- Wear safety gloves and goggles to protect your hands and eyes.
- Avoid smoking or any open flames near the battery.
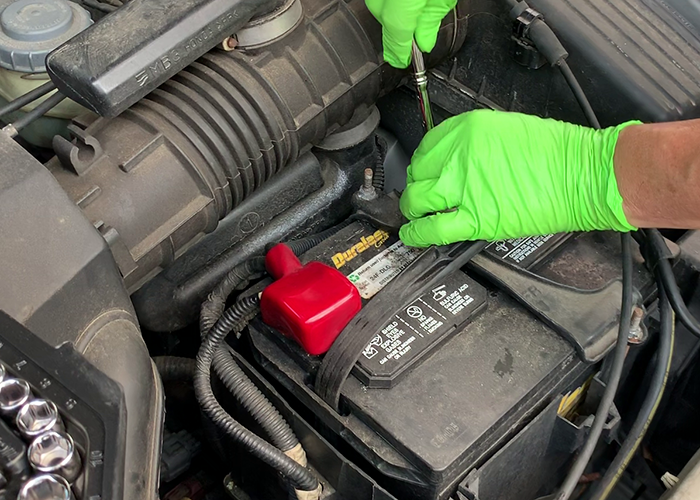
Disconnecting The Cables
- Start by identifying the negative (-) and positive (+) terminals.
- Loosen the nut on the negative terminal using a wrench.
- Detach the negative cable and tuck it away from the battery.
- Repeat the same process for the positive cable and terminal.
Installing The New Battery
Installing the new battery in your Honda Odyssey is a simple process that can be done with basic tools and a little know-how. Here is a step-by-step guide on how to replace your Honda Odyssey battery.
Choosing The Right Replacement
This is the first step in replacing your Honda Odyssey battery. Ensure you purchase a battery that is compatible with your vehicle’s specifications.
- Look for a battery that matches the group size and CCA rating of the original battery.
- Check the owner’s manual or consult with a professional to determine the correct replacement battery.
Connecting The Cables
After selecting the right replacement battery, it’s time to connect the cables properly to ensure your Honda Odyssey runs smoothly.
- Loosen the nut of the negative cable and remove it carefully from the old battery.
- Repeat the same process with the positive cable, being cautious not to mix up the terminals.
- Connect the positive cable to the positive terminal of the new battery and tighten the nut securely.
- Finally, attach the negative cable to the negative terminal and ensure it is tight to establish a secure connection.
Testing And Finishing Up
After changing the battery of your Honda Odyssey, it’s crucial to test the new battery and ensure all connections are secure. Once verified, you can proceed with finishing up the process by tightening the battery terminals and securing the battery cover.
This simple task will ensure your Honda Odyssey is powered up and ready to go.
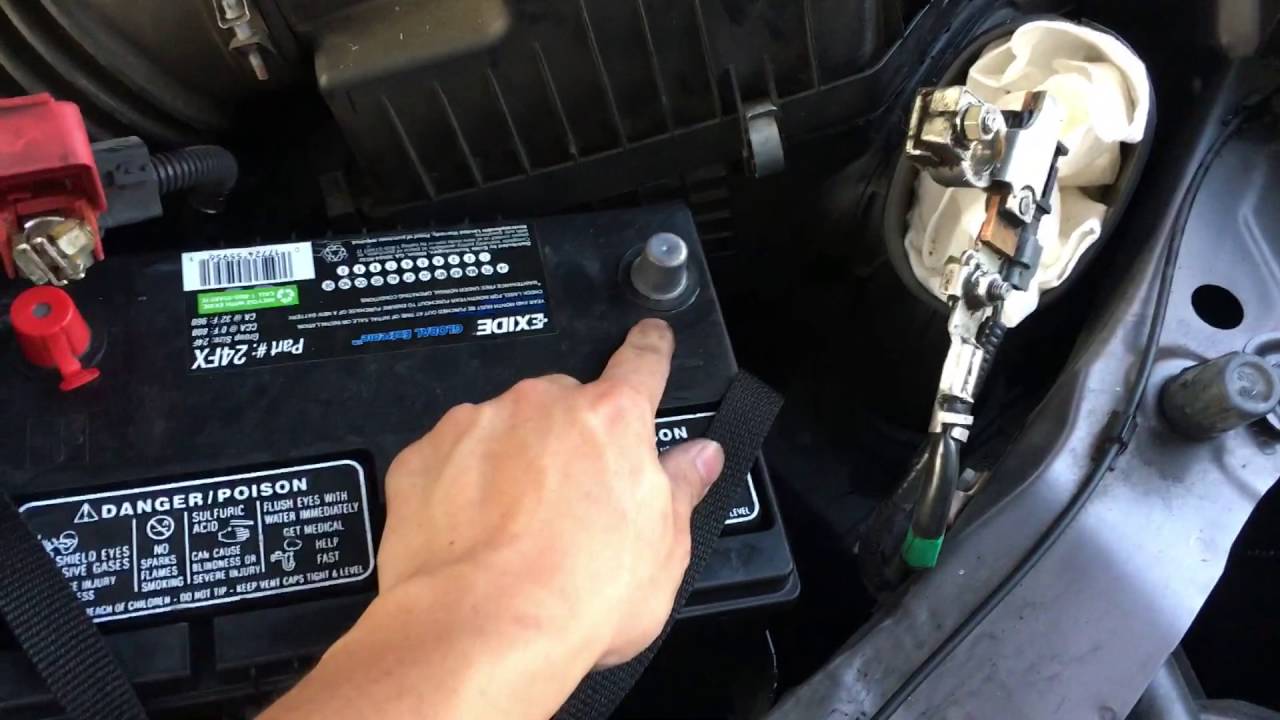
Testing The New Battery
After successfully installing the new battery in your Honda Odyssey, it’s crucial to perform a series of tests to ensure everything is in working order. Testing the new battery is essential to prevent any future issues and ensure a smooth operation. Here, we will walk you through the steps to test the new battery properly. First, start by checking the battery voltage using a multimeter. Simply connect the positive (red) lead to the positive terminal of the battery and the negative (black) lead to the negative terminal. The voltage should ideally read between 12.4 to 12.7 volts. Anything below 12 volts may indicate a weak battery or potential problems. Next, turn the ignition key to the “On” position and observe the dashboard lights. If all the lights illuminate brightly, it indicates a healthy battery. However, if the lights appear dim or flicker, it may indicate a weak battery or a problem with the electrical system. In this case, it’s advisable to seek professional assistance.Securing The Battery
Once you have successfully tested the new battery, it’s crucial to secure it properly to prevent any movement or damage while driving. Follow these steps to secure the battery firmly: 1. Ensure the battery is placed in the correct position and aligned with the battery tray. This helps to prevent any accidental contact with other parts of the vehicle. 2. Attach the hold-down bracket using the appropriate bolts or screws. The hold-down bracket ensures that the battery remains stable and doesn’t move around, reducing the risk of damage. 3. Tighten the hold-down bracket securely, ensuring it’s snug but not over-tightened. Be careful not to overtighten the bracket as it may damage the battery or the tray. 4. Double-check all connections and make sure they are tight and secure. Ensure that the positive (+) and negative (-) terminals are connected correctly and that there are no loose or corroded connections. By following these steps to test and secure your new Honda Odyssey battery, you can have peace of mind knowing that your vehicle is operating at its best. Don’t forget to dispose of your old battery properly, following any local regulations or guidelines. With a new battery and a secure installation, you’re ready to hit the road with confidence!
Credit: www.remodelandolacasa.com
Frequently Asked Questions For How To Change Honda Odyssey Battery
How Much Does It Cost To Replace A Battery In A Honda Odyssey?
The cost of replacing a battery in a Honda Odyssey can range from $100 to $250.
Can I Change My Own Car Battery?
Yes, you can change your own car battery. Simply follow the proper steps and precautions.
How Often Do You Need To Replace The Battery In A Honda Odyssey?
You typically need to replace the battery in a Honda Odyssey every 3-5 years for optimal performance.
What Is The Life Expectancy Of An Odyssey Battery?
The life expectancy of an Odyssey battery varies, but it typically lasts longer than conventional batteries. It’s designed to provide reliable power for longer periods, resulting in a longer lifespan. With proper maintenance and care, an Odyssey battery can last several years.
How Often Should I Change The Battery In My Honda Odyssey?
It’s recommended to replace the battery every 3-5 years for optimal performance.
What Are The Signs That Indicate A Dying Battery In A Honda Odyssey?
Symptoms like slow engine crank, dimming lights, and warning lights are indicators.
Can I Replace The Honda Odyssey Battery Myself, Or Should I Seek Professional Help?
It’s possible to replace the battery yourself, but professional assistance is advisable for safety.
Conclusion
Changing the battery on your Honda Odyssey is a straightforward task that can save you time and money. By following the steps outlined in this blog post, you can confidently replace your battery without the need for professional help. Remember to always disconnect the negative terminal first and connect it last when installing the new battery.
With these simple instructions, you can keep your Honda Odyssey running smoothly for years to come.