How to Change a Water Pump
To change a water pump, drain coolant, remove old pump, replace with new pump, and refill coolant. Changing a water pump is essential for maintaining the cooling system of a vehicle, ensuring optimal performance and preventing overheating.
An efficiently functioning water pump circulates coolant throughout the engine, preventing it from overheating and sustaining damage. Learning how to change a water pump can save you time and money by avoiding costly repairs or breakdowns due to engine overheating.
Following a few simple steps, you can replace the water pump on your own and keep your vehicle running smoothly. In this guide, we will provide you with a step-by-step process on how to change a water pump successfully.
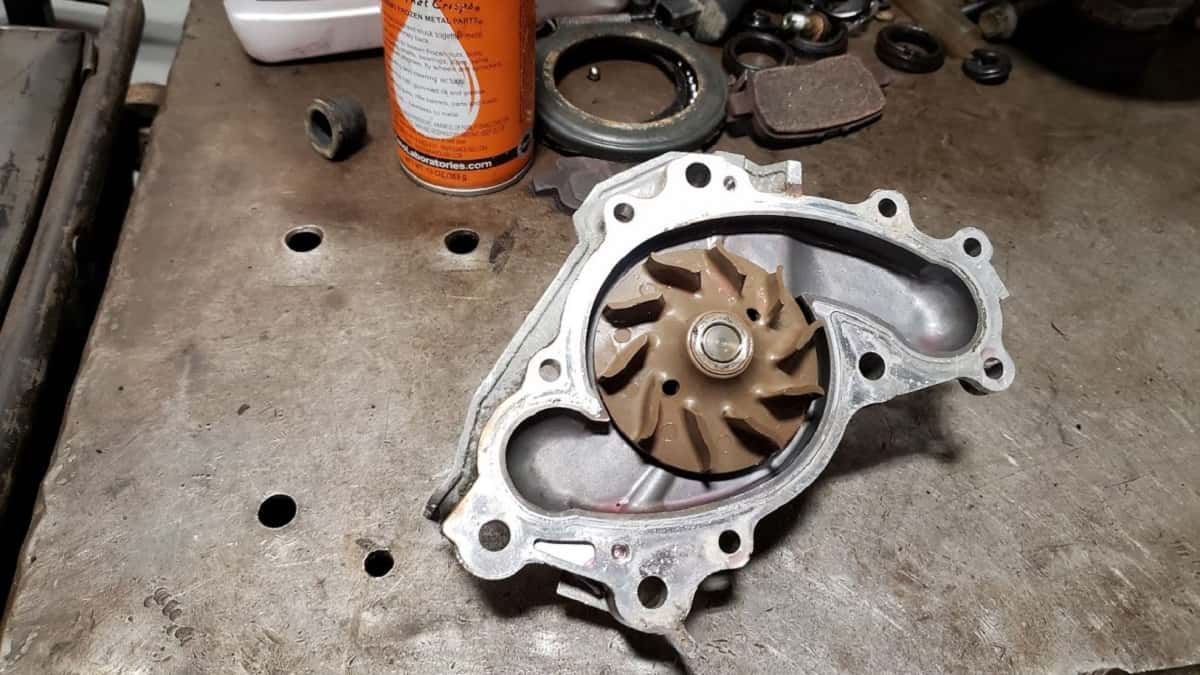
Credit: www.torquenews.com
Step 1: Gather The Necessary Tools
Before getting started with the water pump replacement, the first step is to gather all the necessary tools and equipment. Having the right tools on hand will ensure a smooth and efficient process. Here are the essential tools you will need:
Tool #1: Wrench Set
A wrench set is a must-have for changing a water pump. It will help you in loosening and tightening bolts and nuts of varying sizes, ensuring precision and ease during the replacement process.
Tool #2: Socket Set
Having a good quality socket set is crucial for accessing and manipulating fasteners that hold the water pump in place. This versatile tool will enable you to work with different sizes of bolts and fasteners.
Tool #3: Drain Pan
When changing a water pump, it’s important to have a drain pan to catch any coolant that may spill during the removal process. This will help keep your work area clean and prevent environmental contamination.
Step 2: Drain The Coolant
To change a water pump, start by draining the coolant from your vehicle. This crucial step is necessary to prevent any damage to the engine and ensure a successful replacement.
Locate The Radiator Drain Valve
Find the radiator drain valve located beneath the radiator. Take a good look to make sure you have identified it correctly.
Get A Container Ready
Prepare a container to collect the coolant. Make sure it is big enough to hold all the coolant from the radiator.
Drain The Coolant
Open the radiator drain valve using a wrench. Allow the coolant to flow freely into the container until the radiator is empty.
Remember to dispose of the old coolant safely according to local regulations.Step 3: Remove The Old Water Pump
Now that you have disconnected the negative battery cable and removed the drive belts and hoses, it’s time to take out the old water pump.
Disconnect The Negative Battery Cable
- Locate the negative battery cable in the engine compartment.
- Use a suitable tool to disconnect the cable by loosening the terminal nut.
Remove The Drive Belts
- Identify the drive belts that are connected to the water pump.
- Loosen the tension on the belts using an appropriate tool.
- Slide the belts off the water pump pulley.
Disconnect The Hoses
- Identify the hoses connected to the water pump.
- Use pliers to loosen the hose clamps.
- Gently pull the hoses off the water pump.
Remove The Old Water Pump
Once the belts and hoses are disconnected, locate the bolts securing the water pump to the engine block.
Use the appropriate tools to remove the bolts and carefully lift out the old water pump from its housing.
Step 4: Install The New Water Pump
When installing a new water pump, it’s important to follow the correct procedures to ensure proper functionality and prevent any leaks. Here are the steps you need to follow to install the new water pump for your vehicle.
Clean The Gasket Surfaces
Start by cleaning the gasket surfaces of both the engine block and the new water pump to ensure a proper seal and prevent any leaks from occurring. Remove any remnants of the old gasket using a gasket scraper and be sure to clean the surfaces thoroughly using a suitable solvent.
Install The New Water Pump
Carefully position the new water pump on the engine block and make sure the gasket is properly aligned. Secure the pump in place using the appropriate mounting bolts and torque them to the manufacturer’s specifications in a crisscross pattern. Be aware not to over-tighten the bolts as it can damage the pump and cause leaks.
Reconnect The Hoses
Reconnect all the hoses to the water pump and secure them tightly with the hose clamps. Ensure that there are no kinks or twists in the hoses, and double-check that all connections are secure to prevent any water leaks.
Reinstall The Drive Belts
Carefully reattach the drive belts to the water pump pulley and adjust the tension according to the manufacturer’s specifications. Ensure that the belts are properly aligned and tensioned to prevent slipping and prolong their lifespan.
Finally, reconnect the negative battery cable using the appropriate size wrench to secure the connection. This completes the installation of the new water pump, and the system is now ready for testing.
Step 5: Refill The Coolant
Once the water pump is replaced, proceed to Step 5: Refill the coolant. Open the radiator cap and pour in the appropriate coolant mixture, then secure the cap tightly. Run the engine and check for any leaks, ensuring the coolant level is at the recommended mark.
Close The Radiator Drain Valve
To begin refilling the coolant, you need to make sure that the radiator drain valve is closed. This valve is typically located at the bottom of the radiator. If you had opened it earlier to drain the old coolant, it’s essential to close it tightly before moving on to the next step. This will prevent any leaks or spills during the coolant refill process.Refill The Coolant
Now that the radiator drain valve is closed, it’s time to refill the coolant. This step requires a mixture of coolant and distilled water. The ratio of coolant to water may vary depending on the manufacturer’s instructions, so be sure to check the recommended ratio for your specific vehicle. To begin, locate the coolant reservoir tank. It is usually near the radiator and may have a cap labeled “coolant” or have markings indicating the proper fill level. Remove the cap and carefully pour the coolant mixture into the reservoir, ensuring that you do not exceed the maximum fill level indicated. Take your time and pour the mixture slowly to avoid any spillage.Bleed The Cooling System
After refilling the coolant, you need to bleed the cooling system to remove any trapped air bubbles. These air bubbles can hinder the proper circulation of coolant, leading to overheating issues. To bleed the system, follow these steps: 1. Start by locating the bleeder valve, which is usually located near the radiator and may have a cap or be marked with an arrow. 2. With the engine off and cool, place a container underneath the bleeder valve to catch any coolant that may spill. 3. Use a wrench to loosen the bleeder valve slightly, but be careful not to fully remove it. 4. Start the engine and let it idle for a few minutes. As the engine runs, you will notice air bubbles escaping from the bleeder valve. 5. Once you see a steady stream of coolant without any air bubbles, tighten the bleeder valve back to its original position. 6. Turn off the engine and allow it to cool completely. 7. Check the coolant level in the reservoir and top up if necessary. By following these steps, you can successfully refill the coolant and bleed the cooling system after changing the water pump. Remember to dispose of the old coolant responsibly and to consult your vehicle’s manual for any specific instructions or recommendations.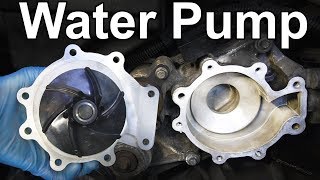
Credit: www.youtube.com

Credit: www.youtube.com
Frequently Asked Questions Of How To Change A Water Pump
Can I Change A Water Pump Myself?
Yes, you can change a water pump yourself if you have mechanical skills. It’s a moderate difficulty task.
Can You Replace A Well Water Pump Yourself?
Yes, you can replace a well water pump yourself if you have the necessary skills and tools.
What Tools Do You Need To Change A Water Pump?
To change a water pump, you will need a socket set, wrenches, pliers, and a gasket sealant.
How Many Man Hours Does It Take To Replace A Water Pump?
Replacing a water pump typically takes around 2-4 man hours. The exact time may vary depending on the vehicle’s make, model, and any additional complications encountered during the process. Trust a professional mechanic for an accurate estimate specific to your vehicle.
How Do You Know If Your Water Pump Is Bad?
If your engine is overheating, coolant is leaking, or you hear strange noises, these are signs your water pump may be failing.
How Long Does It Take To Change A Water Pump?
On average, it takes around 2 to 4 hours to change a water pump, but the time can vary depending on the vehicle make and model.
Can You Drive A Car With A Bad Water Pump?
It is not recommended to drive a car with a bad water pump as it can lead to engine overheating and serious damage.
Conclusion
Changing a water pump can be a challenging but doable task for car owners. By following the step-by-step instructions and using the right tools, you can successfully replace a worn-out water pump and ensure optimal performance of your vehicle’s cooling system.
With the right knowledge and preparation, this maintenance task can be accomplished without the need for professional assistance. Keep in mind the importance of safety and thorough understanding of your vehicle’s specifications as you tackle this DIY project.