How To Add Fluid To Hydraulic Disc Brakes
Hydraulic disc brakes are a crucial component of modern bicycles, ensuring reliable and efficient stopping power. However, over time, the fluid in these systems can become contaminated or depleted, compromising brake performance. Therefore, it is essential for cyclists to understand how to add fluid to their hydraulic disc brakes.
This article provides a step-by-step guide on adding fluid to hydraulic disc brakes in a technical, precise, and detailed manner. The instructions aim to engage the audience by using language appropriate for individuals seeking understanding. By following this guide, cyclists will be able to maintain optimal brake function and enhance overall safety during their rides.
To begin with, readers will learn about the necessary tools and materials required for this maintenance task. Next, they will be guided through preparing their bike for the procedure and locating the specific bleed port on their brake system. Additionally, instructions on attaching the bleed kit and preparing the appropriate fluid will be provided. Finally, readers will be advised on bleeding the brake system effectively as well as testing and adjusting the brakes after completing this maintenance task.
In conclusion, this article serves as an invaluable resource for cyclists who desire to maintain their hydraulic disc brakes properly.
Gather the Necessary Tools and Materials
The first step in the process involves procuring the appropriate tools and materials required for adding fluid to hydraulic disc brakes. Choosing the right brake fluid is crucial for ensuring optimal performance of the braking system. It is essential to consult the manufacturer’s recommendations or refer to the bike’s manual to determine which type of brake fluid is compatible with your specific model. Understanding the importance of proper fluid levels is also paramount. Insufficient fluid can result in decreased braking power, while excessive fluid can impair brake function and cause overheating. Therefore, it is necessary to maintain an adequate level of brake fluid within the system.
To gather the necessary tools and materials, you will need a container specifically designed for storing and dispensing brake fluid, such as a syringe or a small bottle with a narrow tip. Additionally, it is imperative to have clean rags or towels on hand to wipe away any spills or excess fluid during the process.
With all these tools and materials ready, you are now prepared to move on to preparing your bike for maintenance by following the subsequent section instructions.
Prepare Your Bike for Maintenance
To properly prepare your bike for maintenance, it is crucial to ensure that all necessary pre-maintenance checks are conducted. Before beginning any bike repair or maintenance task, it is important to inspect the overall condition of the bike. This includes checking the frame for any cracks or damages, examining the tires for wear and tear, and inspecting the brake system for any signs of damage or malfunction. Additionally, it is essential to clean the bike thoroughly before starting any maintenance work. This will help in identifying any hidden issues and prevent dirt or debris from getting into delicate parts.
Once you have assessed the condition of your bike and cleaned it properly, you can proceed with preparing specific areas for maintenance. For instance, when working on hydraulic disc brakes, it is necessary to remove any existing brake pads from the caliper as they might interfere with bleeding process later on. Furthermore, make sure to secure your bike in a stable position using a work stand or a sturdy support so that you can easily access the brake system without any hindrance.
Having completed these preparatory steps in bike maintenance and repair, you can now move on to locating the bleed port on your brake system.
(Note: Transition sentence into next section: Now that your bike is ready for maintenance and repair tasks…)
Locate the Bleed Port on Your Brake System
When locating the bleed port on your brake system, it is essential to identify the designated area where air bubbles can be released and fluid can be replenished. The bleed port serves as an access point for bleeding hydraulic disc brakes, a crucial maintenance procedure to ensure optimal brake performance. To successfully locate the bleed port, follow these steps:
- Start by examining your brake system to find the small, cylindrical component called the caliper.
- Look for a small screw-like cap on top of the caliper; this is often referred to as the bleed screw or valve.
- Once you have located the cap, use a suitable tool such as an Allen wrench or a specific tool provided with your brake system to loosen it counterclockwise.
- As you loosen the cap, you will notice fluid or air escaping from the port.
By following these tips for bleeding hydraulic disc brakes and locating the bleed port accurately, you will be able to proceed further in maintaining your brakes effectively. The next step involves attaching the bleed kit and preparing the fluid for a successful bleeding process.
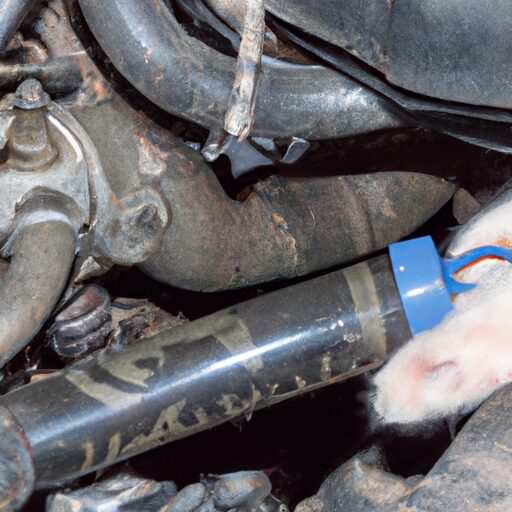
Attach the Bleed Kit and Prepare the Fluid
After successfully locating the bleed port on your brake system and understanding its significance in maintaining optimal brake performance, the next step involves attaching the bleed kit and preparing the necessary components for a successful bleeding process. To begin, gather all the items needed for the bleed kit setup. This typically includes a bleed syringe, tubing, an adapter specific to your brake system, and a container to collect the old fluid. Ensure that all components are clean and free from any contaminants that could compromise the effectiveness of the process.
Before proceeding further, it is essential to prepare the fluid that will be used during the bleeding process. Start by selecting an appropriate hydraulic brake fluid recommended by your bike manufacturer or specified in your brake system’s user manual. It is crucial to use compatible fluid as different types may not mix well with each other and can damage your brakes.
To prepare the fluid, carefully open its container using clean tools or gloves to avoid contamination. Fill a small reservoir or cup with an adequate amount of fluid according to your brake system’s requirements.
With everything set up and prepared, you are now ready to move on to bleeding the brake system using these components.
Bleed the Brake System
The next step in the brake maintenance process involves bleeding the brake system, a crucial procedure that ensures optimal performance and safety. Bleeding the hydraulic disc brakes is necessary to remove any air bubbles that may have entered the system, as well as to replace old or contaminated brake fluid. This process helps maintain the integrity of the braking system and prevents potential issues such as spongy brakes or loss of stopping power.
During this step, it is important to follow a precise and technical approach to ensure accurate results. First, locate the bleed port on the brake caliper and attach a bleeder hose from the bleed kit. Then, open the bleed screw using an appropriate tool while simultaneously applying pressure to compress the brake lever. This action allows any trapped air within the system to escape through the bleed port into a container attached at its end.
Bleeding also provides an opportunity for troubleshooting if any problems arise during this process. For instance, if air continues to appear in the fluid even after multiple attempts at bleeding, it could indicate a deeper issue within the brake system that requires further investigation.
With bleeding complete, we can now move on to testing and adjusting the brakes for optimal performance without compromising safety.
Test and Adjust the Brakes
To ensure optimal performance and safety, it is essential to test and fine-tune the brakes, like a conductor harmonizing an orchestra to create a seamless symphony of stopping power. Testing brake performance involves evaluating the responsiveness and effectiveness of the hydraulic disc brakes. This can be done by applying gradual pressure on the brake lever while observing how quickly the brakes engage and how smoothly they modulate. Additionally, it is important to check for any signs of brake drag or excessive noise during operation.
Adjusting the brake calipers is another crucial step in achieving proper brake performance. The calipers should be correctly aligned with the rotor to ensure even pad wear and maximum braking power. This can be accomplished through adjustments using an Allen wrench or similar tool, allowing for precise positioning of the caliper relative to the rotor.
By testing and adjusting these key components of hydraulic disc brakes, riders can optimize their braking system’s efficiency and effectiveness. Once this step is completed, it is imperative to maintain regular fluid levels and check for leaks as part of ongoing maintenance. This will help ensure consistent performance and prevent potential issues that may compromise safety on future rides.
Maintain Regular Fluid Levels and Check for Leaks
Regular maintenance of the brake system involves monitoring the levels of the essential fluid and inspecting for any potential leaks, ensuring a smoothly operating and reliable mechanism. To maintain regular fluid levels and check for leaks in hydraulic disc brakes, it is crucial to follow these steps:
- Checking for damaged brake pads: Inspect the brake pads for signs of wear or damage regularly. Damaged pads can lead to decreased braking performance and increased risk of accidents. If any issues are detected, replace the brake pads promptly.
- Understanding the importance of brake fluid in hydraulic disc brakes: Brake fluid plays a vital role in hydraulic disc brakes as it transfers force from the master cylinder to the calipers, enabling efficient stopping power. It also lubricates various components within the system, preventing corrosion and ensuring optimal performance.
- Regularly checking fluid levels: Check the brake fluid reservoir regularly to ensure it is at an appropriate level. Low levels can indicate a leak or excessive pad wear. It is important to use the correct type of brake fluid recommended by the manufacturer when topping up.
By regularly monitoring fluid levels and inspecting for leaks, you can ensure that your hydraulic disc brakes function optimally, providing reliable stopping power when needed and enhancing overall safety on the road.
Frequently Asked Questions
How often should hydraulic disc brakes be bled?
Hydraulic disc brakes should be bled every 6-12 months or when signs of air in the brake system are observed. Signs include a spongy lever feel, inconsistent braking, or excessive lever travel. Regular bleeding ensures optimal brake performance and safety.
Can I use any type of brake fluid for hydraulic disc brakes?
When it comes to hydraulic disc brakes, it is crucial to use the correct brake fluid. Different brake fluid types have specific properties that ensure optimal performance and safety of the braking system. Using the wrong type of brake fluid can lead to malfunctioning brakes, reduced stopping power, and potential damage to the braking components. Therefore, it is important to always consult the manufacturer’s recommendations or seek professional advice when selecting brake fluid for hydraulic disc brakes.
What should I do if I accidentally overfill the brake fluid?
To prevent brake fluid contamination and ensure proper maintenance for hydraulic disc brakes, it is important to avoid overfilling the brake fluid. If accidental overfilling occurs, excess fluid should be carefully removed using a syringe or similar tool.
Is it necessary to remove the brake pads while bleeding the brake system?
When bleeding the brake system, it is not necessary to remove the brake pads. Bleeding techniques involve removing air from the hydraulic lines, while brake pad maintenance focuses on inspecting and replacing worn pads for optimal braking performance.
How do I know if there is air in my brake system after bleeding?
To check for air in a brake system and troubleshoot hydraulic disc brakes, follow these steps. Firstly, pump the brake lever multiple times and hold it down to build pressure. Then, release the lever slowly to observe if there is any spongy or soft feel. If there is, it indicates the presence of air in the system which needs to be bled out.
Conclusion
In conclusion, the process of adding fluid to hydraulic disc brakes requires careful preparation and precision. By gathering the necessary tools and materials, preparing the bike for maintenance, locating the bleed port on your brake system, attaching the bleed kit and preparing the fluid, bleeding the brake system, testing and adjusting the brakes, as well as maintaining regular fluid levels and checking for leaks, you can ensure proper functioning of your hydraulic disc brakes. This technical and detailed procedure demands meticulous attention to detail for optimal performance.