Mastering Trailer Safety: How to Wire a Brake Controller
To wire a trailer brake controller, first identify the brake control wiring on your vehicle and match it with the appropriate wires on the controller. Then, connect the wires with wire connectors or a soldering iron for a secure connection.
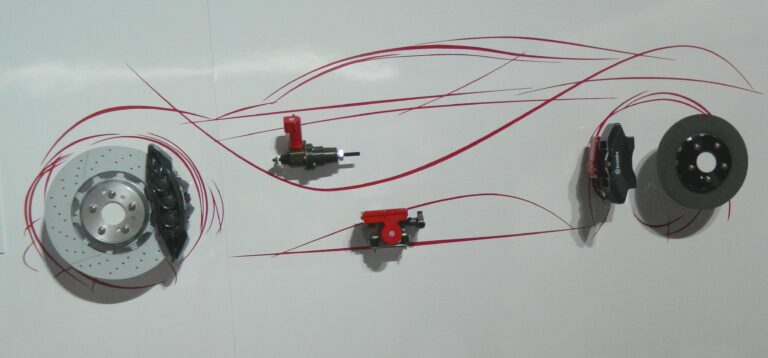
Wiring a trailer brake controller is an important component of towing safely. The purpose of a brake controller is to apply the brakes of your trailer in proportion to the brakes of your tow vehicle. This is especially important when towing larger or heavier trailers.
The process of wiring a brake controller involves identifying the brake control wiring on your vehicle and matching it with the appropriate wires on the controller. It’s important to ensure secure connections, either through the use of wire connectors or a soldering iron. Following a step-by-step guide and consulting with a professional can ensure a safe and successful wiring process.

Credit: blog.campingworld.com
Understanding Brake Controllers
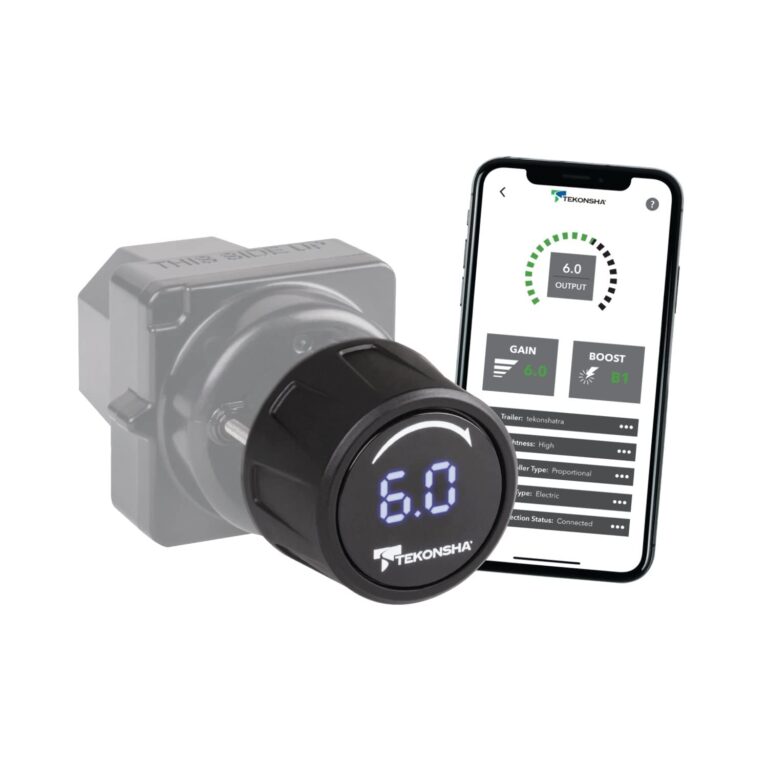
When it comes to wiring a trailer, you’ll need a brake controller to ensure that your trailer’s brakes are working correctly. A brake controller, also known as a trailer brake controller, is a device that allows the driver to control the electric brakes on the trailer from inside the vehicle.
In this section, we’ll explain the different types of brake controllers, discuss the pros and cons of each type, and highlight the factors you should consider when selecting a brake controller for your trailer.
Different Types Of Brake Controllers
There are three main types of brake controllers: mechanical, hydraulic, and proportional. Here’s a breakdown of how each type works:
- Mechanical brake controllers: These controllers use a physical connection between the vehicle’s brake pedal and the trailer’s brake system. When you apply the brakes, the controller sends a signal to the trailer to activate the brakes. This type of controller is the simplest and least expensive to install, but it doesn’t allow for precise braking adjustments.
- Hydraulic brake controllers: Similar to mechanical brake controllers, hydraulic brake controllers also use a physical connection between the vehicle’s brake pedal and the trailer’s brake system. However, instead of sending an electrical signal, the controller uses hydraulic pressure to engage the trailer’s brakes. This type of controller is more expensive than a mechanical one, but it allows for greater control over the brake force.
- Proportional brake controllers: Proportional brake controllers use an electronic circuit to determine the appropriate amount of braking force necessary for the trailer based on the vehicle’s deceleration rate. This type of controller is the most advanced and allows for the most precise braking adjustments, resulting in a smoother and more consistent braking experience. However, it is also the most expensive option.
Pros And Cons Of Different Brake Controllers
Each type of brake controller has its advantages and disadvantages. Here’s a summary:
- Mechanical brake controllers are the simplest and least expensive, but they don’t allow for precise braking adjustments.
- Hydraulic brake controllers are more expensive than mechanical ones, but they offer greater control over brake force.
- Proportional brake controllers are the most advanced and allow for precise braking adjustments, resulting in a smoother and more consistent braking experience, but they are the most expensive.
Factors To Consider When Selecting A Brake Controller For Your Trailer
When selecting a brake controller, there are several factors you should consider:
- Weight rating: The brake controller’s weight rating must match or exceed the weight of your trailer. Be sure to check the manufacturer’s specifications for both the controller and your trailer.
- Brake type: Some brake controllers are designed for electric brakes, while others are designed for hydraulic brakes. Ensure that you select a controller that is compatible with your trailer’s brake system.
- Type of driving: Consider the type of driving you’ll be doing, such as highway driving or off-roading. Proportional brake controllers provide the smoothest, most consistent braking experience, making them ideal for highway driving. However, if you’ll be doing off-roading or other types of challenging driving, you may want to opt for a hydraulic brake controller that allows for more control over the braking force.
- Budget: Finally, consider your budget when selecting a brake controller. While proportional brake controllers are the most advanced, they are also the most expensive. Mechanical brake controllers may be more suitable if you’re on a tight budget.
Understanding the different types of brake controllers, their pros and cons, and the factors to consider when selecting a brake controller is essential to ensure that your trailer’s brakes work correctly. Be sure to select a brake controller that is suitable for your trailer’s weight rating and braking system, as well as your driving needs and budget.
Preparing For Wiring
Before you can wire a trailer brake controller, you need to prepare your vehicle and gather the necessary tools and materials. Taking the proper safety precautions is also essential. This section will cover all of those aspects in detail.
Necessary Tools And Materials
To wire a trailer brake controller, you will need the following tools and materials:
- Trailer brake controller kit: Ensure that you have the right kit for your specific vehicle make and model.
- Wire strippers: Used to remove insulation from wires.
- Socket set: Will be needed to remove bolts and screws.
- Electrical tape: A type of tape used to insulate electrical wires.
- Crimping pliers: These enable you to attach connectors to the end of wires.
- Drill bit: Required to drill holes into the vehicle’s body if new mounting holes are necessary.
- Wire connectors: Used to connect wires together.
- Screwdrivers: Phillips and flathead screwdrivers will be necessary.
- Heat gun or lighter: Used to shrink heat shrink tubing to secure connections.
- Multimeter: Instrument used to measure voltage, current, and resistance.
Safety Precautions To Take
Safety is a crucial aspect when wiring a trailer brake controller. Here are some precautions you need to take:
- Always read the instructions and follow them carefully.
- Turn off the vehicle’s engine before starting any work.
- Use appropriate personal protective equipment (e.g., gloves, eye protection) when wiring the controller.
- Ensure that you work in a well-ventilated area since inhaling fumes from drilling or melting wires can be harmful.
- Always use the right tools and materials for the job.
- Double-check your work before testing the brake controller. Make sure everything is secure and in the right place.
- If you are not confident, enlist the help of a certified mechanic or electrician.
Steps To Follow Before Wiring The Brake Controller
Before you can begin wiring the brake controller, follow these steps:
- Check your vehicle’s user manual to see if it is pre-wired for a brake controller. If it is not, you will need to wire the controller manually.
- Determine the best location to mount the controller. A typical location is under the dashboard in reach of the driver.
- Before drilling any holes, use a multimeter to test the wires to see which ones have power to them.
- Once you’ve determined which wires to connect to, use wire strippers to remove the insulation from the wires.
- Use crimping pliers to attach the connectors to the end of the wires.
- Connect the wires to the brake controller according to the instructions provided with the kit.
- Use electrical tape or heat shrink tubing to secure the connections.
By following these steps, you’ll be well on your way to successfully wiring a trailer brake controller. Remember to take your time, follow the instructions carefully, and take appropriate safety precautions.
Wiring The Brake Controller
Wiring a brake controller for your trailer can save your vehicle’s brakes and add an extra level of safety to your towing experience. Before you begin, make sure you have the appropriate tools and equipment, including wire strippers, electrical tape, a voltage meter, and the wiring diagram for your specific brake controller.
In this post, we will discuss step-by-step instructions for wiring the brake controller, troubleshooting common wiring issues, and tips for ensuring a safe and reliable connection.
Step-By-Step Instructions For Wiring The Brake Controller
Wiring a brake controller is a straightforward process but requires some understanding of electrical wiring. Follow these instructions for safe and successful installation:
- Mount the brake controller in a suitable location inside the tow vehicle.
- Connect the black wire of the brake controller to the negative battery terminal of the vehicle.
- Connect the white wire of the brake controller to the white wire on the 7-pin connector.
- Connect the blue wire of the brake controller to the blue wire on the 7-pin connector.
- Connect the red wire of the brake controller to the cold side of the brake pedal switch.
- Connect the brake wire of the trailer to the black wire of the 7-pin connector.
- Use a voltage meter to test the brake controller’s function.
Troubleshooting Common Wiring Issues
If you encounter any issues with the brake controller’s functionality, it may be due to wiring problems. Here are some troubleshooting tips:
- Check all connections for loose or corroded wires.
- Use electrical tape to secure all connections.
- Verify that all wires are connected to the proper terminals according to the wiring diagram.
- Use a voltage meter to test for proper electrical output.
Tips For Ensuring A Safe And Reliable Connection
A properly installed brake controller is imperative for safe towing. Here are some tips for ensuring a safe and reliable connection:
- Always use wire strippers to remove insulation from wires.
- Use electrical tape to secure all connections and prevent unraveling.
- Do not over-tighten wire connections as this can cause damage to the wiring.
- Routinely check the brake controller’s function and electrical output to ensure proper operation.
By following these step-by-step instructions, troubleshooting tips, and safety suggestions, you can wire a trailer brake controller with confidence and ensure a safe and reliable towing experience.
Testing And Calibration
How To Properly Test The Brake Controller Connection
Before using a trailer brake controller, it’s essential to ensure that it’s correctly connected to the tow vehicle. Follow these key points to test the brake controller connection using a multimeter:
- Turn on the tow vehicle and the brake controller.
- Connect the multimeter’s black lead to the negative (-) battery terminal of the tow vehicle.
- Connect the multimeter’s red lead to the brake controller’s blue wire.
- Depress the brake pedal and notice the voltage on the multimeter. It should indicate the voltage output of the brake controller.
If the voltage output is zero or too low, check the brake controller’s manual to see how to troubleshoot or replace it.
Adjusting Brake Controller Settings
Adjusting the brake controller settings is crucial for optimal trailer braking performance. Follow these key points:
- Set the brake controller’s power output level by using the manual control lever while driving at a low speed.
- Adjust the gain control adjustment to set the power output so that the stopping distance of the trailer is about the same as the vehicle.
- Increase or decrease the gain control adjustment based on the trailer’s weight, road conditions, and driving speed.
Remember to adjust the brake controller settings every time the trailer’s load changes.
Best Practices For Calibrating Brake Controllers
Calibrating brake controllers is the process of synchronizing the controller with the trailer’s braking system. Follow these best practices to calibrate brake controllers:
- Follow the specific calibration instructions provided by the brake controller manufacturer.
- Ensure that the trailer’s brakes are fully operational before calibrating the brake controller.
- Choose a suitable and safe location for brake controller calibration.
- Calibrate the brake controller with the same load and road conditions that you will encounter during the trip.
Following these best practices will help you calibrate the brake controller correctly and ensure that your trailer performs safely and efficiently on the road.
Best Practices For Trailer Safety
Trailer brake controllers help ensure a safe and smooth ride when towing heavy loads. As a responsible driver, it is essential to use a brake controller that is compatible with your vehicle and trailer. Here are some best practices for trailer safety:
Other Key Components Of Trailer Safety To Consider
- Weight distribution: Distribute the weight of the load evenly to avoid overloading one side of the trailer. This can prevent accidents on the road.
- Lights and signals: Proper lighting is necessary to alert other drivers of your presence on the road. Ensure that all lights and signals are functioning correctly before hitting the road.
- Hitch and coupling: The hitch and coupling should be secure, and the safety chains should be properly attached. This ensures no disconnection of the trailer while driving.
- Tyres: Always check the tyres’ pressure and condition before setting off on your journey. Bald tyres will compromise your ability to control the trailer, resulting in loss of control.
Tips For Safe Towing And Driving With A Trailer
- Stay alert: Always stay alert and drive defensively to avoid accidents. Be aware of your surroundings and adjust your speed accordingly.
- Keep a safe distance: Leave enough space between you and other vehicles on the road. This allows you to stop safely in case of an emergency.
- Brake early: It takes longer to stop when towing a trailer. Therefore, you should brake earlier than usual to avoid sudden stops that may cause accidents.
- Slow down: Drive at a reasonable speed and avoid speeding, especially when going down a slope.
Importance Of Regular Maintenance And Inspections
- Regular maintenance: Regular maintenance ensures that your brake controller is always in good condition. Check if there are any signs of wear and tear and replace the parts if necessary.
- Pre-trip inspection: Before any trip, examine your trailer and brake controller to ensure that they are in good working condition. This will help avoid breakdowns and costly repairs while on the road.
- Routine service: Regular servicing will ensure that your brake controller functions optimally. Regular servicing can help prolong the unit’s life, ensuring safety in all trips.
Following these best practices for trailer safety will ensure that you have a safe and comfortable trip. Furthermore, always remember to adhere to local road safety laws, and never exceed the weight limit recommended by the manufacturers. Stay safe and happy travels!
Frequently Asked Questions For How Do You Wire A Trailer Brake Controller
What Is A Trailer Brake Controller And What Does It Do?
A trailer brake controller is an electric device that activates the brakes on a trailer when the tow vehicle stops. It provides safety by preventing the trailer from colliding with the towing vehicle.
How Do You Install A Trailer Brake Controller?
To install a trailer brake controller, connect the trailer brakes to the controller using wires, and then connect the controller to the power and ground wires in the wiring harness. You may also need to adjust the brake controller settings for optimal brake performance.
What Are The Different Types Of Trailer Brake Controllers?
The three different types of trailer brake controllers are proportional, time-delayed, and inertia-based controllers. Proportional controllers provide smooth braking, while time-delayed controllers apply the trailer brakes after a delay. Inertia-based controllers sense the trailer’s movement and adjust braking force based on the trailer’s weight.
Can A Trailer Brake Controller Be Used On Any Trailer?
Yes, a trailer brake controller can be used on any trailer that requires braking power to stop. However, some states have specific rules regarding trailer braking systems, so it’s important to check local laws and regulations before using a brake controller.
Do I Need A Professional To Wire My Trailer Brake Controller?
While it’s possible to wire a trailer brake controller yourself, it may be best to seek the help of a professional. An experienced technician can ensure that the wiring is correctly installed and that the brake controller is functioning properly, providing a safer driving experience.
Conclusion
Now that you’ve learned the basics of how to wire a trailer brake controller, you can embark on a safe towing experience. It’s crucial to follow the installation steps mentioned above thoroughly and be mindful of the safety precautions mentioned.
Although it seems intimidating, wiring a trailer brake controller is relatively simple, and it only takes a short amount of time. Always remember to consult your vehicle owner’s manual before attempting to install a brake controller. Furthermore, practice makes perfect – the more you tow, the more your confidence will grow, and you’ll become an expert in no time.
Keep in mind that a brake controller can make your trailer towing experience more comfortable and secure. Hence, make sure to wire it correctly and enjoy your safe and pleasant journey!