Ultimate Guide to Alternator Repair for [Car Make/Model]
Your ultimate guide to alternator repair for [Car Make/Model] includes troubleshooting tips and step-by-step repair instructions. Keep reading for expert guidance.
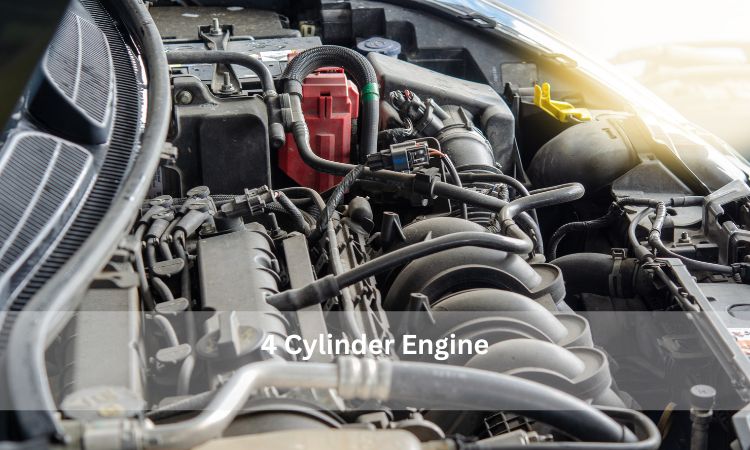
Are you experiencing battery issues or dimming headlights in your [Car Make/Model]? Understanding how to diagnose and repair a faulty alternator can save you time and money in the long run. In this guide, we will cover the key components of an alternator, common signs of a failing alternator, tools needed for repair, and a detailed breakdown of the repair process.
By following these instructions, you can confidently tackle alternator repairs and keep your [Car Make/Model] running smoothly. Let’s dive in and uncover all you need to know about alternator repair for your vehicle.
Common Signs Of Alternator Problems
When it comes to keeping your [Car Make/Model] in optimal condition, understanding the common signs of alternator problems is crucial. The alternator plays a vital role in your vehicle’s electrical system, charging the battery and powering various electrical components. If you notice any of the following signs, it’s important to address the issue promptly to prevent further damage and avoid being stranded on the road.
Dimming Headlights
Dimming headlights are often a clear indicator of alternator problems. If you notice that your headlights are becoming progressively dimmer while driving or when you use other electrical components, such as the radio or air conditioning, it indicates that the alternator is not producing enough power. Dim headlights not only compromise your visibility but also point to a potential issue with the alternator’s ability to recharge the battery.
Strange Noises
Strange noises coming from under the hood should never be ignored. When it comes to alternator problems, unusual sounds like grinding, squealing, or rattling can signal trouble. These noises may indicate a faulty alternator bearing, a loose belt, or worn-out internal components. It’s crucial to have these noises inspected and repaired as soon as possible to prevent further damage to the alternator and avoid unexpected breakdowns.
Weak Or Dead Battery
A weak or dead battery is another common sign of alternator problems. If you find that your battery gets drained quickly, struggles to start the car, or dies completely, it may be due to a malfunctioning alternator. The alternator should be supplying enough power to the battery while the engine is running, allowing it to recharge. If the alternator fails to do so, the battery will gradually lose its charge, leading to starting issues and potential breakdowns.
| Signs of Alternator Problems |
|---|
| Dimming Headlights |
| Strange Noises |
| Weak or Dead Battery |
Being aware of these common signs of alternator problems can help you take the necessary steps to address them before they escalate. If you experience any of these issues with your [Car Make/Model], it’s recommended to consult a qualified mechanic to diagnose and resolve the alternator problem efficiently, ensuring the safety and reliability of your vehicle.
- Dimming headlights indicate insufficient power.
- Strange noises (grinding, squealing, rattling) signal potential issues.
- Weak or dead battery point to a malfunctioning alternator.
Diagnosing Alternator Issues
Diagnosing alternator issues is crucial for ensuring the proper functioning of your [Car Make/Model]. Look out for symptoms such as dimming headlights or odd noises, and use a multimeter to test the alternator’s output. Regular maintenance and timely repairs can prevent major breakdowns and keep your vehicle running smoothly.
Trying to determine if your alternator is causing problems? Here are some steps to follow.
Using A Multimeter
Start by checking the voltage output of the alternator with a multimeter. Set the multimeter to the voltage setting and connect the positive lead to the positive terminal of the battery and the negative lead to the negative terminal. A healthy alternator should show a reading between 13.8 and 14.2 volts while the engine is running.
Inspecting The Drive Belt
Next, inspect the drive belt for any signs of wear or damage. A loose or damaged belt can cause the alternator to not operate properly. Make sure the belt is properly tensioned and check for any cracks or fraying. If you notice any issues, replace the belt as soon as possible to prevent further damage.
Tools Needed For Alternator Repair
When it’s time to do an alternator repair for your [Car Make/Model], having the right tools is crucial for a smooth and successful repair process. The following are the essential tools you’ll need for the job:
Socket Set
A socket set is indispensable for removing and replacing various bolts and nuts during alternator repair.
Torque Wrench
A torque wrench helps ensure that bolts are tightened to the correct specifications to prevent issues down the road.
Screwdrivers
Having a selection screwdrivers of different sizes and types is essential for accessing and removing components within the alternator.
![Ultimate Guide to Alternator Repair for [Car Make/Model]](https://www.grandslipring.com/wp-content/uploads/alternator-slip-rings-repair.jpg.webp)
Credit: www.grandslipring.com
Step-by-step Alternator Repair Guide
Discover the ultimate step-by-step alternator repair guide for your [Car Make/Model]. This comprehensive resource provides easy-to-follow instructions to help you troubleshoot and fix alternator issues, ensuring optimal performance for your vehicle.
Step-by-Step Alternator Repair Guide
Welcome to the step-by-step alternator repair guide specifically tailored for [Car Make/Model]. In this comprehensive guide, we will walk you through the process of disconnecting the battery, removing the old alternator, and installing the new alternator. By following these simple steps, you can save time and money by repairing your alternator yourself. So, let’s begin the exciting journey of reviving your vehicle’s electrical power!
Disconnecting the battery
The first step in any electrical repair is disconnecting the battery to ensure your safety and prevent any accidental electrical shocks. Here’s how you can do it in a few quick and easy steps:
1. Locate the vehicle’s battery under the hood.
2. Carefully remove the negative (-) cable from the battery terminal.
3. Use a wrench or socket set to loosen the bolt securing the cable.
4. Once loose, disconnect the cable from the terminal.
5. Repeat the same process for the positive (+) cable, ensuring both cables are completely disconnected.
Remember, safety should always be your top priority when working with electrical components. By disconnecting the battery, you minimize the risk of electrical accidents and potential damage to your vehicle’s electrical system.
Removing the old alternator
Now that the battery is disconnected, we can move on to removing the old alternator. Follow these steps for a smooth removal process:
1. Locate the alternator, typically positioned near the engine’s front.
2. Identify the belt connecting the alternator to the engine.
3. Using a wrench or socket set, find the tensioner pulley and rotate it to release tension on the belt.
4. While keeping the tension off, carefully slide the belt off the alternator pulley.
5. Next, remove the bolts securing the alternator to the engine block, using the appropriate socket size.
6. Once the bolts are removed, gently detach the electrical connectors from the alternator.
7. Finally, lift the old alternator out of its position, making sure to handle it with care to avoid any damage.
Installing the new alternator
Now that we’ve successfully removed the old alternator, it’s time to install the new one. Here’s how you can complete the installation process:
1. Take the new alternator and carefully position it in the same location as the old alternator.
2. Attach the electrical connectors to the new alternator, ensuring a secure connection.
3. Align the new alternator with the mounting bracket on the engine block.
4. Insert and tighten the bolts that secure the alternator to the engine block using the appropriate socket size.
5. Find the tensioner pulley again, rotate it to relieve tension, and slide the belt back onto the alternator pulley.
6. Once the belt is correctly placed, release the tensioner pulley, allowing it to apply the necessary tension to the belt.
7. Double-check all connections and make sure everything is properly tightened.
Congratulations! You have successfully completed the step-by-step alternator repair process for [Car Make/Model]. By following these simple steps, you can restore the electrical power of your vehicle and get back on the road with full confidence.
Remember, if you ever feel unsure or uncomfortable performing this repair yourself, it’s always best to consult a professional mechanic.
Tips For Maintaining A Healthy Alternator
The alternator is a crucial component in maintaining the electrical system of your [Car Make/Model]. To keep it in optimal condition, there are several essential tips for maintaining a healthy alternator that you should follow. By incorporating these tips into your routine maintenance, you can ensure that your alternator operates efficiently and prolong its lifespan.
Regular Inspections
Regular inspections of the alternator are vital in ensuring its proper functioning. Check the belt tension to ensure it is not too loose or too tight, as this can affect the alternator’s performance. Inspect the wiring and connections for any signs of damage or corrosion. Additionally, monitor the battery voltage to identify any fluctuations that may indicate a problem with the alternator.
Keeping The Electrical System Clean
Maintaining a clean electrical system is essential for the health of your alternator. Dirt and debris can accumulate on the alternator, affecting its cooling and performance. Regularly clean the alternator and surrounding components to prevent the build-up of grime and ensure optimal airflow. This practice can help prevent overheating and extend the lifespan of your alternator.
![Ultimate Guide to Alternator Repair for [Car Make/Model]](https://mzwmotor.com/wp-content/uploads/2019/08/www.mzwmotor.com_alternator.png)
Credit: mzwmotor.com
![Ultimate Guide to Alternator Repair for [Car Make/Model]](https://repairsmith-prod-wordpress.s3.amazonaws.com/2023/12/tesla-model3-in-snow.jpg)
Credit: www.autonationmobileservice.com
Frequently Asked Questions For Ultimate Guide To Alternator Repair For [car Make/model]
How To Repair Alternator Step By Step?
To repair an alternator, start by disconnecting the battery, removing the alternator belt and bolts, then replace faulty parts and reassemble everything carefully. Test the alternator to ensure it’s functioning properly before reconnecting the battery.
Are Alternators Model Specific?
No, alternators are not model specific. They vary based on vehicle make, model, and year.
Can I Fix Car Alternator Myself?
Yes, you can fix your car alternator yourself. It’s important to follow proper instructions and have basic knowledge of electrical systems. However, if you’re unsure or don’t have experience, it’s recommended to seek professional help for safety reasons.
How Do I Find The Right Alternator For My Car?
To find the right alternator for your car, check your vehicle’s make, model, and year. You can also consult your car’s manual or contact a professional mechanic for assistance. Ensure the alternator matches your vehicle’s specifications for proper fit and functioning.
Conclusion
To sum up, this ultimate guide has equipped you with the necessary knowledge and steps to effectively handle alternator repair for [Car Make/Model]. By understanding the signs of a faulty alternator, performing regular maintenance, and seeking professional help when needed, you can ensure the longevity and performance of your vehicle.
Don’t let alternator issues disrupt your driving experience – take action and keep your car running smoothly.