Mastering the Art of Troubleshooting Trailer Brake Controller Installation
Troubleshooting installation issues of a trailer brake controller requires thorough inspection and testing to identify potential problems and resolve them effectively. In this guide, we will discuss common installation issues and provide practical solutions to help you address any problems you may encounter.
Whether it is a faulty connection, improper wiring, or compatibility issues, understanding these troubleshooting steps will ensure a successful installation and enhance the safety and efficiency of your trailer braking system. So, let’s dive in and troubleshoot those installation issues for a smooth and hassle-free experience on the road.
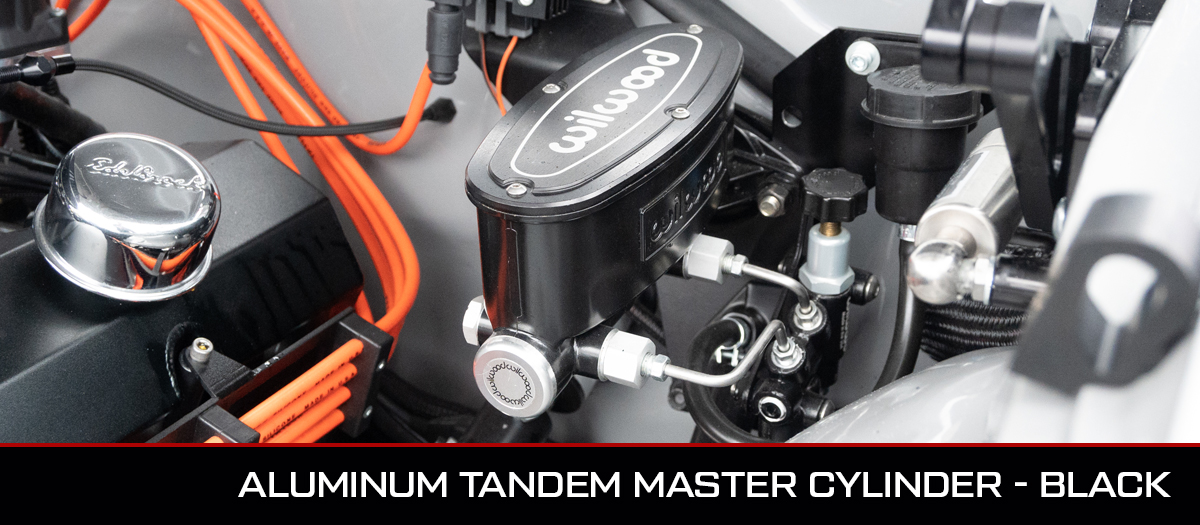
Credit: www.wilwood.com
Understanding Trailer Brake Controller Basics
A properly functioning brake controller is essential for the safe operation of a trailer. Whether you are towing a camper, boat, or utility trailer, having a reliable brake controller ensures that your trailer’s brakes are engaged when you need them.
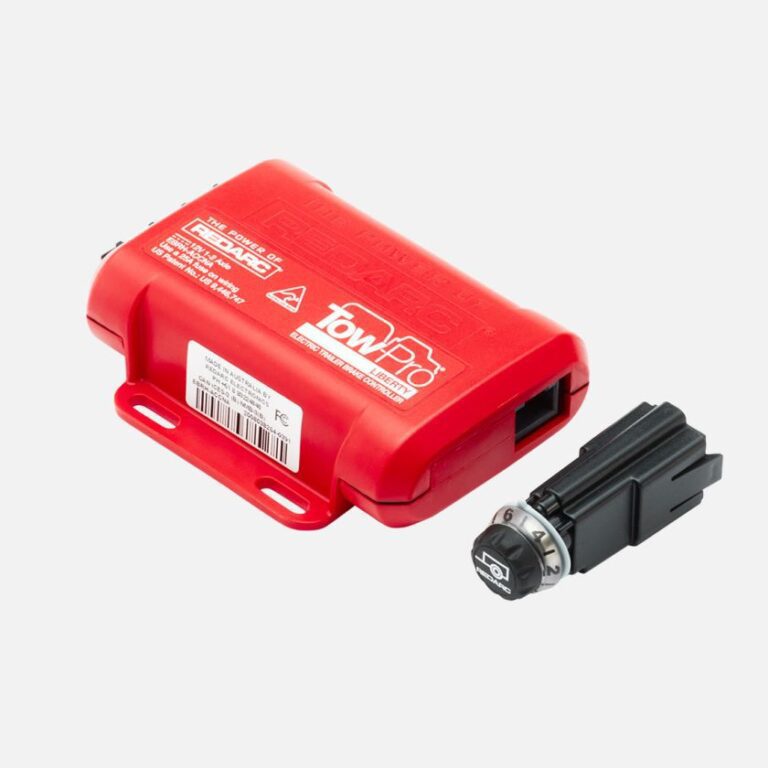
Types Of Trailer Brake Controllers
There are three main types of trailer brake controllers to choose from, each with its own unique features and benefits:
- Time-delayed brake controllers: These controllers apply a predetermined amount of braking force to the trailer based on a set time delay. They are a cost-effective option and suitable for most towing scenarios. However, they may not provide as precise braking control as other types.
- Inertia-activated brake controllers: These controllers use the trailer’s momentum to determine the appropriate braking force. They offer more proportional braking, meaning the braking force matches the deceleration of the towing vehicle. This type of controller is ideal for situations where you have varying loads or road conditions.
- Hydraulic brake controllers: Designed specifically for trailers with hydraulic brakes, these controllers offer precise control and quick response. They utilize the towing vehicle’s hydraulic brake system to apply pressure to the trailer’s brakes.
How Brake Controllers Work
To understand how a brake controller functions, let’s break it down into a few key components and steps:
- Electric signal: When you apply the brakes in your towing vehicle, an electric signal is sent to the brake controller.
- Braking force adjustment: The brake controller receives the electric signal and adjusts the amount of braking force to be applied to the trailer’s brakes.
- Power distribution: The brake controller distributes the electric current to the trailer’s brakes, activating them proportionally to the braking force set by the controller.
- Deceleration matching: The braking force is adjusted dynamically based on the deceleration of the towing vehicle, ensuring smooth and proportional braking.
Importance Of A Properly Installed Brake Controller
A properly installed brake controller is vital for several reasons:
- Safety: A well-functioning brake controller ensures that both the towing vehicle and the trailer can stop safely, reducing the risk of accidents and collisions.
- Control: With a reliable brake controller, you have better control over your trailer’s braking, allowing for smoother deceleration and maneuvering.
- Compliance: It is important to comply with local laws and regulations regarding trailer brake controllers. A properly installed controller helps you meet these requirements.
- Protection of equipment: A brake controller prevents excessive wear and tear on your trailer’s brakes, extending their lifespan and potentially saving you from costly repairs.
Understanding the basics of trailer brake controllers is crucial for troubleshooting installation issues and ensuring safe towing experiences. Whether you opt for a time-delayed, inertia-activated, or hydraulic brake controller, make sure it is properly installed and functioning correctly to enjoy worry-free towing.
Choosing The Right Brake Controller For Your Trailer
When it comes to selecting a brake controller for your trailer, there are several factors to consider. Choosing the right one ensures the safety and efficiency of your trailers’ braking system. Here are a few key points to keep in mind:
- Trailer weight and capacity: Determine the weight of your trailer and its maximum capacity. This information is crucial in selecting an appropriate brake controller that can handle the load effectively. The weight distribution and braking power of your trailer will vary based on its size and load capacity.
- Type of trailer brakes: Consider the type of brakes installed on your trailer. There are two common types: electric trailer brakes and hydraulic trailer brakes. Electric trailer brakes operate using an electric current, while hydraulic trailer brakes rely on brake fluid. Ensure that the brake controller you choose is compatible with the type of brakes your trailer has.
- Vehicle compatibility: Check the compatibility of the brake controller with your vehicle. Different vehicles may have varying electrical systems or towing capacities. It is essential to choose a brake controller that can be easily integrated into your vehicle’s existing wiring and interface seamlessly with its braking system.
- Ease of installation: Look for a brake controller that offers simple and straightforward installation. Some brake controllers may require professional installation, while others can be easily installed by diy enthusiasts. Consider your comfort level with electrical wiring and read user reviews to determine the ease of installation for a particular model.
- Brake controller types: There are different types of brake controllers available in the market, including time-delayed controllers and proportional controllers. Time-delayed controllers provide a preset delay before engaging the trailer brakes, while proportional controllers sense the braking pressure applied by the tow vehicle and adjust the trailer brakes accordingly. Evaluate your towing needs and preferences to choose the appropriate type.
- User-friendly interface: Opt for a brake controller that offers a user-friendly interface. Clear and intuitive controls ensure ease of use and allow for quick adjustments while on the road. Look for controllers with responsive buttons or knobs for smooth operation.
- Budget considerations: Set a budget for your brake controller purchase. Prices can vary based on features and functionality. It is crucial to strike a balance between affordability and quality to ensure a reliable and durable brake controller.
- Warranty and customer support: Check the warranty and customer support offered by the manufacturer. A reliable brand will stand behind its product and provide assistance in case of any issues or concerns.
- Reviews and recommendations: Read product reviews and seek recommendations from fellow trailer owners or automotive experts. Their insights can provide valuable information and help you make an informed decision.
By considering these factors, you can confidently choose the right brake controller for your trailer, ensuring a safe and smooth towing experience. So, take the time to evaluate your needs, weigh your options, and select a brake controller that best suits your trailer’s requirements.
Gathering The Necessary Tools And Equipment
Essential Tools For Installing A Brake Controller
When it comes to installing a trailer brake controller, having the right tools is crucial for a successful installation. Here are the essential tools you’ll need:
- Socket set: A good quality socket set will come in handy when connecting wires and mounting the brake controller.
- Wire strippers: These tools will help you strip the insulation off the wires, ensuring a secure and reliable connection.
- Multimeter: A multimeter is essential for testing the voltage and continuity of the wiring, ensuring everything is working correctly.
- Crimping tool: A crimping tool allows you to securely attach connectors to the wires, preventing any loose connections.
- Screwdriver: A screwdriver is needed to secure the brake control mounting bracket and adjust any necessary settings.
- Heat gun or electrical tape: These tools are used for insulating and protecting the connections from moisture and damage.
Additional Equipment Needed For A Successful Installation
In addition to the essential tools mentioned above, there are a few more equipment items you will need to ensure a successful brake controller installation:
- Wiring harnesses: Depending on your vehicle and trailer configuration, you may need specific wiring harnesses to connect the brake controller to your vehicle’s electrical system.
- Brake control mounting brackets: These brackets are designed to securely hold the brake controller in place, preventing any movement or damage while driving.
- Wire connectors: To make secure and reliable connections, you may need wire connectors such as butt connectors or quick splice connectors.
- Zip ties: Use zip ties to neatly secure the wiring and prevent any loose or dangling wires that could get caught on something.
Installing a brake controller can be a straightforward process if you have the right tools and equipment. Having these essentials on hand will ensure a smooth installation and help you get your trailer brake system up and running in no time.
Remember to follow the manufacturer’s instructions and consult a professional if you’re unsure about any aspect of the installation process. Happy towing!
Preparing Your Vehicle For Brake Controller Installation
Before installing a trailer brake controller in your vehicle, there are a few key steps you need to take to ensure a smooth and successful installation. By properly preparing your vehicle, you can avoid any potential installation issues and ensure that your brake controller functions effectively.
Here are the important points to keep in mind:
Identifying The Brake Controller Wiring Port In Your Vehicle
- Locate the brake controller wiring port: The first step in preparing your vehicle for brake controller installation is to find the wiring port where the brake controller will connect. This port is usually located under the dash on the driver’s side, but it may vary depending on the make and model of your vehicle. Refer to your vehicle’s owner’s manual or consult a professional if you are unsure of its exact location.
- Check for compatibility: Once you have located the wiring port, ensure that it is compatible with the brake controller you have purchased. Different brake controllers may require different types of wiring connections, so double-check the specifications provided by the manufacturer. It is crucial to match the wiring requirements of the brake controller with the wiring capabilities of your vehicle’s port.
Locating The Brake Switch Wire
- Understand the brake switch wire: The brake switch wire is an essential component for the brake controller to operate correctly. It is responsible for sending a signal to the brake controller to activate the trailer brakes when you apply the brakes in your vehicle. Locating this wire is crucial for a successful brake controller installation.
- Follow the wire from the brake pedal: To locate the brake switch wire, start by tracing it from the brake pedal. The wire typically runs along the firewall and may be bundled with other wires. Look for a wire that is connected to the brake pedal switch and follow it towards the rear of the vehicle.
- Use a test light or multimeter: To confirm that you have located the correct wire, use a test light or multimeter to check for the presence of a signal when you press the brake pedal. Attach the test light or multimeter probe to the suspected brake switch wire and have someone press the brake pedal. If the test light illuminates or the multimeter shows a voltage reading, then you have located the correct wire.
Evaluating The Condition Of The Wiring Port
- Inspect for any damage or corrosion: Before connecting the brake controller, thoroughly inspect the wiring port for any signs of damage or corrosion. Damaged or corroded ports can lead to poor electrical connections and affect the performance of the brake controller. If you notice any issues, it is recommended to clean or replace the wiring port before proceeding with the installation.
- Ensure secure and tight connections: Once you have determined that the wiring port is in good condition, make sure that all connections are secure and tight. Loose connections can cause intermittent electrical problems and affect the brake controller’s functionality. Carefully plug in the brake controller to the wiring port and ensure that it fits snugly.
By following these steps to prepare your vehicle for brake controller installation, you can avoid potential issues and ensure a successful installation process. Remember to consult your vehicle’s owner’s manual or seek professional assistance if you encounter any difficulties along the way.
Installing The Brake Controller Wiring Harness
Steps To Connect The Wiring Harness To The Brake Controller
Connecting the brake controller wiring harness is an essential step in the installation process. Follow these steps to ensure a proper connection:
- Locate the wiring harness: Find the wiring harness that is specifically designed for your trailer brake controller. It typically comes included with the controller or can be purchased separately.
- Identify the brake controller wires: The brake controller will have several wires coming out of it. Identify the following wires: power wire, brake wire, ground wire, and the wire that connects to the trailer’s brake system.
- Prepare the wiring harness: Prepare the wiring harness by stripping the protective coating from the ends of the wires. This will ensure a clean connection.
- Match the wires: Match the wires from the brake controller to the corresponding wires on the wiring harness. Ensure that the colors match and that the connections are secure.
- Connect the wires: Use wire connectors or solder the wires together to create a secure connection. Make sure to follow the manufacturer’s instructions for proper wiring techniques.
- Secure the connected wires: Once the wires are connected, use electrical tape or wire connectors to secure the connections. This will prevent any unintentional disconnections during use.
Ensuring A Secure Connection
A secure connection is crucial for the proper functioning of the trailer brake controller. Here are some tips to ensure a secure and reliable connection:
- Use quality connectors: Invest in good quality wire connectors that are specifically designed for automotive applications. These connectors provide a secure connection and are resistant to vibrations and moisture.
- Crimp the connectors properly: When crimping the wire connectors, make sure to apply enough pressure to ensure a tight connection. Use a crimping tool to achieve a proper crimp.
- Test the connection: After making the connections, test the brake controller to ensure that it is functioning correctly. Apply the brakes and ensure that the trailer brakes engage smoothly.
- Inspect for loose connections: Regularly inspect the wiring harness and connections for any signs of looseness or damage. Secure any loose connections immediately to prevent malfunctions.
- Follow manufacturer’s instructions: Always refer to the manufacturer’s instructions for specific guidelines on wiring and connection techniques. Each brake controller may have slight variations in the wiring process.
Tips For Routing The Wiring Harness
Routing the wiring harness properly is essential to ensure its longevity and prevent any damage. Consider the following tips when routing the wiring harness:
- Avoid sharp edges and hot surfaces: When routing the wiring harness, make sure to avoid sharp edges and hot surfaces that could potentially damage the wires. Use protective sleeves or clips if necessary.
- Keep the wiring away from moving parts: Ensure that the wiring harness is routed away from any moving parts or areas that could cause abrasion or pinching. This will help prevent short circuits and wire damage.
- Secure the wiring with zip ties or clips: Use zip ties or clips to secure the wiring harness along its route. This will keep the wires neatly organized and prevent them from hanging loose or getting tangled.
- Protect the wiring from the elements: If the wiring harness is exposed to the elements, make sure to use weather-resistant materials such as conduit or heat shrink tubing to protect the wires from moisture and corrosion.
- Follow the trailer’s existing wiring routes: If possible, try to follow the existing wiring routes of the trailer to ensure a clean and organized installation. This will also help prevent any accidental damage to the wiring.
By following these steps and tips, you can successfully connect the wiring harness to the brake controller and ensure a secure and reliable installation. Properly routed and connected wiring will contribute to the overall performance and safety of your trailer’s braking system.
Wiring The Brake Controller To Your Trailer
Connecting The Brake Controller To The Trailer Brake System
When it comes to installing a trailer brake controller, one critical step is wiring it to your trailer’s brake system. Properly connecting the brake controller ensures that it can communicate with the trailer brakes effectively. Here are the key points to keep in mind:
- Gather the necessary equipment: Before you begin the wiring process, make sure you have all the required equipment, including a brake controller, electrical connectors, wire cutters, and electrical tape.
- Locate the brake controller wiring port: Most modern vehicles come with a designated wiring port for brake controllers, usually located beneath the dashboard. Consult your vehicle’s owner’s manual or refer to the manufacturer’s instructions to find the exact location.
- Identify the correct wires: The brake controller wiring harness will consist of several wires, each serving a specific function. You’ll typically have wires for power, ground, brake switch, and trailer brake output. Identify these wires and ensure you understand their purpose before proceeding.
- Connect the wires: Follow these steps to connect the brake controller wires to the trailer brake system:
- Power wire: Connect the power wire from the brake controller to the positive terminal of your vehicle’s battery, using an appropriate-sized fuse or circuit breaker for added safety.
- Ground wire: Properly grounding the brake controller is crucial for its functionality. Locate a suitable grounding point near the controller and connect the ground wire securely.
- Brake switch wire: Identify the brake switch wire in your vehicle’s wiring harness and connect it to the appropriate wire on the brake controller. This wire activates the controller when you press the brake pedal.
- Trailer brake output wire: Connect the trailer brake output wire from the controller to the corresponding wire on the trailer’s wiring harness. This wire is responsible for supplying appropriate voltage to the trailer brakes.
- Secure the connections: Once all the wires are connected, make sure to secure the connections properly. Use electrical connectors for a secure and reliable connection, and wrap each connection with electrical tape for added protection against moisture and potential short circuits.
- Test the connection: Once the brake controller is wired to the trailer brake system, it’s essential to test the connection for functionality. To do this:
- Start your vehicle’s engine and apply the trailer brakes using the manual control function on the brake controller.
- Observe if the trailer brakes engage appropriately. Adjust the brake controller settings if necessary until you achieve the desired responsiveness.
By following these steps and ensuring a proper connection between the brake controller and the trailer brake system, you’ll be well on your way to troubleshooting any installation issues and enjoying safe, controlled braking while towing your trailer. Remember to refer to the specific instructions provided by the brake controller and trailer manufacturers for best results.
Troubleshooting Common Brake Controller Installation Issues
If you’re experiencing problems with your trailer brake controller installation, it’s important to troubleshoot the issues to ensure safe towing. Below are some common installation problems and steps to resolve them:
Brake Controller Not Turning On
- Check the power source: Ensure that the brake controller is properly connected to a power source. If it is directly wired to the vehicle’s battery, inspect the wiring for any loose or damaged connections.
- Verify the ground connection: A faulty ground connection can prevent the brake controller from turning on. Make sure the ground wire is securely attached to a suitable grounding point on the vehicle’s chassis.
- Confirm voltage supply: Use a multimeter to check if the brake controller is receiving the correct voltage supply. If the voltage is lower than the required specifications, inspect the wiring and connections for any issues.
Trailer Brakes Not Engaging Properly
- Verify brake controller output: Check the brake controller’s output level. Adjust it according to the weight and braking requirements of your trailer. Consult the brake controller’s manual for specific instructions on adjusting the output.
- Inspect trailer wiring: Examine the trailer wiring for any loose or damaged connections. Ensure that all cables are securely connected and that there are no exposed wires.
- Check trailer brake magnets: The trailer’s brake magnets may need adjustment or replacement if they are not engaging properly. Consult the trailer’s manual for guidance on checking and adjusting the brake magnets.
Error Codes And Troubleshooting Steps
- Consult the brake controller manual: Error codes can vary depending on the brake controller model. Refer to the manual provided with your brake controller to understand the specific error codes and their corresponding troubleshooting steps.
- Check wiring and connections: Many error codes can be attributed to wiring or connection issues. Inspect the brake controller wiring, as well as the connections to the vehicle and trailer, for any faults or loose connections.
- Test brake controller functionality: Perform a functionality test to determine if the brake controller is working properly. Follow the troubleshooting steps provided in the manual to diagnose and resolve any issues.
Understanding Common Error Codes
- Error code: E1 – this code typically indicates a shorted output or a wiring issue. Check the wiring connections to ensure they are secure and properly connected.
- Error code: E2 – this code suggests an open output or a wiring problem. Inspect the wiring connections for any loose or disconnected wires.
- Error code: E3 – this code typically indicates an overload or a short fault. Check the brake controller’s manual for specific troubleshooting steps to resolve this error.
Resetting The Brake Controller
- Disconnect the power source: To reset the brake controller, disconnect its power source by removing the fuse or unplugging the wiring harness.
- Wait for a few minutes: Allow the brake controller to remain without power for a few minutes. This will clear any temporary issues or errors.
- Reconnect the power source: After the waiting period, reconnect the power source to the brake controller. This will initiate a fresh start for the controller.
Remember, if you encounter persistent issues with your brake controller installation, it is recommended to consult a professional technician or refer to the brake controller manufacturer’s support for further assistance.
Adjusting And Fine-Tuning Your Brake Controller
After the installation of your trailer brake controller, it is essential to properly adjust and fine-tune its settings to ensure optimal performance. Below are the key points to consider when adjusting and fine-tuning your brake controller:
Testing the brake controller settings:
- Before hitting the road, it’s crucial to test the brake controller settings to ensure they are properly functioning.
- Connect your trailer to the tow vehicle and engage the manual override on the brake controller.
- Observe if the trailer brakes activate promptly and smoothly.
- Experiment with different braking scenarios, such as sudden stops and gradual deceleration, to assess the responsiveness and effectiveness of the brake controller.
Proper adjustment for different trailer weights:
- One of the critical aspects of brake controller adjustment is accounting for the varying weights of different trailers.
- Adjust the brake controller’s gain setting according to the trailer’s weight to achieve the appropriate braking force.
- Increasing the gain will provide more braking power for heavier trailers, while decreasing it will accommodate lighter trailers.
- Consult your brake controller’s manual or manufacturer guidelines for specific instructions on determining the ideal gain setting for different trailer weights.
Fine-tuning sensitivity and response time:
- The sensitivity and response time of your brake controller play a significant role in ensuring smooth and controlled braking.
- Fine-tune the sensitivity to avoid excessive brake force that may cause skidding or locking up of the trailer’s wheels.
- Adjust the response time to optimize the delay between the brake application and the activation of the trailer brakes.
- Finding the right balance of sensitivity and response time will result in a comfortable and safe towing experience.
Remember, properly adjusting and fine-tuning your brake controller is crucial for efficient braking and overall towing safety. By conducting thorough testing and taking into account the trailer’s weight, you’ll be able to enjoy a smooth and controlled towing experience.
Regular Maintenance And Inspections
Importance Of Regular Brake Controller Maintenance
Regular maintenance and inspections are essential to ensure the smooth operation of your trailer brake controller. By properly maintaining your brake controller, you can prevent potential issues and ensure optimal functionality. Here are the key points to consider:
- Preserve brake controller performance: Regular maintenance helps maintain the optimal performance of your brake controller, ensuring efficient braking and safe towing.
- Extended lifespan: Proper maintenance can extend the lifespan of your brake controller, saving you money on replacements in the long run.
- Enhanced safety: By regularly inspecting and maintaining your brake controller, you can identify any potential issues before they become major safety concerns.
- Peace of mind: Knowing that your brake controller is regularly maintained can give you the peace of mind to enjoy your towing experience without worrying about brake failures.
Signs Of Wear Or Damage To Look Out For
It’s crucial to periodically inspect your brake controller for any signs of wear or damage. By identifying these issues early on, you can address them promptly, preventing further damage. Here are some key signs to look out for:
- Physical damage: Check for any visible cracks, dents, or loose wiring on the brake controller itself.
- Faulty display: If the display on your brake controller is not functioning properly, it may indicate an internal issue that needs attention.
- Non-responsive controls: Test the buttons and knobs on your brake controller to ensure they are working correctly and responding to inputs.
- Erratic braking: If you notice sudden braking fluctuations or inconsistent braking performance, it may signify a problem with the brake controller.
- Error codes or warning lights: Pay attention to any error codes or warning lights displayed on your brake controller, as they can indicate underlying issues.
Regularly inspecting your brake controller and being vigilant about these signs of wear or damage will help maintain its optimal performance and ensure your safety while towing. Take proactive steps to address any issues promptly, whether through diy troubleshooting or seeking professional assistance.
Frequently Asked Questions About Brake Controller Troubleshooting
Common Questions About Brake Controller Installation And Troubleshooting
If you’re experiencing issues with your trailer brake controller, you’re not alone. Installation problems and troubleshooting can be frustrating, but understanding common questions and their solutions can help. Here are some frequently asked questions about brake controller troubleshooting:
- Why is my brake controller not working?
- Check if the controller is securely connected to the vehicle’s electrical system.
- Ensure that the brake controller is properly grounded.
- Verify that the brake signal wire is correctly connected to the stop light switch.
- Why are my trailer brakes not engaging?
- Confirm that the trailer is properly connected to the brake controller.
- Check the brake controller settings to ensure the brake gain is set appropriately.
- Inspect the trailer’s wiring for any loose or damaged connections.
- Ensure that the trailer’s brake system is functional and not in need of repair or adjustment.
- What should i do if my brake controller is displaying an error code?
- Refer to the brake controller’s user manual to determine the meaning of the specific error code.
- Troubleshoot the issue according to the provided instructions, which may involve resetting the controller or contacting technical support.
- How do i adjust the brake gain on my brake controller?
- Locate the brake gain adjustment knob or menu on the controller.
- Start with a low brake gain setting and gradually increase it until the trailer brakes engage smoothly without skidding.
- Test the brakes under various driving conditions to ensure optimal brake performance.
- Why is my brake controller activating without the brake pedal being pressed?
- Check if the trailer wiring is properly grounded and not causing a short circuit.
- Inspect the brake signal wire for any loose connections or bare wires that may be causing unintentional activation.
- Ensure that the brake controller is properly installed according to the manufacturer’s instructions.
- Why are my trailer brakes pulsating or locking up?
- Adjust the brake gain to find the optimal setting for smooth and controlled braking.
- Check for any mechanical issues with the trailer’s brake system, such as worn brake pads or damaged brake components.
- Consider upgrading to a proportional brake controller, which applies the trailer brakes in proportion to the braking force applied by the vehicle.
Expert Answers And Solutions To Common Issues
Now that we’ve covered some common questions about brake controller troubleshooting, let’s delve into expert answers and solutions to these issues:
- Ensure proper installation: Double-check all electrical connections and ensure the brake controller is grounded correctly.
- Consult the manual: Review the manufacturer’s instructions for troubleshooting guidance and error code explanations.
- Test the wiring: Thoroughly inspect the trailer’s wiring for any signs of damage, including loose connections or exposed wires.
- Optimize brake gain: Adjust the brake gain setting gradually until the trailer brakes engage smoothly without skidding or locking up.
- Consider a proportional controller: If you’re experiencing pulsating or locking brakes, upgrading to a proportional brake controller may provide more control and stability.
- Professional assistance: If you’ve exhausted all troubleshooting options without success, consider seeking professional help from a qualified technician.
By addressing common questions and providing expert answers and solutions, you’ll be better equipped to troubleshoot installation issues with your trailer brake controller. Remember to always follow the manufacturer’s instructions and consult professional assistance when needed for a safe towing experience.
Frequently Asked Questions On Troubleshooting Installation Issues Of Trailer Brake Controller
How Do I Troubleshoot A Trailer Brake Controller?
To troubleshoot a trailer brake controller, start by checking the wiring connections and ensuring they are secure. Test the brake controller settings and adjust them accordingly. If the issue persists, consult the user manual or contact a professional for further assistance.
Why Is My Trailer Brake Controller Not Working?
There could be several reasons why your trailer brake controller is not working. Check the electrical connections, make sure the trailer brakes are properly adjusted, and verify if there is power reaching the brake controller. If all these aspects seem fine, it could be an issue with the brake controller itself, and it may need to be repaired or replaced.
How Can I Test My Trailer Brake Controller?
To test your trailer brake controller, start by slowly driving your vehicle and observing if the trailer brakes engage smoothly when you apply the brake pedal. If the brakes do not respond or engage properly, adjust the braking force using the controller settings.
Additionally, you can perform a manual override test to ensure the trailer brakes are functioning correctly.
Why Are My Trailer Brakes Locking Up?
If your trailer brakes are locking up, it may be due to an imbalance in brake force distribution. Check if the brake shoes and drums are properly adjusted and make sure the brake controller settings are appropriate for your specific trailer and load.
If the issue persists, consult a professional for further inspection and adjustment.
What Should I Do If My Trailer Brakes Are Weak?
If your trailer brakes are weak, first check if there is sufficient power reaching the brake controller. Ensure the brake shoes and drums are not worn out or damaged. Adjust the brake controller settings to increase the braking force if necessary.
If the problem persists, it is recommended to have a professional inspect and repair the trailer brake system.
How Often Should I Adjust My Trailer Brakes?
It is important to regularly inspect and adjust your trailer brakes, especially before long trips or after prolonged periods of inactivity. Industry experts recommend adjusting trailer brakes every 3,000 to 6,000 miles or at least once a year, depending on your usage and the manufacturer’s guidelines.
Regular maintenance ensures optimal brake performance and safe towing.
Why Are My Trailer Brakes Pulsating?
If your trailer brakes are pulsating, it could indicate a problem with the brake rotors or drums. Warping or uneven wear on these components can cause the brakes to pulsate. Check the condition of the rotors or drums and replace them if necessary.
It is also important to ensure the brake shoes are properly aligned and adjusted to prevent pulsating brakes.
How Do I Choose The Right Trailer Brake Controller?
When selecting a trailer brake controller, consider factors such as the towing capacity of your vehicle, the size and weight of your trailer, and the type of braking system it uses. Choose a brake controller that is compatible with your vehicle and provides sufficient braking power for your trailer.
Consult your vehicle’s owner’s manual or seek advice from a professional if you are unsure which brake controller to choose.
Can I Install A Trailer Brake Controller Myself?
Yes, installing a trailer brake controller is a relatively straightforward process that can be done by most diy enthusiasts. However, it is important to follow the manufacturer’s instructions and ensure all connections are secure and correctly wired. If you are not confident in your abilities or lack experience in electrical wiring, it is recommended to have the brake controller installed by a professional to ensure proper functionality and safety.
Conclusion
Troubleshooting installation issues of a trailer brake controller can be a frustrating but necessary process for ensuring the safe and effective operation of your trailer brakes. By following the steps outlined in this blog post, you can overcome common problems such as faulty wiring, incorrect installation, or incompatible components.
Remember to thoroughly inspect your brake controller and trailer wiring, test for proper voltage, and consult the manufacturer’s instructions for specific troubleshooting guidance. Additionally, seeking the help of a professional or utilizing online resources, such as forums or videos, can provide valuable insights and solutions.
With the right knowledge and patience, you can successfully troubleshoot and resolve any installation issues with your trailer brake controller, allowing for smooth and worry-free towing experiences.

