how to recharge a dead car battery
Introduction
Importance of knowing how to recharge a dead car battery
Recharging a dead car battery is an essential skill every car owner should know. Whether you accidentally left your headlights on overnight or your battery is simply old and unable to hold a charge, being able to recharge it can save you time and money. Instead of relying on others for a jump start or calling for roadside assistance, you can take matters into your own hands and get your vehicle up and running quickly.
Safety precautions and considerations
Before attempting to recharge your car battery, it’s important to take some safety precautions and considerations:
– Wear safety goggles and gloves to protect yourself from any potential acid spills or electrical shocks.
– Ensure that the area around the battery is well-ventilated to prevent the buildup of any potentially explosive gases.
– Read and carefully follow the instructions provided by the battery charger to avoid any mishaps or damage to the battery.
– Avoid smoking or creating sparks near the battery, as this can lead to a fire hazard.
– Make sure to keep children and pets away from the battery and charger to prevent any accidents.
Now, let’s go through the step-by-step process of recharging your car battery:
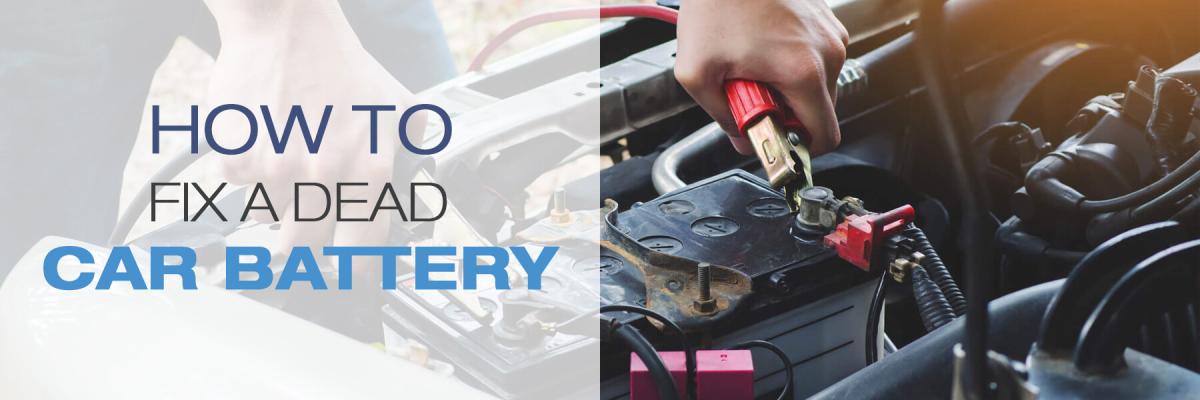
Step 1: Find your vehicle’s battery and locate the positive and negative terminals. Most cars have their battery under the hood. The positive terminal is marked with a “+” and the negative terminal is marked with a “-“. Sometimes, the terminals are protected by plastic covers that need to be flipped out of the way. Other vehicles may have their batteries in the trunk.
Step 2: Prepare the battery charger. Double-check the instructions that come with the charger to ensure you are operating it correctly. Set the charger to the appropriate charging rate for your battery. Many battery chargers deliver two to six amps and can take several hours to recharge a dead car battery.
Step 3: Connect the charger to the battery. Attach the positive (red) clamp of the charger to the positive terminal of the battery. Then, attach the negative (black) clamp of the charger to a stable metal part of your vehicle’s chassis. Avoid attaching it directly to the negative terminal to prevent any sparks or accidents.
Step 4: Start the charging process. Once the charger is connected to the battery, plug it into a power outlet and turn it on. Your charger’s indicator light will signal when it’s done charging the battery. During the charging process, avoid letting the charger’s clamps touch the battery’s loose negative clamp.
Step 5: Disconnect everything once the battery is charged. When the battery is fully charged, shut off the charger and unplug it. Then, remove the cables, unhooking the negative (black) clamp first. Reconnect the car’s negative terminal to the battery. Disconnect the charger completely.
Conclusion
Knowing how to recharge a dead car battery is a valuable skill that can save you time and money. By following the safety precautions and step-by-step process outlined in this article, you can confidently recharge your car battery and get back on the road with a fresh start. Remember to double-check the instructions that come with your specific battery charger and always prioritize safety throughout the process.
Understanding the Battery Charging Process
Different types of battery chargers and their functionalities
When it comes to charging a car battery, there are different types of battery chargers available in the market. Each type has its own specific functionalities and is suitable for different situations. Here are some common types of battery chargers:
1. Trickle Charger: This charger provides a low and constant charge to the battery, keeping it fully charged without overcharging. It is ideal for long-term battery maintenance or for batteries that are not frequently used.
2. Float Charger: Similar to a trickle charger, a float charger also provides a low and constant charge. However, it is specifically designed to keep the battery fully charged without overcharging, making it suitable for long-term storage or seasonal vehicles.
3. Smart Charger: This type of charger is equipped with advanced microprocessors that monitor and adjust the charging process based on the battery’s condition. It can analyze the charge level, temperature, and voltage of the battery, ensuring optimal charging and preventing overcharging.
4. Portable Jump Starter: A portable jump starter not only helps jump-start a dead battery but also has the capability to charge the battery. It is a convenient option for emergencies as it eliminates the need for another vehicle or external power source.
Evaluating the charging capacity and time required
The charging capacity of a battery charger is typically measured in amps (A) or milliamps (mA). The higher the ampere rating, the faster the charger can recharge the battery. However, it is important to choose a charger with an appropriate amp rating for your specific battery to avoid damaging it.
Additionally, the charging time required can vary depending on factors such as the battery’s capacity, the charger’s amp rating, and the battery’s current charge level. It is recommended to refer to the charger’s manual or manufacturer’s guidelines for an estimate of the charging time.
It is worth noting that charging a battery too quickly can lead to overheating and damage, while charging it too slowly may not fully recharge the battery. Therefore, it is important to find a balance based on the battery’s specifications and the charger’s capabilities.
In conclusion, understanding the battery charging process and having the right knowledge about the different types of chargers and their functionalities is essential for effectively charging a car battery. Evaluating the charging capacity and time required can help ensure a safe and efficient charging process. By taking proper care of your car battery and promptly addressing any issues, you can prolong its lifespan and avoid unexpected breakdowns.
Step 1: Preparing the Charger
Reading and following the instructions provided
Before starting the charging process, it is important to carefully read and understand the instructions provided with the battery charger. Different chargers may have specific requirements or precautions that need to be followed for safe and effective charging.
Checking the charger’s compatibility with the car battery
It is crucial to ensure that the battery charger is compatible with the type and specifications of the car battery. Some chargers are designed for specific battery types, such as lead-acid or lithium-ion batteries, while others are more versatile and can charge multiple battery types. Make sure to check the voltage and amp rating requirements of the charger to ensure it matches the car battery’s specifications.
Step 2: Connecting the Charger to the Battery
Locating the battery terminals
To begin the charging process, locate the positive and negative terminals of the car battery. In most vehicles, the battery is located under the hood, with the positive terminal marked with a “+” sign and the negative terminal marked with a “-” sign. In some cases, the terminals may be protected by plastic covers that need to be flipped out of the way.
Attaching the charger to the battery terminals
Once the terminals are located, ensure that the battery charger is unplugged and turned off before proceeding. Connect the charger’s positive clamp to the positive terminal of the battery and the negative clamp to the negative terminal. Make sure to secure the clamps tightly to ensure a good connection.
Step 3: Charging the Battery
Setting the charging parameters
Some battery chargers have adjustable settings that allow you to select the desired charging parameters. These may include the charging rate (measured in amps), the charging mode (trickle charge, fast charge, etc.), and any additional features such as desulfation or maintenance mode. Refer to the charger’s manual for guidance on selecting the appropriate settings for your specific battery.
Plugging in and turning on the charger
Once the charger is properly connected and the settings are adjusted, plug the charger into a power outlet and turn it on. The charger will begin supplying the necessary current to the battery, which will gradually recharge it.
Step 4: Disconnecting and Storing the Charger
Checking the battery’s charge level
Monitor the battery’s charge level during the charging process. Most battery chargers have built-in indicators or displays that show the current charge level. Once the battery reaches a full charge, the charger should automatically stop supplying power. If your charger does not have this feature, refer to the manual for instructions on determining the charge level.
Disconnecting the charger
Once the battery is fully charged, turn off the charger and unplug it from the power outlet. Remove the clamps from the battery terminals, starting with the negative (black) clamp first, followed by the positive (red) clamp. Ensure that the clamps are stored safely and the charger is properly stored in a cool, dry place.
Performing a post-charge check
After the charging process is complete, it is recommended to perform a post-charge check to verify that the battery is holding the charge properly. You can use a multimeter or battery load tester to measure the voltage and assess the battery’s condition. If the battery does not hold the charge or shows signs of deterioration, it may be necessary to replace it.
By following these step-by-step guidelines, you can safely and effectively charge your car battery. Regular maintenance and proper charging techniques can help prolong the lifespan of your battery and ensure reliable vehicle performance. If you have any doubts or concerns, it is recommended to consult a professional or refer to the vehicle’s manual for specific instructions.
Step 2: Connecting the Charger
Identifying the positive and negative terminals of the battery
Before connecting the battery charger, it is important to locate the positive and negative terminals of your car’s battery. In most vehicles, the battery is found under the hood, with the positive terminal marked with a “+” and the negative terminal marked with a “-“. In some cases, the terminals may be protected by plastic covers that need to be flipped out of the way. However, if your vehicle has the battery located in the trunk, you will need to consult the owner’s manual or seek guidance from a professional to locate the terminals.
Attaching the charger cables securely
To begin the charging process, attach the charger cables securely to the battery terminals. Start by attaching the red/clamp to the positive terminal and the black/negative clamp to the negative terminal. It is important to ensure a good connection by giving the clamps a little wiggle. This will help prevent any loose connections that could affect the charging process.
For safety purposes, it is advisable to keep the charger as far away from the battery as the cables allow. This minimizes the risk of any sparks or accidental contact while the charging process is underway. Additionally, double-check the instructions provided with the charger to make sure you are using it correctly, as different chargers may have specific guidelines or precautions.
Understanding the Battery Charging Process
Different types of battery chargers and their functionalities
When it comes to charging a car battery, there are different types of battery chargers available in the market. Each type has its own specific functionalities and is suitable for different situations. Here are some common types of battery chargers:
– Trickle Charger: Provides a low and constant charge to the battery, ideal for long-term maintenance or batteries that are not frequently used.
– Float Charger: Similar to a trickle charger, it keeps the battery fully charged without overcharging, making it suitable for long-term storage or seasonal vehicles.
– Smart Charger: Equipped with advanced microprocessors that monitor and adjust the charging process, ensuring optimal charging and preventing overcharging.
– Portable Jump Starter: Not only jump-starts a dead battery, but can also be used to charge the battery, making it a convenient option for emergencies.
Evaluating the charging capacity and time required
The charging capacity of a battery charger is measured in amps (A) or milliamps (mA). Choosing the appropriate amp rating is crucial to avoid damaging the battery. Higher amp ratings allow for faster charging, but it is essential to refer to the battery’s specifications and manufacturer guidelines to determine the suitable amp rating for your specific battery.
The charging time required can vary based on the battery’s capacity, charger’s amp rating, and the battery’s current charge level. It is recommended to consult the charger’s manual or the manufacturer’s guidelines for an estimate of the charging time. However, it is important to note that charging the battery too quickly can lead to overheating and damage, while charging it too slowly may not fully recharge the battery. Striking a balance is key.
In conclusion, understanding the battery charging process, including the different types of chargers and their functionalities, is crucial for effective car battery charging. Evaluating the charging capacity and time required helps ensure safe and efficient charging. By properly maintaining and promptly addressing any battery issues, you can extend its lifespan and avoid unexpected breakdowns..
Step 3: Setting up the Charger
Adjusting the charging voltage and amperage
Once the charger is securely connected to the battery terminals, it is important to adjust the charging voltage and amperage settings to ensure safe and efficient charging. The voltage and amperage settings may vary depending on the battery type and charger model.
– Voltage Adjustment: Most battery chargers have a voltage selector switch that allows you to choose the appropriate voltage for your battery. The voltage options typically range from 6V to 24V, with 12V being the standard for car batteries. Refer to the battery’s specifications or the manufacturer’s guidelines to determine the correct voltage setting.
– Amperage Adjustment: The amperage setting determines the rate at which the charger supplies current to the battery. It is essential to select the appropriate amperage to avoid overcharging or damaging the battery. Higher amperage settings can charge the battery more quickly, but it is crucial to refer to the battery’s specifications or the manufacturer’s recommendations for the correct amperage.
Ensuring proper ventilation during the charging process
During the charging process, it is important to ensure proper ventilation to minimize the risk of fire or explosion. Charging a battery produces hydrogen gas, which can be flammable in high concentrations. To ensure proper ventilation:
– Charge the battery in a well-ventilated area, preferably outdoors or in a garage with the doors open. Avoid charging the battery in enclosed spaces or near flammable materials.
– Avoid smoking or using open flames near the charging area.
– Keep the charger and battery away from heat sources or direct sunlight.
By following these precautions and ensuring proper ventilation, you can minimize the risk of accidents and ensure a safe charging process for your car battery.
In this step, we discussed the importance of adjusting the charging voltage and amperage settings based on the battery type and model. We also highlighted the significance of proper ventilation to prevent any potential hazards during the charging process.
Next, we will move on to step 4, which involves initiating the charging process and monitoring the battery’s charge level. Stay tuned for more detailed instructions on how to successfully charge a car battery with a charger.
Step 4: Charging the Battery
Monitoring the charging progress
Once the charger is connected properly, it is important to monitor the charging progress to ensure the battery is charging effectively and safely. Most battery chargers come with an indicator light or display that shows the charging status. This indicator light may change color or blink to indicate different stages of the charging process. It is crucial to refer to the charger’s manual or instructions to understand the specific indicators and their meanings.
During the charging process, it is recommended to avoid leaving the charger unattended for an extended period. Regularly check the charger and battery to ensure there are no signs of overheating or other issues. If you notice any unusual smells, smoke, or sparks, immediately disconnect the charger and assess the situation. Safety should always be the top priority.
Preventing overcharging and its consequences
Overcharging a battery can lead to significant damage and reduce its overall lifespan. To prevent overcharging, it is crucial to refer to the charger’s settings and follow the manufacturer’s guidelines. Some chargers may have built-in safety features that automatically adjust the charging rate or shut off when the battery is fully charged.
If your charger does not have these automatic features, it is important to monitor the charging progress and disconnect the charger once the battery is fully charged. Overcharging can cause the water inside the battery to evaporate, leading to increased acidity of the battery’s liquid. This can result in permanent damage to the battery and decrease its performance.
To assess if the battery is fully charged, you can use a battery tester or a multimeter. These tools can provide information about the battery’s voltage and overall charge level. Additionally, starting the car that contains the previously dead battery will also indicate whether the battery has enough power to start the engine.
In conclusion, effectively charging a dead car battery using jumper cables requires a thorough understanding of the process and precautions. By properly connecting the charger, monitoring the charging progress, and preventing overcharging, you can safely recharge a dead battery and get back on the road. Remember to always consult the charger’s manual and follow the manufacturer’s guidelines to ensure safe and efficient charging. Taking proper care of the car battery through regular maintenance and charging practices can help extend its lifespan and avoid unexpected breakdowns.
Step 5: Disconnecting the Charger
Safely shutting off and unplugging the charger
Once the battery is fully charged, it is important to safely shut off and unplug the charger. This will ensure that there are no electrical connections between the charger and the battery, reducing the risk of electric shock or other accidents. Here are the steps to follow:
1. **Shut off the charger:** Refer to the charger’s manual or instructions to locate the power switch or button. Turn off the charger to cut off the electricity flow.
2. **Unplug the charger:** Once the charger is turned off, unplug it from the power source. This will completely disconnect it from the electrical outlet.
Removing the cables, starting with the negative clamp
After the charger is shut off and unplugged, it is time to disconnect the cables that were connected to the battery. By starting with the negative (black) clamp, you can minimize the risk of accidents and ensure a safe disconnection process. Here are the steps to follow:
1. **Start with the negative (black) clamp:** Locate the negative terminal on the battery, which is usually marked with a “-” symbol. Loosen the negative clamp by using a wrench or pliers. Once it is loose, carefully remove the negative clamp from the battery terminal.
2. **Remove the positive (red) clamp:** With the negative clamp safely disconnected, move on to the positive terminal, marked with a “+” symbol. Loosen the positive clamp and remove it from the battery terminal.
3. **Give the clamps a little wiggle:** Before completely removing the clamps, give them a slight wiggle to ensure they have a good connection to the battery terminals. This will help avoid any loose connections that may affect the battery’s performance.
Remember to always exercise caution when handling the clamps and avoid touching any metal surfaces or other cables while disconnecting them. Properly storing the cables and charger after use is also essential for safety and convenience.
By following these steps, you can safely disconnect the charger from the battery and complete the charging process. This ensures that the battery is ready to be used and reduces the risk of any electrical incidents. Always consult the charger’s manual and follow the manufacturer’s guidelines to ensure safe and proper disconnection.
Alternatives to Recharging
Using a jump starter as a viable option
Jumpstarting a dead car battery can provide temporary energy and allow the vehicle to start. This method involves connecting another vehicle’s battery to the dead battery using jumper cables. While jumpstarting can be effective, it is important to note that the charge may not last for an extended period of time, especially once the second vehicle’s engine is turned off. This option is best suited for situations where a quick fix is needed to get the car running temporarily. However, it is not a long-term solution.
Seeking professional assistance at a service center
If the car’s battery is completely dead and cannot be recharged or jumpstarted, it is recommended to bring the vehicle to a professional service center. An experienced technician can diagnose the issue that caused the battery to die and determine if a replacement battery is needed. They have the expertise and equipment to properly assess the situation and provide the appropriate solution. Seeking professional assistance ensures that the problem is addressed correctly and minimizes the risk of further damage or complications.
Regardless of the chosen alternative, it is crucial to consult a professional if you are unsure or uncomfortable with performing any of these steps. Car batteries can be complex and mishandling them can lead to additional problems. With the help of a professional, you can ensure that the best solution is implemented based on your specific vehicle and battery condition.
It’s important to note that these alternative options should be seen as temporary measures and may not provide a long-term solution. Reconditioning the battery or replacing it entirely might be necessary depending on the severity of the battery’s condition. Consulting a professional can help determine the best course of action to get your car battery back to optimal performance.
Remember, each alternative option has its pros and cons, and it is important to weigh these factors before making a decision. Taking proper care of your car battery through regular maintenance and charging practices can help prevent battery failure and extend its lifespan. If you suspect that your car battery is completely dead and cannot be recharged, it is always best to seek professional help to address the issue effectively and avoid any further complications.
Conclusion
Importance of correctly recharging a dead car battery
Recharging a dead car battery using jumper cables is a practical and temporary solution that can help get your vehicle back on the road. It is crucial to follow the proper steps and precautions to ensure a safe and effective jump-start. By connecting the batteries correctly and allowing time for the alternator to recharge the battery, you can revive a dead car battery in no time. However, it is important to note that jump-starting is only a temporary fix and may not provide a long-term solution. It is recommended to seek professional assistance if the battery cannot be recharged or jumpstarted.
Final tips and advice for a successful charging process
Here are some final tips and advice to ensure a successful jump-start and charging process:
– Always disconnect the grounding cable first, followed by the negative terminal and positive terminal cables.
– Allow the car with the dead battery to run for at least five minutes after jump-starting to ensure the battery is recharged.
– It is important to properly maintain your car battery and regularly check its condition to avoid unexpected failures.
– If you are unsure or uncomfortable with performing the jump-start process, it is best to seek professional assistance.
– Reconditioning or replacing the battery may be necessary depending on its condition and performance.
– Consulting a professional can help determine the best course of action for your specific vehicle and battery.
Remember, proper care and maintenance of your car battery are essential to ensure its longevity and optimal performance. By following the correct charging process and seeking professional help when needed, you can avoid further complications and keep your vehicle running smoothly.