How to Pour Oil in Car
To pour oil in a car, locate the oil filler cap and unscrew it. Slowly pour the oil in.
Ensuring the correct technique is crucial when adding oil to your car’s engine. Properly maintaining the oil levels in your vehicle is essential for its optimal performance and longevity. In this guide, we will discuss the step-by-step process of how to safely pour oil into your car, helping you keep your engine running smoothly.
By following these simple instructions, you can help extend the life of your vehicle and avoid costly repairs in the future. Let’s dive into the details of properly adding oil to your car’s engine to ensure it operates at its best.
Credit: www.yourmechanic.com
Preparing To Pour Oil
Before you pour oil into your car, it’s important to make a few preparations to ensure a smooth and clean process. This will not only help you avoid any spills or accidents but also make the entire procedure more efficient. In this section, we will discuss the necessary supplies you need to gather and how to prepare your car properly.
Gather Necessary Supplies
Before you begin, gather the following supplies to ensure you have everything you need at hand:
- Engine oil suitable for your car’s make and model
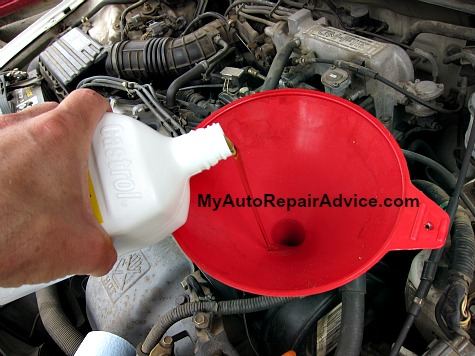
- A funnel with a wide mouth to prevent any spills
- A clean cloth or rag to wipe any spills or excess oil
- A pair of gloves to protect your hands
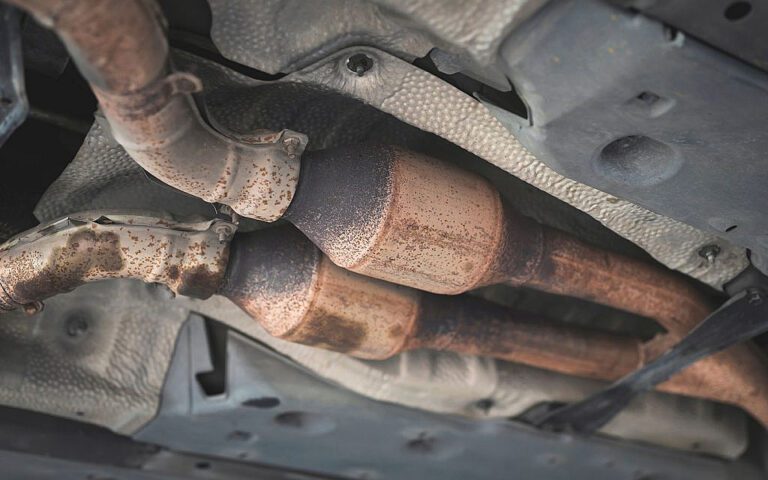
- A container to catch and dispose of the old oil safely
- A wrench or socket set to remove the oil drain plug
Prepare The Car
Preparing your car before pouring oil will ensure a clean and hassle-free process. Follow these steps:
- Park your car on a level and stable surface: This will prevent any accidents and allow for easy access to the engine.
- Turn off the engine and let it cool down: This is important as the oil can be hot and cause burns if handled immediately.
- Locate the oil dipstick: Open the hood and locate the oil dipstick. This will help you identify the oil fill cap, which is usually located nearby.
- Clean the area around the oil fill cap: Use a clean cloth or rag to wipe away any dirt or debris around the cap. This will prevent any contaminants from entering the engine.
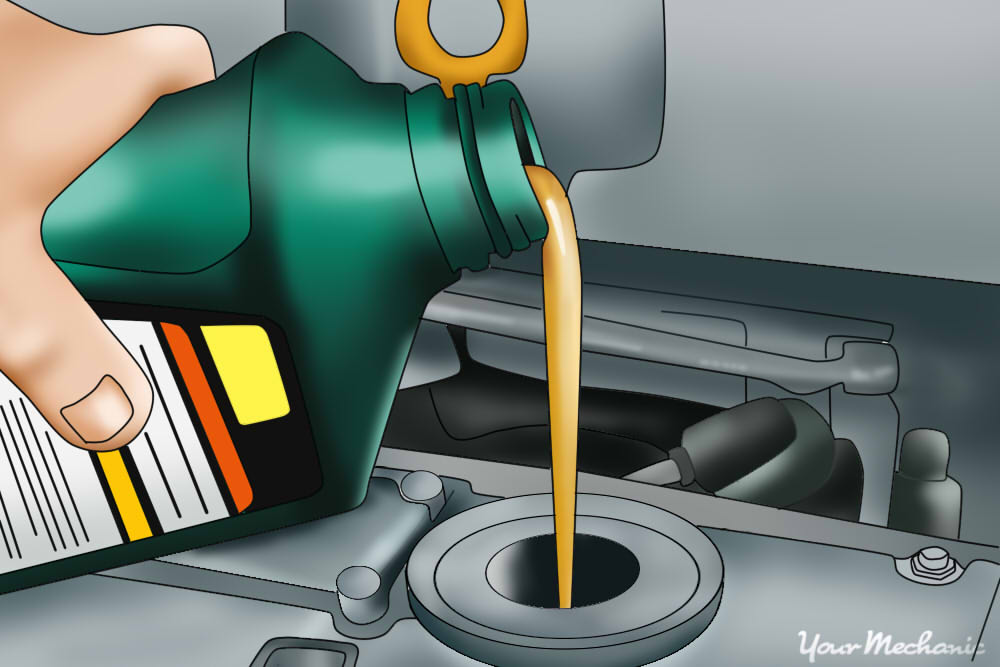
- Remove the oil fill cap: Unscrew the oil fill cap and set it aside. This will allow proper ventilation and prevent any vacuum when pouring the new oil.
By gathering the necessary supplies and properly preparing your car, you will be ready to pour oil into your car’s engine without any hassle or complications. Always remember to follow the manufacturer’s instructions and dispose of the old oil responsibly. Now that you’re prepared, let’s move on to the next step: pouring the oil!

Credit: www.jdpower.com
Locating And Opening The Oil Cap
To pour oil into a car, first, locate the oil cap by referring to the owner’s manual. It usually has a symbol of an oil can. Once found, twist and unscrew the cap to open it, allowing you to pour the oil into the engine.
The first step in pouring oil into your car is to locate the oil cap. It is typically found on the top of the engine and is often labeled with a symbol of an oil can.Locate The Oil Cap
Look for the oil cap near the front of the engine, close to the radiator. Check your car’s manual if you are unsure about the location.Opening The Oil Cap
To open the oil cap, simply twist it counterclockwise. Be careful not to drop any dirt or debris into the opening. Make sure the engine is cool before opening the oil cap. Wipe around the cap to remove any dust or dirt that may have accumulated. Consider using a clean rag or paper towel to maintain cleanliness when opening the oil cap. Now that you have located and opened the oil cap, you are ready to proceed with pouring oil into your car.Pouring The Oil
Learn how to pour oil in your car with these simple steps. Follow the guidelines to ensure a smooth and mess-free process.
Positioning The Oil Container
Place the oil container on a stable surface near the car engine.
Slowly Pouring The Oil
Carefully open the oil cap from the engine and steady the oil container.
Checking The Oil Level
Regularly checking the oil level in your car is essential for keeping your engine running smoothly and preventing any potential damage. By following a few simple steps, you can ensure that your oil is at the optimal level for efficient engine performance.
Using The Dipstick
To check the oil level, you will need to locate the dipstick. This metal rod is usually located near the engine and has a brightly colored handle to make it easy to identify. Start by turning off your engine and allowing it to cool for a few minutes.
Once the engine has cooled, open the hood and locate the dipstick. Pull it out of its tube and wipe off any existing oil with a clean cloth or paper towel. Insert the dipstick back into the tube completely, and then take it out again to get an accurate reading.
Adding More Oil If Needed
After removing the dipstick, you will notice two markers or notches on it indicating the minimum and maximum oil levels. The oil on the dipstick should ideally be between these two markers. If it’s below the minimum mark, then it’s time to add more oil.
To add oil, remove the oil cap located on top of the engine. Carefully pour the oil into the oil filler hole, using a funnel if necessary. Be cautious not to overfill the engine, as this can also lead to problems. It’s always better to add a little at a time and recheck the level using the dipstick to ensure you don’t exceed the maximum mark.
Once you have added enough oil, securely fasten the oil cap and give the engine a few minutes to allow the oil to settle. Afterward, recheck the oil level using the dipstick to ensure it’s within the recommended range.
By checking the oil level regularly and adding more oil if needed, you can keep your engine well lubricated and extend its lifespan. Don’t overlook this simple maintenance task, as it can save you from costly repairs down the road.
Closing Up
Now that you’ve successfully poured in the new oil, it’s time to complete the process by taking care of the finishing touches. This includes replacing the oil cap and cleaning up any spills. Properly closing up the process will ensure that your car engine stays well-lubricated and performs optimally.
Replacing The Oil Cap
After pouring in the new oil, make sure to securely replace the oil cap. This prevents any debris or contaminants from getting into the engine oil, which could potentially damage your car’s engine. Ensure that the cap is tightened to the manufacturer’s specifications to maintain a proper seal.
Cleaning Up Spills
If you’ve accidentally spilled oil during the pouring process, it’s important to clean it up promptly. Oil spills can be harmful to the environment and can also pose a slipping hazard. Use an absorbent material, such as kitty litter or a spill kit, to mop up the spill. Dispose of the soiled material responsibly, following your local regulations.
Credit: www.myautorepairadvice.com
Frequently Asked Questions On How To Pour Oil In Car
How Do You Put Oil In A Car Step By Step?
To put oil in a car, locate oil filler cap, remove it, insert funnel, pour oil slowly, check oil level.
How Do You Pour Oil In A Car Without Spilling It?
To pour oil in a car without spilling, use a funnel, pour slowly, and maintain a steady hand. Position the container above the funnel and pour steadily. Aim for the opening to prevent spills. Review the oil level to avoid overfilling.
How Do You Pour Oil In A Car Without A Funnel?
Pouring oil in a car without a funnel can be tricky, but it’s possible. One method is to use a clean plastic bottle with a small hole in the cap. Slowly tilt the bottle to pour the oil into the fill hole, being careful not to spill.
Alternatively, use a flexible funnel or a clean hose as a makeshift funnel.
How Do You Properly Pour Oil?
To properly pour oil, place a funnel in the oil receptacle, and pour slowly to prevent spillage. Check the oil level as you pour and stop when it reaches the desired amount. Clean up any spills immediately. Dispose of used oil responsibly.
Why Is It Important To Pour Oil In Car Regularly?
Regular oil changes help maintain engine performance and longevity by lubricating moving parts.
How Often Should I Pour Oil In My Car?
Follow manufacturer recommendations, generally every 5,000 to 7,500 miles or as indicated by the oil life monitor.
Can I Use Any Type Of Oil For My Car?
Refer to the owner’s manual for the recommended oil viscosity and specification suitable for your car’s engine.
Conclusion
Mastering the art of pouring oil in your car is essential for maintaining its longevity and performance. By following the step-by-step guide outlined in this blog post, you can ensure a seamless and error-free oil change process. Remember to always use the recommended type and quantity of oil, and regularly check your oil levels to keep your engine running smoothly.
Taking good care of your car’s lubrication needs will go a long way in preserving its health and ensuring a smoother ride for years to come.