How To Patch A Garage Door
If you’re a homeowner, your garage door is likely an essential part of your daily routine. It provides security for your vehicles and storage space while also adding value to your home. But what happens when it’s damaged or needs repairs? Don’t worry; you don’t have to call a professional every time there’s an issue. With the right tools and some basic knowledge, you can easily patch up your garage door yourself.
In this article, we’ll guide you through the process of patching up a damaged garage door step-by-step. From identifying the problem to gathering the necessary tools and disconnecting the opener, we’ll cover everything in detail, so you have all the information you need to get started. We understand that as a homeowner, you value freedom and independence in taking care of your property’s maintenance needs; that’s why we’ve created this guide to help empower you with the skills needed for DIY garage door repairs. So let’s dive into it!
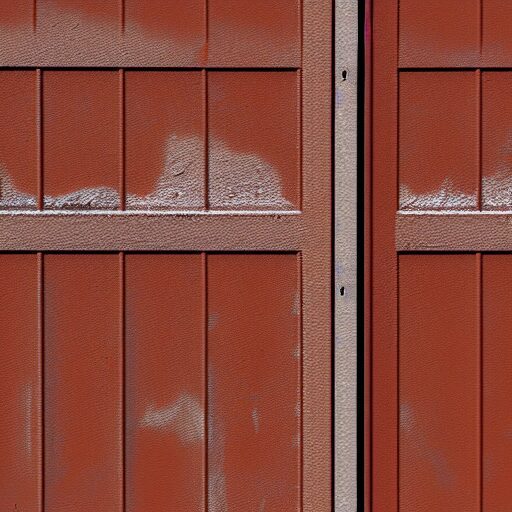
Identify the Type of Garage Door Problem
@ Midjourney AI Image Prompt: /imagine prompt:Create an image showing a close-up of a garage door with clear visual indicators of common types of garage door problems, such as broken springs, damaged panels, or misaligned tracks. –v 5 –ar 3:2 (Note: Use –v 4 if you do not have a paid Midjourney account)
You’ll want to figure out what’s causing the issue before you can fix it, so let’s identify the type of problem you’re dealing with. Common causes of garage door problems include broken springs, damaged panels, and malfunctioning openers. Troubleshooting these issues will help you determine which part needs to be fixed or replaced.
If your garage door won’t open or close properly, a broken spring may be the culprit. Check for signs of wear and tear on the springs, such as rust or cracks. If they appear damaged, it’s best to replace them immediately to avoid further damage to your garage door.
Another common problem is damaged panels. Inspect your garage door for any dents or cracks that may have occurred from accidental bumps or weather-related incidents. If the damage is minor, you may be able to repair it yourself using a patch kit. However, if the damage is severe, it’s best to call in a professional for assistance in replacing the panel entirely.
Gather the Necessary Tools
@ Midjourney AI Image Prompt: /imagine prompt:Create an image of a person holding a toolbox with various tools spilling out, including a hammer, screwdriver, pliers, and a patch kit, in front of a garage door. –v 5 –ar 3:2 (Note: Use –v 4 if you do not have a paid Midjourney account)
Before starting, make sure you have all the tools needed to complete the job, such as a power drill and safety glasses. When it comes to patching a garage door, having the right tools can make all the difference in achieving a successful repair. Additionally, it’s important to choose replacement parts that are compatible with your specific type of garage door opener.
There are three main types of garage door openers: belt-drive, chain-drive and screw-drive. Each type operates differently and requires different replacement parts. For example, if you have a belt-drive opener, you’ll need to replace the rubber belt if it becomes worn or damaged. On the other hand, if you have a chain-drive opener, you’ll need to replace the metal chain when necessary.
When choosing replacement parts for your garage door opener, be sure to consult your owner’s manual for guidance on which parts are compatible with your specific model. It may also be helpful to do some research online or speak with a professional in order to ensure that you’re purchasing high-quality parts that will last for years to come. By taking these steps and using proper safety precautions when handling power tools, you can successfully patch your garage door and enjoy greater freedom in accessing your home or workspace without worrying about malfunctioning equipment.
Disconnect the Garage Door Opener
@ Midjourney AI Image Prompt: /imagine prompt:Create an image of a person manually disconnecting the garage door opener by pulling the emergency release cord. Show the cord clearly and emphasize the physical effort required to disconnect it. –v 5 –ar 3:2 (Note: Use –v 4 if you do not have a paid Midjourney account)
Now it’s time to disconnect your opener so you can work on the inner workings without any interference. Before starting, make sure that your garage door is in the closed position and unplugged from power. You can also use a ladder to reach the opener easily.
The importance of safety cannot be overstated when dealing with garage doors. These are heavy and dangerous machines that require proper handling. Start by pulling down on the manual release cord which will disengage the trolley from the opener carriage. This will allow you to operate your door manually without using electricity.
When you’re done with patching up your garage door, it’s essential to reconnect safely. To do this, simply pull down on the manual release cord once again until you hear a click sound which means that it has re-engaged with the trolley. Then plug back in your opener and test out its functionality by opening and closing it a few times before resuming normal use of your garage door.
Release the Tension on the Garage Door Springs
@ Midjourney AI Image Prompt: /imagine prompt:Create an image of a person using a winding bar to release tension on garage door springs. Show the bar inserted into the winding cone and the person using a steady, controlled motion to turn the bar. –v 5 –ar 3:2 (Note: Use –v 4 if you do not have a paid Midjourney account)
It’s crucial to prioritize your safety by releasing the tension on those powerful springs before attempting any repairs or adjustments. Garage door safety should never be taken lightly, especially when dealing with parts that could cause serious injury or even death if not handled properly. Therefore, before you begin patching up your garage door, make sure you follow this four-item checklist:
- Always wear protective gear like goggles and gloves.
- Use a winding bar to loosen the set screws holding the torsion spring in place.
- Slowly unwind the spring until there is no more tension left.
- Remember to double-check that there is absolutely no tension remaining before proceeding.
It’s important to note that while you can do some basic maintenance on your garage door yourself, certain tasks require professional expertise for both your own safety and ensuring proper functionality of the door. Attempting repairs or adjustments beyond your skill level can lead to additional damages and costly repairs down the line. So, don’t hesitate to seek out professional help when needed.
By taking these necessary precautions and following proper procedures, you’ll be able to safely release the tension on your garage door springs and move forward with repairing any issues without fear of harm or further damage occurring during the process. Remember: always prioritize safety first!
Remove the Damaged Panel or Cable
@ Midjourney AI Image Prompt: /imagine prompt:Create an image showing hands removing a damaged garage door panel or cable. Show the specific tools and steps involved in the process. No text or words in the image. –v 5 –ar 3:2 (Note: Use –v 4 if you do not have a paid Midjourney account)
To fix the damaged panel or cable on your garage door, you’ll need to take caution and follow proper safety procedures. Garage door panel replacement requires careful attention to detail as you remove the damaged piece and prepare to install a new one. Likewise, cable removal techniques should be done with care to avoid accidentally removing the wrong cable or causing further damage.
When removing a damaged panel, begin by releasing tension on any springs holding it in place. Next, remove any screws or bolts securing the panel to the frame before gently pulling it away from the garage door. Be sure to keep a firm grip on the panel as you work so that it doesn’t fall and potentially cause injury.
For cable removal, start by disconnecting any cables from their tracks and pulleys. Then, loosen any tension still present in the system before carefully detaching each cable from its anchor point. Take note of where each cable was attached so that you can reattach them correctly later on. With patience and attention to detail, you can safely remove damaged panels or cables from your garage door without risking further harm.
Install the Replacement Parts
@ Midjourney AI Image Prompt: /imagine prompt:Create an image of a hand holding a wrench and installing a new hinge onto a garage door panel. The panel should be tilted at an angle to show the process of patching the door. –v 5 –ar 3:2 (Note: Use –v 4 if you do not have a paid Midjourney account)
You’re about to become a garage door repair expert as you install the replacement parts with ease and confidence, making it seem like child’s play. Before you start installing the new panel or cable, make sure that it is compatible with your garage door. Once confirmed, proceed by lifting the new panel into place and securing it using screws.
Proper alignment is crucial in making sure that your garage door operates smoothly and efficiently. Use a level to ensure that the replacement part is perfectly aligned with the rest of the panels. If there are any issues with alignment, troubleshoot by adjusting the screws until everything lines up correctly.
Troubleshooting techniques also come in handy when installing a new cable. Make sure that it’s threaded correctly through all of its pulleys before attaching it to both sides of the bottom bracket. Adjust tension on each side until they are equal, then test out your newly installed garage door!
Reconnect the Garage Door Opener
@ Midjourney AI Image Prompt: /imagine prompt:Create an image showing a person holding the garage door opener and reconnecting it to the motor unit. Show the wires being connected and the person testing the opener. –v 5 –ar 3:2 (Note: Use –v 4 if you do not have a paid Midjourney account)
Now it’s time to get your opener back up and running by reconnecting it to the newly installed parts. Before you begin, make sure that the power source is turned off. You don’t want any accidents or injuries to happen during this process.
First, locate the terminals on your opener and connect them to the corresponding wires on the door. It’s important that you match the colors correctly so that everything works in sync. Once connected, turn the power source back on and test out your garage door opener.
If for some reason your opener isn’t working properly, there are a few troubleshooting tips you can try before calling in a professional. First, check to see if there are any loose connections or wires that need tightening. Also, check to see if there are any obstructions or debris blocking the sensors. Safety precautions should always be taken when attempting any repairs on your garage door as it can be dangerous if not done correctly.
Test the Garage Door
@ Midjourney AI Image Prompt: /imagine prompt:Create an image that shows a person pulling down on the garage door with a hand while another uses a flashlight to look at the bottom edge, checking for any gaps or light shining through. –v 5 –ar 3:2 (Note: Use –v 4 if you do not have a paid Midjourney account)
It’s crucial to test the functionality of your newly repaired opener and ensure that it’s safe to use. Start by testing the balance of the door. Disconnect the opener from the door by pulling down on the release handle, then manually lift and lower the door halfway. If it stays in place, it’s balanced. If not, adjust the springs accordingly.
Next, check the sensors located near the bottom of each side of the garage door opening. Wave a broomstick or other object in front of one sensor while closing the door with your remote or wall button. The door should stop and reverse when it detects an obstruction. Repeat this process with both sensors to make sure they’re working properly.
Once you’ve tested both balance and sensors, you can be confident that your garage door is safe to use. Regularly performing these tests will help prevent accidents and prolong the life of your garage door system.
Lubricate Moving Parts
@ Midjourney AI Image Prompt: /imagine prompt:Create an image of a hand applying lubricant to the hinges and rollers of a garage door, with drops of oil visible on the surfaces and a rag nearby. –v 5 –ar 3:2 (Note: Use –v 4 if you do not have a paid Midjourney account)
Oh, so you just love the sound of screeching metal every time you open or close your precious little entrance to your storage space? Well, why not show it some love and lubricate those moving parts like a responsible adult? Lubricating your garage door is an essential part of maintenance that can help extend its lifespan. It also ensures smooth operation and reduces wear and tear on the moving parts.
So what are the benefits of lubricating garage door parts? For starters, it reduces friction between metal components, which can reduce noise levels significantly. A well-lubricated garage door also requires less force to operate, making it easier for you to open and close it. Additionally, regular lubrication prevents rust from forming on these metal parts by repelling moisture.
When it comes to types of lubricants for garage doors, there are plenty of options available in the market. Some popular choices include silicone spray lubricant, white lithium grease, and Teflon-based sprays. Each type has its unique properties that make them suitable for specific applications. Regardless of which one you choose, make sure to read the manufacturer’s instructions before applying them to ensure proper use.
Remember that a little bit of maintenance goes a long way when it comes to keeping your garage door functioning smoothly. So don’t wait until you hear screeching sounds every time you need access to your storage space; take action today by regularly lubing up those moving parts!
Regular Maintenance Tips
@ Midjourney AI Image Prompt: /imagine prompt:Create an image of a person using a silicone sealant to patch a crack on a garage door. Show tools like a caulking gun, putty knife and sandpaper nearby. The person should wear gloves and safety glasses. –v 5 –ar 3:2 (Note: Use –v 4 if you do not have a paid Midjourney account)
Don’t neglect regular maintenance if you want to ensure your entrance stays smooth and functioning for years to come. Preventative measures can save you both time and money in the long run. One of the most important things you can do is keep all moving parts well lubricated, as we discussed in the previous subtopic. However, there are other tasks that should be performed on a regular basis.
Firstly, inspect your garage door frequently for signs of wear and tear. This includes checking for cracks or damage to the tracks, rollers, springs, cables, and hinges. If any issues are found during an inspection, it’s best to address them immediately before they become bigger problems. Secondly, clean your garage door regularly with a mild detergent and water solution to remove any dirt or debris that may have accumulated over time.
Common issues that arise from neglected maintenance include noisy operation (which could indicate worn out rollers or loose hardware), balance problems (which could cause premature wear and tear on components), and malfunctions caused by electrical shorts or damaged wiring. By performing regular maintenance tasks like lubrication and inspection, you can catch these issues early on before they become costly repairs.
Remember: taking care of your garage door doesn’t have to be complicated or expensive. By following these simple preventative measures and addressing common issues as soon as they arise, you can ensure that your entrance remains smooth and functioning properly for many years to come without compromising your freedom of movement in any way!
Frequently Asked Questions
Can I patch a garage door with just duct tape or another temporary solution?
If you’re in a bind and need to temporarily patch a garage door, there are alternative options to using duct tape. While duct tape is known for its versatility and strength, it may not be the best solution for repairing a garage door. Instead, consider using materials like plywood or sheet metal to cover up any holes or cracks. These materials provide more durability and can withstand harsh weather conditions. Additionally, if the damage is extensive or poses a safety hazard, it’s important to seek professional help rather than relying on temporary solutions. Remember, while temporary fixes may offer some relief in the short term, it’s always best to address the root cause of the problem for long-term freedom from worry.
How do I know if my garage door opener needs to be replaced instead of just disconnected?
You may think that your garage door opener is indestructible, but even the toughest machines can malfunction. Signs of malfunction include grinding or scraping noises, a slow opening and closing speed, and a complete failure to move at all. If you’re experiencing any of these issues, it’s important to troubleshoot the problem before assuming that your opener needs to be replaced. Start by checking the power source and the safety sensors. If those aren’t the issue, inspect the gears and chains for wear and tear. By taking these steps, you’ll be able to identify whether your opener needs to be replaced or if it just needs some maintenance. Remember: your garage door opener is an essential component of your home’s security system – so don’t take its functionality for granted!
Are there any safety precautions I should take when releasing tension on the garage door springs?
When it comes to spring maintenance for your garage door, safety measures are crucial. Before releasing tension on the springs, ensure that you have unplugged the opener and disconnected it from the door. Use a winding bar to turn the spring slowly and steadily, ensuring that you keep your face and body away from the spring while doing so. Never attempt to repair or replace a spring yourself if you are unsure of what you’re doing – this is best left to professionals who have experience in handling these dangerous components. Taking these precautions will ensure that you can maintain your garage door safely and enjoy the freedom of easily accessing your car whenever you need it.
Do I need to hire a professional to install replacement parts, or can I do it myself?
When it comes to replacing parts on your garage door, you may be wondering if you should attempt the repairs yourself or hire a professional. While DIY options can be cheaper, they also come with a higher risk of mistakes and errors that could result in further damage or injury. Additionally, professionals have access to high-quality materials and tools that may not be readily available to homeowners. Ultimately, the decision will depend on your skill level and comfort with handling potentially dangerous equipment. It’s important to weigh the cost comparison between DIY and professional services before making a final decision. Remember, while saving money is important, safety should always come first.
How often should I perform regular maintenance on my garage door to prevent future issues?
To keep your garage door functioning smoothly and avoid future issues, it’s important to perform regular maintenance. The frequency of maintenance depends on how often you use the door, but a good rule of thumb is to do it every six months. Prevention techniques include checking for any loose or worn-out parts, lubricating the moving components, tightening any screws or bolts, and inspecting the weatherstripping for cracks or damage. By taking these steps regularly, you can extend the lifespan of your garage door and avoid costly repairs down the line. Plus, performing maintenance yourself gives you the freedom to take care of your property without having to rely on professionals.
Conclusion
In conclusion, fixing your garage door doesn’t have to be a daunting task if you follow the steps outlined in this guide. Remember the old adage "A stitch in time saves nine" – taking care of small repairs promptly can prevent larger issues down the road. By identifying the problem, gathering tools, releasing tension on springs, removing damaged parts, and reconnecting the opener, you’ll be back to using your garage door in no time.
After completing the repair, don’t forget to regularly maintain your garage door by lubricating moving parts and checking for wear and tear. This will help extend its lifespan and save you money in costly repairs or replacements. With these tips and a little bit of elbow grease, you’ll be able to patch up your garage door like a pro!