How To Install Bow Mount Trolling Motor On Aluminum Boat
There are a few things to consider when installing a bow mount trolling motor on an aluminum boat. The first is the size and weight of the motor. You’ll need to make sure the motor is the correct size and weight for your boat.
The second is the type of trolling motor. There are two types of trolling motors, transom mounted and bow mounted. You’ll need to decide which type is best for your boat.
The third is the power source. You’ll need to make sure the power source is compatible with the trolling motor. The fourth is the installation process.
You’ll need to follow the instructions carefully to ensure a proper installation.
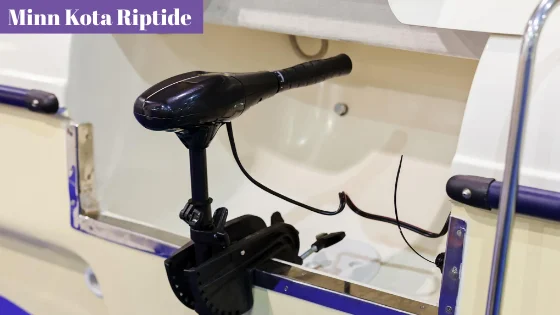
- Position the trolling motor at the bow of the boat
- Use the supplied mounting hardware to secure the trolling motor to the boat
- Connect the trolling motor to the battery
- Test the trolling motor to make sure it is working properly
Where do you mount a trolling motor on a bow?
Installing a bow mount trolling motor on an aluminum boat can be a bit tricky, but with a little bit of patience and attention to detail, it can be done relatively easily. Here are the basic steps you’ll need to follow:
1. Start by attaching the trolling motor mount to the front of the boat.
It’s important to make sure that the mount is securely attached and that all bolts are tightened properly.
2. Once the mount is in place, you can start attaching the trolling motor itself. Again, it’s important to make sure that all bolts are tightened properly.
3. Once the trolling motor is attached, you’ll need to connect the battery. Make sure that the battery is properly secured and that the connections are tight.
4. Finally, you’ll need to test the trolling motor to make sure that it’s working properly.
Start by turning on the power and then moving the throttle forward to see if the motor turns on.
How far should a bow mount trolling motor be in the water?
If you’re an avid fisherman, you know that having a trolling motor on your boat can be a game-changer. Not only does it give you the ability to move around without having to row, but it also allows you to fish in areas that would otherwise be inaccessible. If you’re looking to add a trolling motor to your aluminum boat, here’s a quick guide on how to do it.
First, it’s important to select the right trolling motor for your boat. There are a few factors to consider, such as the size of your boat, the type of water you’ll be fishing in, and your budget. Once you’ve selected the perfect trolling motor, it’s time to get started with the installation.
To begin, you’ll need to drill four holes in the back of your boat. Two of these holes will be for the mounting brackets, and the other two will be for the wires.
How far below the bottom of the boat should a trolling motor be?
If you’re looking to install a bow mount trolling motor on your aluminum boat, there are a few things you’ll need to take into account. First, you’ll need to make sure that the mount is properly secured to the boat. This can be done by drilling holes and using bolts to secure the mount to the boat.
You’ll also need to make sure that the wiring is properly installed and that the trolling motor is properly secured to the mount.
Can you use a bow mount trolling motor on the transom?
If you’re the owner of an aluminum boat, you may be wondering how you can go about installing a trolling motor. While the process may seem daunting, it’s actually not too difficult – as long as you have the right tools and know-how. Here’s a step-by-step guide on how to install a bow mount trolling motor on your aluminum boat:
1. Begin by measuring the width of your boat’s hull, as this will determine the size of the trolling motor mount that you’ll need to purchase.
2. Once you’ve got the right size mount, it’s time to start attaching it to the boat. Begin by drilling four pilot holes into the aluminum hull – two in the front and two in the back.
3. Next, use bolts to secure the mount to the hull. Make sure that the mount is level and secure before moving on.
4. Now it’s time to install the trolling motor itself.
Bow plate for aluminum boat
If you’re the owner of an aluminum boat, you may be wondering how to go about installing a trolling motor. While the process may seem daunting, it’s actually not too difficult – especially if you have a few helpful tips to get you started. Here’s everything you need to know about installing a bow mount trolling motor on an aluminum boat:
1. Start by attaching the motor to the transom. You’ll need to use bolts and washers that are specifically designed for aluminum boats.
2. Next, connect the power cables to the battery.
Make sure to use marine-grade battery terminals to avoid corrosion.
3. It’s important to mount the trolling motor in a way that won’t put stress on the hull of the boat. Use a mounting bracket that’s designed for aluminum boats to ensure a secure connection.
4. Finally, connect the trolling motor to the steering system.
Homemade bow mount trolling motor bracket
Installing a trolling motor on an aluminum boat can be a bit tricky, but with a little bit of know-how, it can be easily done. Here are the steps you need to take in order to install a trolling motor on an aluminum boat:
1. Choose the right trolling motor for your boat.
There are many different trolling motors available on the market, so it’s important to choose one that is specifically designed for use with an aluminum boat.
2. Mount the trolling motor onto the boat. This can be done by drilling holes into the aluminum and then bolting the trolling motor down, or by using a special mounting bracket.
3. Connect the trolling motor to the battery. This is usually done by running a positive and negative wire from the battery to the trolling motor.
4. Test the trolling motor to make sure it’s working properly.
Where to install bow mount trolling motor
If you’re looking to add a trolling motor to your aluminum boat, there are a few things you need to do to ensure a proper install. First, you’ll need to drill four holes in the boat – two in the front and two in the back – in order to mount the trolling motor. Be sure to countersink the holes so that the heads of the bolts are flush with the surface of the boat.
Next, you’ll need to attach the trolling motor to the boat using bolts and nuts. Be sure to use lock washers on all the bolts to prevent them from coming loose. Once the trolling motor is mounted, you can wire it up to your boat’s battery.
If you’re not comfortable drilling holes in your boat or wiring up the trolling motor, you can always take it to a professional to have it done. However, if you follow these instructions, you should be able to install your trolling motor on your aluminum boat without any problems.
Jon boat trolling motor install
If you’re looking to add a trolling motor to your aluminum boat, there are a few things you need to know before you get started. Here’s a step-by-step guide to help you through the process.
1. Determine where you want to mount the trolling motor.
It’s important to consider factors like weight distribution and wind resistance when making your decision.
2. Once you’ve chosen a location, use a drill to create pilot holes for the mounting bolts.
3. Place the trolling motor in the desired location and use the bolts to secure it in place.
4. Attach the power cables to the battery and plug them into the trolling motor.
5. You’re ready to go! Be sure to test the trolling motor before heading out on the water.
Bow mount trolling motor on v hull
Installing a trolling motor on an aluminum boat can be a bit tricky, but with a little patience and attention to detail, it can be done relatively easily. Here are the steps you need to take:
1. First, you need to determine where on the boat you want to install the trolling motor.
It’s important to consider things like weight distribution and where the batteries will be located.
2. Once you have a location in mind, you need to drill four holes in the aluminum hull – two for the mounting brackets and two for the wiring.
3. Next, you’ll need to install the brackets onto the hull.
Be sure to use marine-grade hardware and seal the holes with silicone sealant to prevent leaks.
4. Now it’s time to wire up the trolling motor. To do this, you’ll need to run two wires from the batteries to the trolling motor.
How to mount a trolling motor on a fiberglass boat
If you’re the proud owner of an aluminum boat, you may be wondering how to go about installing a trolling motor. While the process may seem daunting, it’s actually quite simple. Here’s a step-by-step guide to help you get the job done.
1. Begin by determining where you want to mount the trolling motor. It’s important to consider things like weight distribution and ease of use when making your decision.
2. Once you’ve chosen a spot, use a drill to create holes for the mounting bolts.
Be sure to use a drill bit that’s slightly smaller than the bolts themselves so they’ll fit snugly.
3. Next, insert the bolts through the holes and attach the trolling motor mount.
4. Now it’s time to install the trolling motor itself.
Simply attach it to the mount using the provided bolts.
Install trolling motor on deck boat
If you’re a lucky owner of an aluminum boat, you can install a trolling motor on it to make fishing a breeze. Here’s a step-by-step guide on how to do it:
1. Decide where you want to mount the trolling motor.
It’s important to consider the weight and balance of the boat when choosing a location.
2. Mark the mounting holes on the boat. Drill pilot holes for the mounting bolts.
3. Install the trolling motor bracket according to the manufacturer’s instructions.
4. Attach the trolling motor to the bracket. Make sure the motor is properly secured before use.
5. Wire the trolling motor to the boat’s battery. Follow the manufacturer’s instructions for wiring the motor.
Now you’re ready to enjoy trolling around in your aluminum boat!
How to mount a trolling motor on a center console
Installing a trolling motor on an aluminum boat is a relatively easy process that can be completed in a few hours. The first step is to determine where on the boat the trolling motor will be mounted. It is important to consider the weight and size of the trolling motor when making this decision.
The trolling motor should be mounted as close to the center of the boat as possible to avoid affecting the boat’s handling.
Once the location for the trolling motor has been determined, the next step is to drill holes for the mounting bolts. It is important to use a drill bit that is slightly smaller than the bolts to avoid damaging the threads.
The holes should be drilled through the boat’s hull and into the aluminum framing.
After the holes have been drilled, the trolling motor can be mounted using the provided bolts. It is important to make sure that the trolling motor is secure and will not move around while the boat is in use.
Conclusion
Installing a trolling motor on an aluminum boat is a relatively easy process that can be completed in a few hours. The first step is to determine where on the boat the trolling motor will be mounted. It is important to choose a location that is easily accessible and strong enough to support the weight of the motor.
The next step is to drill holes in the boat for the mounting brackets. Once the brackets are in place, the trolling motor can be attached and the wiring can be run to the battery. The final step is to test the trolling motor to make sure it is working properly.