How To Fix Orange Light On Garage Door Sensor
Have you ever experienced the frustration of trying to open your garage door, only to have it refuse to budge? One common cause of this problem is an orange light on your garage door sensor. This indicates that something is preventing the sensors from communicating properly, which can prevent your garage door from opening or closing safely.
Fortunately, fixing an orange light on your garage door sensor doesn’t have to be a complicated process. By following a few simple steps, you can quickly identify and resolve the issue. In this article, we’ll guide you through each step of the process, from identifying the cause of the orange light to resetting your garage door opener and maintaining your sensors in optimal condition for long-term performance. So if you’re ready to take control of your garage door and enjoy smooth, hassle-free operation once again, let’s get started!
Understanding the Purpose of Garage Door Sensors
@ Midjourney AI Image Prompt: /imagine prompt:Create an image of a hand adjusting the height of a garage door sensor with an orange light. The hand should be positioned at the same height as the sensor, with the background showing a garage door and a car parked inside. –v 5 –ar 3:2 (Note: Use –v 4 if you do not have a paid Midjourney account)
If you’ve ever watched a garage door close, you’ve probably noticed small devices near the bottom of the door that send signals to your opener – these are crucial for ensuring safety and preventing damage to your vehicle or property. Understanding the importance of garage door safety is vital if you want to keep your family safe from accidents. Garage doors can weigh hundreds of pounds and can cause serious injury or even death if they fall on someone.
There are two types of garage door sensors commonly used: photoelectric and mechanical. Photoelectric sensors use an infrared beam that is broken when something interrupts it, such as a child or pet walking through it. Mechanical sensors, also known as pressure sensors, detect physical force against the sensor itself. Both types of sensors work together with the opener to ensure that the door stops closing immediately if there’s an obstruction in its path.
Regular maintenance of your garage door system is essential for keeping your sensors working correctly. Dirt and dust can build up on photoelectric sensors over time, which can cause them to malfunction or stop working altogether. You should clean them periodically with a soft cloth and make sure they’re aligned correctly so that they "see" each other without any interference. If you notice an orange light on one of your sensors, it could indicate that there’s something wrong with the sensor itself or its wiring – in this case, calling a professional technician is recommended to fix it properly without causing further damage to your system.
Identifying the Cause of the Orange Light
@ Midjourney AI Image Prompt: /imagine prompt:Create an image that shows a close-up of a garage door sensor with an orange light illuminated. The background should show the garage door and surrounding area. The focus should be on the sensor and the orange light. –v 5 –ar 3:2 (Note: Use –v 4 if you do not have a paid Midjourney account)
Now, you need to pinpoint the root of this glowing anomaly and unravel the mystery behind what’s causing it. The orange light on your garage door sensor can be an indication that something is wrong with the system. One possible reason for this could be a misaligned sensor.
To troubleshoot this issue, start by checking if there are any obstructions blocking the sensors’ view. Clear away any debris or objects that may have accidentally come in between them. Next, ensure that both sensors are aligned with each other and facing directly at each other.
If these troubleshooting tips do not solve the problem, then it’s possible that there may be other common issues contributing to the orange light on your garage door sensor. It could be a faulty wire connection or damaged wiring. In such cases, it’s best to seek professional help from a qualified technician who can diagnose and fix the issue for you without further risks or damage to your garage door system.
Checking for Obstructions
@ Midjourney AI Image Prompt: /imagine prompt:Create an image of a hand holding a broomstick horizontally in front of a garage door sensor to check for obstructions. The broomstick should be at the same height as the sensor. The hand should be wearing a glove. –v 5 –ar 3:2 (Note: Use –v 4 if you do not have a paid Midjourney account)
Take a look at the sensors and see if anything is blocking their view, like leaves or garbage cans, to ensure they can communicate with each other properly. Sometimes debris can accumulate in front of the sensors, causing the orange light to appear. Clearing any debris from the sensor area can help solve the problem.
Here are five things you should check for when looking for obstructions:
- Check for any leaves or branches that may be blocking the sensor’s path.
- Make sure there are no objects obstructing the garage door’s path that could interfere with sensor communication.
- Check for dirt or dust on the sensors themselves, which could interfere with their ability to communicate.
- Ensure that nothing is hanging down from your garage ceiling that might block either of your sensors’ paths.
- Finally, make certain that your wiring is all connected and free of damage.
In addition to checking for obstructions, it’s also important to check wiring connections between your sensors and opener unit. If wires are damaged or disconnected, this too can cause an orange light on one or both of your garage door sensor lights. By taking these simple steps and being patient in troubleshooting issues as they arise, you’ll be able to get back to enjoying effortless use of your garage door system without delay!
Cleaning the Sensor Lens
@ Midjourney AI Image Prompt: /imagine prompt:Create an image of a person using a microfiber cloth to gently clean the sensor lens on a garage door. Show the orange light turning green as a result of the cleaning. –v 5 –ar 3:2 (Note: Use –v 4 if you do not have a paid Midjourney account)
Keep your sensors in tip-top shape by cleaning their lenses regularly. This is an important part of regular maintenance and will help ensure smooth and effortless operation of your garage system. Over time, dust, dirt, and debris can build up on the sensor lens, which can cause it to malfunction or stop working altogether. By keeping the sensor lens clean, you can avoid common mistakes that might lead to an orange light on your garage door sensor.
When cleaning the sensor lens, make sure to use a soft cloth or brush. Avoid using harsh chemicals or abrasive materials that could scratch or damage the lens. Start by gently wiping away any visible dirt or debris with a dry cloth. Then, use a damp cloth to remove any stubborn grime or residue.
It’s also important to avoid touching the sensor lens with your fingers as this could leave behind oils or other residues that might interfere with its function. With regular care and maintenance, you can prevent problems before they arise and enjoy hassle-free access to your garage whenever you need it.
Adjusting the Sensor Alignment
@ Midjourney AI Image Prompt: /imagine prompt:Create an image of a hand adjusting the alignment of a garage door sensor with a level tool, ensuring it is perfectly level and aligned. The orange light on the sensor should turn green. –v 5 –ar 3:2 (Note: Use –v 4 if you do not have a paid Midjourney account)
You can ensure that your sensors are working properly by adjusting their alignment, which may prevent unexpected obstacles from blocking your garage system and causing inconvenience. Fine tuning sensitivity is an important aspect of sensor alignment, as it ensures that the sensors detect objects in a timely and accurate manner. To adjust the sensor alignment, start by looking for any visible obstructions or debris around the sensor area. Make sure to remove anything that might be blocking the sensors’ field of view.
Next, check if the sensors are level and aligned with each other. If they’re not, use a small level to make sure both sensors are pointing straight ahead. You’ll need to adjust one sensor up or down until both lights turn green again indicating proper connectivity has been established between them. Once you’ve made these adjustments, test your door by opening and closing it several times to ensure everything is working correctly. Troubleshooting connectivity issues may take some time but will ultimately save you trouble down the road.
Incorporating these simple steps into your routine maintenance will help keep your garage door operating smoothly and efficiently for years to come. Remember that regular checks on sensor alignment can help avoid frustrating situations like being locked out of your own home due to misaligned sensors or missed packages because of faulty connections between sensors. Don’t wait until things go wrong – take action now so you can enjoy peace of mind knowing that everything is running smoothly at all times!
Testing the Sensor’s Range
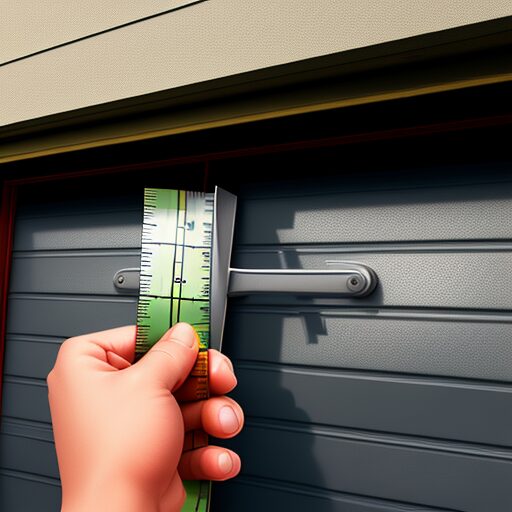
@ Midjourney AI Image Prompt: /imagine prompt:Create an image of a person standing near a garage door with a measuring tape, checking the distance between the sensor and the door. The sensor’s orange light can be visible in the background. –v 5 –ar 3:2 (Note: Use –v 4 if you do not have a paid Midjourney account)
Now that you’ve ensured your garage system is properly aligned, it’s time to test the limits of your sensor’s range and make sure they’re functioning at their maximum potential. Measuring distance is key in this step, so grab a tape measure and mark off a distance of six feet from the sensors. Once you have marked off this distance, slowly move towards the sensors while keeping an eye on the garage door opener. If the orange light turns to green before you reach six feet, then your sensor range is working correctly.
However, if the orange light stays on even as you approach within six feet of the sensors, it could be due to interference. Troubleshooting interference can be done by checking for any objects blocking or reflecting the sensor beam such as cobwebs or debris. Additionally, check for any wireless devices that could be causing signal disruptions like baby monitors or WiFi routers nearby. Lastly, make sure there are no LED lights installed near the sensors as they can emit infrared signals that interfere with sensor signals.
By testing your sensor range and troubleshooting any potential interference issues, you can ensure that your garage door system is functioning properly and safely. Remember to always keep an eye out for any warning signs such as blinking lights or unusual sounds coming from your garage door opener. With these precautions in mind, you’ll have peace of mind knowing that your garage door system is working at its best potential.
Replacing Broken Wires
@ Midjourney AI Image Prompt: /imagine prompt:Create an image of a hand holding wire cutters, cutting a frayed or broken wire on a garage door sensor. The sensor should be visible in the background, with an orange light turned off. –v 5 –ar 3:2 (Note: Use –v 4 if you do not have a paid Midjourney account)
In order to get your garage system back up and running smoothly, it’s time to roll up your sleeves and mend any frayed wires that may be hindering the flow of electricity, just like how a surgeon would repair damaged veins in the body. To begin with, you will need certain tools such as a wire stripper, electrical tape, pliers, and wire connectors. These can be found at any hardware store or online.
Once you have all the necessary tools at hand, it’s time to get started on replacing the broken wires. Start by turning off power to the garage door opener. This is important for your safety as well as preventing further damage to the system. After this step has been completed, remove any old or damaged wires using pliers or wire strippers. Replace them with new ones by attaching wire connectors and covering them with electrical tape.
Finally, test out your repairs by turning back on power to the garage door opener and checking if the orange light on the sensor has disappeared. If not, double-check your connections and ensure they are secure before trying again. With patience and attention to detail throughout this process, you can successfully replace broken wires in your garage door sensor and regain control over your home’s security system once more!
Resetting the Garage Door Opener
@ Midjourney AI Image Prompt: /imagine prompt:Create an image of a hand holding down the "learn" button on a garage door opener while standing next to the sensor. The sensor light is orange but changes to green once the button is released. –v 5 –ar 3:2 (Note: Use –v 4 if you do not have a paid Midjourney account)
If your garage system is acting up and you have an orange light on your safety sensors, the first thing you should try is resetting the garage door opener. This can often solve common issues that arise with garage door openers. To reset, look for a small button or switch on the back of the opener and press it firmly for a few seconds until the lights blink.
It’s important to remember that safety sensors are crucial to the proper functioning of your garage door opener. These sensors detect obstacles in the way of closing doors and prevent accidents from occurring. If one or both of them are not working properly, it can cause problems with opening and closing your garage door.
Before attempting any fixes on your own, make sure to consult with a professional if you are unsure about anything related to your garage door system. Safety should always be a top priority when dealing with machinery like this. By taking these steps, you’ll be able to identify and fix issues quickly while ensuring safe operation of your garage door opener.
Seeking Professional Help
@ Midjourney AI Image Prompt: /imagine prompt:Create an image of a homeowner standing frustrated in front of their garage door sensor with a phone in hand, while a professional technician approaches with a tool kit. –v 5 –ar 3:2 (Note: Use –v 4 if you do not have a paid Midjourney account)
You may want to consider seeking professional help for your garage system if you want to ensure the safety and proper functioning of your opener, as there could be underlying issues that require expert attention. While DIY troubleshooting can be beneficial in some cases, attempting to fix a problem without sufficient knowledge and experience can lead to further damage or even personal injury. Moreover, certain problems may not be obvious or easily fixable by simply resetting the opener.
Knowing when to call a professional is crucial in maintaining the integrity of your garage system. If you have tried all possible DIY solutions and the orange light on your garage door sensor persists, it might be time to seek expert advice. A qualified technician can accurately diagnose the root cause of the problem and provide effective solutions that will not compromise your safety or security.
In summary, while DIY troubleshooting has its benefits, calling a professional is always an option when dealing with complex issues such as those involving garage systems. Remember that ensuring safety should always be your top priority, so do not hesitate to reach out for help from experts who have years of experience in fixing different types of garage door openers. By doing so, you can enjoy peace of mind knowing that your garage system is functioning smoothly and efficiently.
Maintaining Your Garage Door Sensors
@ Midjourney AI Image Prompt: /imagine prompt:Create an image of a person cleaning the garage door sensor with a cloth while standing on a ladder, with the orange light turning green in the background. –v 5 –ar 3:2 (Note: Use –v 4 if you do not have a paid Midjourney account)
To ensure the proper functioning of your garage system, it is imperative to maintain the sensors regularly, as they play a crucial role in detecting any obstacles and preventing accidents. Sensor maintenance involves cleaning them periodically with a soft cloth or brush to remove any dirt or debris that may have accumulated on them. You should also check for any loose connections or wires and tighten them if necessary.
If you are experiencing an orange light on your garage door sensor, there are some troubleshooting tips you can try before seeking professional help. First, make sure that nothing is blocking the sensor’s path. Next, check if the sensors are aligned properly by using a level tool. If they are not aligned correctly, adjust them until they are parallel to each other.
Regular maintenance of your garage door sensors can save you from potential accidents and costly repairs in the future. By following these simple steps for sensor maintenance and troubleshooting tips, you can keep your garage system running smoothly and safely for years to come. Remember to always prioritize safety when dealing with any issues related to your garage door system.
Frequently Asked Questions
What should I do if the orange light on my garage door sensor keeps coming back even after I have cleaned and adjusted it?
You’ve done everything you can to fix the orange light on your garage door sensor, but it just keeps coming back. Frustrating, isn’t it? Don’t worry, there are still possible solutions for this issue. Before seeking professional assistance, try checking the alignment of your sensor once more or replacing the batteries in both sensors. If that doesn’t work, double-check all wiring connections and make sure they’re secure. If none of these options work for you, it may be time to call in a professional for their expertise. It’s important to stay patient throughout this process and remember that freedom from this annoyance is just around the corner.
Is it safe to manually move the garage door when the sensors are not working properly?
If your garage door sensors are not working properly and the orange light is constantly on, you may be wondering if it is safe to manually operate your garage door. Before attempting this task, it’s important to take certain safety precautions to avoid any potential accidents or injuries. First and foremost, make sure that no one is standing near the door or in its path before attempting to move it manually. Additionally, ensure that the door is properly balanced and lubricated to prevent it from becoming stuck or falling off track. While manually operating your garage door can provide temporary relief when sensor issues arise, it’s always best to address the root cause of the problem by fixing the sensors themselves for a more permanent solution.
Can I use any type of cleaning solution to clean the sensor lens?
Cleaning your garage door sensor lens is an important part of maintaining its longevity. Using any type of cleaning solution may seem like a quick fix, but it’s not the best way to go about it. Instead, opt for a gentle solution that won’t damage the sensors or leave behind any residue. Start by wiping down the lens with a microfiber cloth to remove any debris or dust. Then, dampen the cloth with water and gently wipe down the lens, making sure not to apply too much pressure. If necessary, use a mild soap solution to remove stubborn stains or grime. Remember, taking care of your garage door sensors will save you from costly repairs in the long run so take your time and clean them regularly for optimal performance.
How often should I test the range of my garage door sensors?
Regularly testing the range of your garage door sensors is an essential part of maintaining their functionality. It’s important to keep in mind that these sensors are responsible for detecting objects and preventing accidents, so neglecting their maintenance can result in serious consequences. Troubleshooting tips can come in handy during testing and can help you determine whether the sensors are working properly or not. By following a methodical approach, you can easily detect any issues and fix them before they become bigger problems. Remember that prevention is always better than cure when it comes to safety. Taking the time to test your garage door sensors regularly will go a long way towards ensuring that you enjoy complete freedom without having to worry about accidents caused by malfunctioning equipment.
Are there any DIY solutions to fix a broken wire in the garage door sensor system?
If you’re experiencing issues with your garage door sensor system and suspect a broken wire, don’t worry – there are DIY repair solutions available. First, identify the location of the faulty wire by inspecting the sensor’s wiring. Next, disconnect power to the system and carefully remove any damaged wires or connections. Replace them with new wires, ensuring they are properly connected and secured in place. Finally, reapply power to the system and test it out to confirm that everything is functioning properly. With some patience and attention to detail, you can easily replace a broken wire in your garage door sensor system without having to rely on expensive professional repairs.
Conclusion
Congratulations! You have successfully fixed the orange light on your garage door sensor. Your patience and persistence have paid off, and now you can enjoy the convenience and security of a fully functioning garage door system.
But don’t stop there! Maintaining your garage door sensors is crucial to ensuring their longevity and effectiveness. Regularly checking for obstructions, cleaning the lens, and adjusting alignment will prevent future issues from arising. And if all else fails, don’t hesitate to seek professional help.
By following these steps and taking care of your garage door sensors, you can rest assured that your home is safe and secure. So go ahead, pat yourself on the back – you’ve earned it!