How to Change Oil in Mini Cooper
To change oil in a Mini Cooper, first, locate the oil drain plug and oil filter. Remove the plug, drain the oil, replace the filter, and refill with fresh oil.
Changing the oil in a Mini Cooper is a crucial maintenance task that helps to ensure the engine runs smoothly and efficiently. Regular oil changes can prolong the life of the engine and improve overall performance. By following a few simple steps, you can easily change the oil in your Mini Cooper and keep your vehicle running smoothly for years to come.
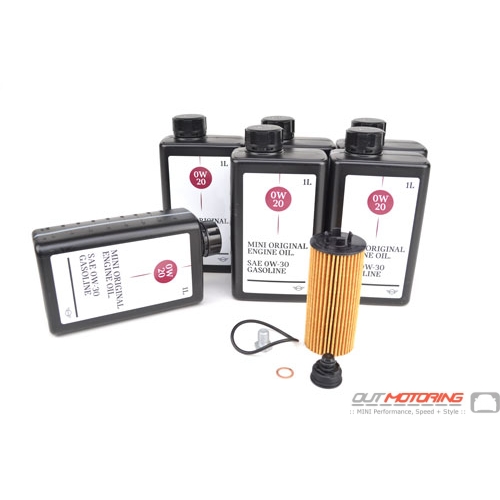
Credit: www.outmotoring.com
Preparing For The Oil Change
Before starting the oil change process for your Mini Cooper, it’s crucial to prepare by gathering the necessary tools and materials and locating the oil filter and drain plug.
Gather The Necessary Tools And Materials
Here’s a list of tools and materials you’ll need for the oil change:
- Oil filter wrench and socket set
- Oil drain pan
- Funnel
- New oil filter
- Quality motor oil
- Rags or paper towels
Ensure you have all the necessary items before starting the oil change to avoid interruptions.
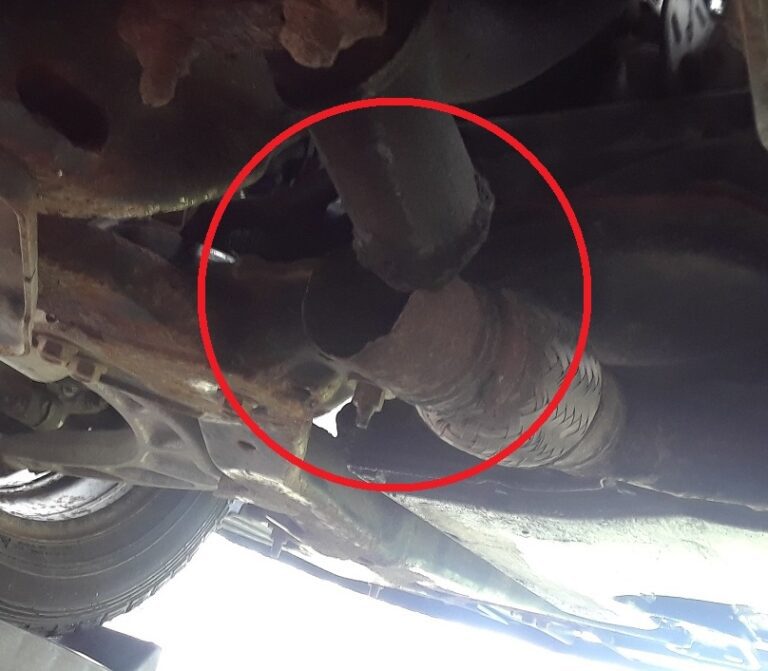
Locate The Oil Filter And Drain Plug
The Mini Cooper’s oil filter and drain plug are typically located beneath the vehicle. Use the owner’s manual or consult online resources to identify their exact positions. Once located, make sure you can easily access and maneuver around these components.

Credit: m.youtube.com
Draining The Old Oil
Changing oil in your Mini Cooper is essential maintenance to keep your car running smoothly. The first step in this process is draining the old oil from the engine.
Position The Oil Pan Underneath The Drain Plug
Use a jack to lift the car and place the oil pan directly below the drain plug.
Remove The Drain Plug And Let The Old Oil Drain Completely
- Locate the drain plug on the bottom of the oil pan.
- Use a wrench to loosen and remove the plug.
- Allow the old oil to completely drain into the pan.
- Make sure to dispose of the old oil responsibly at a recycling center.
This step ensures that all the old oil is removed before proceeding with adding fresh oil to your Mini Cooper.
Replacing The Oil Filter
Changing the oil filter in a Mini Cooper is an important maintenance task. Follow these simple steps to ensure a smooth process and keep your Mini running smoothly.
Remove The Old Oil Filter
To start, locate the old oil filter and carefully unscrew it using an oil filter wrench. Make sure to place a drain pan underneath to catch any dripping oil. Dispose of the old filter properly.
Apply A Thin Coat Of New Oil To The Rubber Gasket Of The New Filter
Before installing the new oil filter, apply a thin coat of fresh oil to the rubber gasket. This helps create a proper seal and prevent leaks. Ensure the gasket is lubricated all around. Incorrect installation can lead to oil leaks.

Credit: m.youtube.com
Adding New Oil
When adding new oil to your Mini Cooper, it’s essential to follow the correct steps for optimal performance. Here are the steps to properly add new oil to your Mini Cooper engine:
Replace The Drain Plug And Tighten It Securely
- Position the new drain plug and hand tighten it.
- Using a torque wrench, tighten the drain plug to the manufacturer’s recommended torque specifications.
Using A Funnel, Pour The Recommended Type And Amount Of New Oil Into The Engine
- Gently insert a funnel into the oil filler hole.
- Refer to your Mini Cooper’s manual to determine the correct type and amount of oil required.
- Pour the new oil into the engine, following the recommended amount for your specific Mini Cooper model.
- Remove the funnel and securely reseal the oil filler cap.
Completing The Oil Change
To complete the oil change in a Mini Cooper, follow these simple steps: Gather the necessary tools and materials, such as the correct grade of oil and oil filter. Then, locate the oil drain plug, drain the old oil, replace the oil filter, and refill the engine with new oil according to the Mini Cooper’s specifications.
After draining the old oil and replacing the oil filter, it’s time to complete the oil change process for your Mini Cooper. These final steps will ensure that your car’s engine is properly lubricated and running smoothly. Check out the following instructions to complete the oil change:
Check The Oil Level Using The Dipstick
Before adding new oil, it’s essential to check the oil level using the dipstick. The dipstick is typically located near the front of the engine. Here’s how you can check the oil level:
- Make sure your car is parked on a level surface and the engine is turned off.
- Open the hood of your Mini Cooper and locate the dipstick.
- Remove the dipstick and wipe it clean with a cloth or paper towel.
- Insert the dipstick back into the engine and fully secure it.
- Remove the dipstick again and observe the oil level. The dipstick usually has markings indicating the appropriate oil level range.
- If the oil level is below the recommended range, you’ll need to add more oil. Refer to your car’s manual to determine the right type and amount of oil for your Mini Cooper.
Dispose Of The Old Oil Properly
Proper disposal of the old oil is essential for environmental safety. Here’s how you can dispose of the old oil properly:
- Prepare a suitable container, such as a drain pan or an empty oil bottle, to collect the old oil.
- Carefully pour the drained oil into the container, ensuring you don’t spill any on the ground.
- Once the container is full, seal it tightly to prevent any leaks.
- Take the container to a local recycling center or an auto parts store that accepts used oil for proper disposal. Avoid throwing the oil in the regular trash or pouring it down the drain, as it can harm the environment.
Completing these final steps of the oil change process will help ensure that your Mini Cooper’s engine is properly maintained. Remember to check the oil level regularly and dispose of the old oil responsibly for a smooth and eco-friendly driving experience.
Frequently Asked Questions For How To Change Oil In Mini Cooper
Can I Change My Own Oil On My Mini Cooper?
Yes, changing your own oil on a MINI Cooper is possible, but ensure you have the necessary tools and follow the owner’s manual instructions carefully.
How Often Do You Change The Oil In A Mini Cooper?
The oil in a MINI Cooper should be changed every 5,000 to 7,000 miles for optimal performance.
How Many Quarts Of Oil Does A Mini Cooper Take?
A MINI Cooper takes about 5 quarts of oil for an oil change. It’s important to use the recommended oil grade and quality. Regular oil changes are essential for maintaining the performance and longevity of the engine.
Why Is An Oil Change In A Mini Cooper So Expensive?
An oil change in a MINI Cooper is expensive due to the specialized synthetic oil required, the precision engineering of MINI engines, and the high-quality filters used. Regular maintenance helps ensure optimal performance and longevity of your MINI Cooper.
How Often Should I Change The Oil In My Mini Cooper?
It is recommended to change the oil in your Mini Cooper every 5,000 to 7,500 miles or every 6 months, whichever comes first.
What Type Of Oil Should I Use In My Mini Cooper?
For optimal performance, use synthetic oil with the recommended viscosity (usually 5W-30) as specified in the owner’s manual or by the manufacturer.
Can I Change The Oil In My Mini Cooper Myself?
Yes, changing the oil in your Mini Cooper can be done at home with the right tools and knowledge. However, it is important to follow the proper steps and dispose of the used oil responsibly.
Conclusion
Taking care of your Mini Cooper by changing its oil is essential to maintaining its performance. By following the simple steps outlined in this guide, you can easily change the oil yourself and ensure that your car runs smoothly. Regular oil changes will extend the longevity of your Mini Cooper and keep it at its best.