How To Change Hydraulic Fluid On Toro Zero Turn
Every year, thousands of homeowners and professionals rely on Toro zero turn mowers to efficiently maintain their lawns. However, proper maintenance is essential to ensure the longevity and optimal performance of these machines. One important aspect of maintenance is changing the hydraulic fluid regularly. By doing so, users can prevent potential damage to the hydraulic system and maintain smooth operation. This article provides a step-by-step guide on how to change hydraulic fluid on a Toro zero turn mower.
Following specific guidelines and using appropriate tools, this process can be completed successfully by individuals with basic mechanical knowledge. The instructions provided are technical, detailed, and precise, aimed at facilitating understanding for an audience seeking practical guidance in maintaining their Toro zero turn mower. By following these steps carefully, owners can effectively replace old hydraulic fluid with fresh fluid and ensure the continued efficiency of their machine’s performance.
Gather the Necessary Tools and Equipment
To begin the process of changing hydraulic fluid on a Toro zero turn mower, it is necessary to gather the required tools and equipment. Firstly, one should have a torque wrench for removing and tightening bolts with precision. Additionally, a drain pan or container capable of holding at least 4 quarts of fluid is essential to collect the old hydraulic fluid during the draining process. A clean rag or shop towels are also needed to wipe any spills and keep the work area tidy.
Furthermore, an adjustable wrench or socket set may be necessary to loosen any clamps securing hoses. It is advisable to have safety glasses and gloves for personal protection during this task as well. A funnel will aid in transferring new fluid into the reservoir without spillage.
Moreover, before proceeding with changing the hydraulic fluid, it is important to check for leaks in the system by inspecting all hoses, fittings, and connections for signs of damage or loose connections. Additionally, removing air bubbles from the system ensures optimal performance; therefore, bleeding out any trapped air should be considered if necessary.
Having gathered all these tools and equipment enables smooth execution of subsequent steps involved in preparing the mower for fluid change.
Prepare the Mower for Fluid Change
First, it is essential to ensure that the mower is properly prepared for the upcoming maintenance procedure. This involves gathering the necessary tools and equipment as discussed in the previous subtopic. Additionally, it is crucial to follow specific steps to prepare the mower for a hydraulic fluid change.
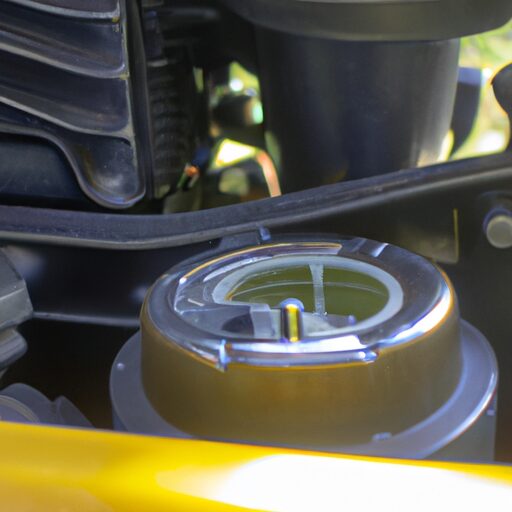
To begin, park the Toro zero turn on a flat surface and engage the parking brake. Next, locate and remove the hydraulic fluid reservoir cap carefully to prevent any spills or leaks. It is important to note that different models may have varying locations of their reservoirs, so consult your owner’s manual if needed.
Once the cap is removed, clean around the opening using a lint-free cloth to avoid any contamination when pouring in new fluid later. Afterward, refer to your manufacturer’s guidelines or owner’s manual for instructions on how to drain the old hydraulic fluid properly.
Remember that using the correct hydraulic fluid for your specific mower model is crucial to its performance and longevity. Consult your owner’s manual or contact Toro customer service for guidance on selecting and purchasing the appropriate fluid.
In conclusion, preparing the mower correctly before changing its hydraulic fluid ensures a smooth maintenance process and prevents potential damage. Now let’s move on to draining out the old hydraulic fluid from your Toro zero turn.
Drain the Old Hydraulic Fluid
Once the hydraulic fluid reservoir cap has been carefully removed and the area around the opening has been cleaned, it is important to follow manufacturer’s guidelines or owner’s manual instructions for draining out the old fluid properly. This ensures that no damage occurs during the process and that all necessary steps are taken. Firstly, locate the drain plug on the hydraulic reservoir. It is typically situated at the bottom of the reservoir. Position an appropriate container underneath to catch all of the old hydraulic fluid as it drains out.
Next, slowly loosen and remove the drain plug using a wrench or socket set. Allow sufficient time for all of the old fluid to completely drain out into the container below. While waiting for this process to complete, it is worth noting some signs that may indicate contaminated hydraulic fluid, such as milky appearance, foaming or excessive bubbling, burnt smell, or presence of debris or particles in the fluid.
Once all of the old hydraulic fluid has drained out completely from Toro Zero Turn mower, dispose of it responsibly according to local regulations and environmental guidelines. Proper disposal methods may include taking it to a recycling center or contacting a waste management facility for guidance.
To continue with maintaining your mower’s hydraulic system, proceed with replacing the hydraulic filter as outlined in subsequent sections without delay.
Replace the Hydraulic Filter
Replacing the hydraulic filter involves locating the filter housing and carefully removing it using a suitable tool. The hydraulic filter plays a crucial role in maintaining the performance of the hydraulic system by preventing contaminants from entering and causing damage to the system components. Regular hydraulic filter maintenance is essential for ensuring optimal system function and avoiding potential issues such as decreased efficiency or even complete failure.
To replace the hydraulic filter, follow these steps:
- First, identify the location of the filter housing. It is typically situated near the pump or control valve assembly.
- Use a suitable tool, such as a wrench or pliers, to loosen and remove any fittings or connections securing the filter housing in place.
- Once loosened, carefully pull out the old filter from its housing.
- Inspect both the old and new filters for any signs of damage or excessive dirt accumulation.
- If there are visible signs of damage on either filter, consider troubleshooting hydraulic fluid leaks before proceeding with replacement.
- Ensure that no debris falls into the open ports while replacing the filters to prevent contamination.
- Install the new filter into its designated position within the housing, making sure it is securely seated.
- Reattach any fittings or connections that were previously removed to secure the housing back in place.
After replacing the hydraulic filter, proceed to refill the system with new fluid to ensure proper operation without interruptions.
Refill the System with New Fluid
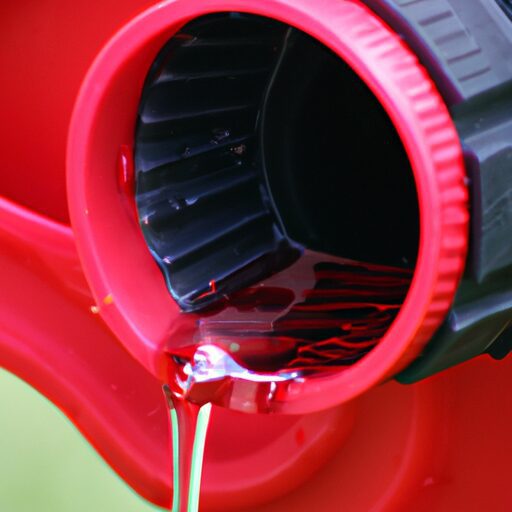
To ensure the optimal functioning of the hydraulic system, it is essential to refill the system with fresh fluid after replacing the hydraulic filter. Before refilling, it is important to check for any leaks in the system to prevent further damage or loss of fluid. This can be done by visually inspecting all connections and hoses, as well as using a leak detection spray if necessary. Once leaks have been ruled out, the next step is to properly dispose of the old hydraulic fluid. This should be done in accordance with local regulations and guidelines, as improper disposal can harm the environment. It is recommended to take the used fluid to a designated recycling center or contact local authorities for proper disposal methods.
After ensuring there are no leaks and disposing of the old fluid correctly, it is time to refill the system with new hydraulic fluid. The specific type and amount of fluid required can typically be found in the owner’s manual or by contacting Toro customer service. Care should be taken when adding new fluid to avoid overfilling or introducing contaminants into the system. Once refilled, this sets up for bleeding air from the hydraulic system before resuming normal operation.
Bleed the Hydraulic System
To ensure optimal functioning and prevent air pockets, bleeding the hydraulic system is a necessary step after refilling with fresh fluid. Common mistakes when bleeding the hydraulic system include not following the proper procedure or not allowing enough time for the process to be completed thoroughly. It is essential to follow the manufacturer’s instructions carefully to avoid any potential damage to the system.
The first step in bleeding the hydraulic system is locating the bleed valves. These valves are typically found near each hydraulic pump and need to be opened fully during the bleeding process. Once located, open each valve one at a time and allow fluid to flow out until there are no more air bubbles present. It may be necessary to repeat this process multiple times, ensuring that all air has been removed from the system.
It is crucial to regularly maintain your Toro zero turn by adhering to a proper maintenance schedule for hydraulic fluid change. This will help prevent any potential issues caused by old or contaminated fluid, as well as ensure optimal performance of your machine.
In conclusion, bleeding the hydraulic system is an important step in maintaining your Toro zero turn mower. By following the correct procedure and keeping up with regular maintenance, you can ensure proper functioning of your machine. The next section will discuss how to test and adjust fluid levels without writing ‘step’.
Test and Adjust the Fluid Levels
To effectively bleed the hydraulic system on a Toro zero turn mower, it is crucial to test and adjust the fluid levels. This step ensures optimal performance and prevents potential damage to the machine.
-
Check for leaks: Before testing the fluid levels, carefully inspect all hydraulic components for any signs of leakage. Common areas to check include hoses, fittings, and valves. If any leaks are found, they must be repaired or replaced before proceeding.
-
Test fluid levels: Start by turning on the mower engine and engaging the hydraulic system. Allow it to run for a few minutes to warm up the fluid. Then, locate the hydraulic reservoir and remove its cap or dipstick to access the fluid level indicator. Use a clean cloth or dipstick to measure the current level accurately.
-
Troubleshoot common issues: If the fluid level is too low, add more hydraulic fluid following manufacturer recommendations until it reaches the appropriate range indicated on the reservoir or dipstick. Conversely, if there is an excessive amount of fluid, carefully drain some out using either a hand pump or gravity feed.
By diligently checking for leaks and ensuring proper fluid levels are maintained through these steps, users can troubleshoot common issues related to hydraulic systems in Toro zero turn mowers with confidence.
Frequently Asked Questions
Can I use any type of hydraulic fluid for my Toro zero turn mower?
Using the wrong hydraulic fluid for your Toro zero turn mower can lead to damage and costly repairs. When changing hydraulic fluid, it is crucial to select the appropriate type that meets the manufacturer’s specifications to ensure optimal performance and longevity of your equipment.
How often should I change the hydraulic fluid on my Toro zero turn mower?
The hydraulic fluid in a Toro zero turn mower should be changed at regular intervals to maintain optimal performance. Signs of low or high fluid levels include unusual noise, jerky movements, and decreased responsiveness. Consult the manufacturer’s guidelines for specific recommendations.
Can I reuse the old hydraulic filter or should I always replace it?
It is recommended to always replace the old hydraulic filter rather than reusing it. Replacing the filter ensures optimal performance and efficiency by removing contaminants that can negatively affect the hydraulic system.
Is it necessary to bleed the hydraulic system after changing the fluid?
The bleeding process is essential after changing the hydraulic fluid on a Toro zero turn mower. It ensures the removal of any air trapped in the system, preventing issues such as loss of power or pump damage. Additionally, using the correct type of hydraulic fluid is crucial for optimal performance and longevity of the mower’s components.
How can I tell if the fluid levels in my Toro zero turn mower are too low or too high?
To check the hydraulic fluid levels in a Toro zero turn mower, locate the reservoir and remove the cap. Use a dipstick or sight glass to determine if the fluid is too low or too high. Proper maintenance tips include regularly checking and adjusting fluid levels as needed.
Conclusion
In conclusion, the process of changing hydraulic fluid on a Toro zero turn mower requires gathering the necessary tools and equipment, preparing the mower for fluid change, draining the old hydraulic fluid, replacing the hydraulic filter, refilling the system with new fluid, bleeding the hydraulic system, and finally testing and adjusting the fluid levels. This meticulous procedure ensures that your Toro zero turn mower will continue to operate smoothly and efficiently. By following these precise steps, you can maintain optimal performance and prolong the lifespan of your equipment.