How to Change a Battery Cable
To change a battery cable, disconnect the battery, remove the old cable, and install the new one. Changing a battery cable is a simple process that can be done at home with basic tools.
Ensuring you have a secure and properly connected battery cable is essential for your vehicle’s electrical system to function efficiently. This guide will walk you through the steps of changing a battery cable, helping you maintain your car’s performance and reliability.
By following these instructions, you can easily replace a worn-out or damaged battery cable and keep your vehicle running smoothly. Let’s dive into the details of how to change a battery cable and the importance of proper maintenance for your car’s overall health.

Credit: www.wikihow.com
Gathering The Necessary Tools
To change a battery cable, gather the necessary tools including a wrench, gloves, and a wire brush. These will help you to safely and effectively replace the cable without any complications, ensuring that your vehicle’s battery functions properly.
Identifying The Tools Needed
Before you begin to change a battery cable, it’s crucial to gather all the necessary tools. Having the right tools on hand will make the process much smoother and more efficient. Here are the essential tools you’ll need to successfully change a battery cable:Gathering The Tools
To change a battery cable, you’ll need to gather the following tools: 1. Socket wrench set: A socket wrench set will be your primary tool for removing and securing the battery cable clamps. 2. Wire brush: A wire brush is used to clean the battery terminal and cable ends, ensuring a better connection and preventing corrosion. 3. Vise grips or pliers: Vise grips or pliers will come in handy for loosening tight battery cable clamps. 4. Protective gloves: It’s important to protect your hands while working on a battery, so be sure to wear a pair of protective gloves. This will prevent any accidental contact with corrosive battery acid. 5. Eye protection: Battery acid can be harmful to your eyes, so wearing eye protection like safety goggles or glasses is essential. 6. Terminal cleaning spray: Terminal cleaning spray helps remove any built-up corrosion on the battery terminals and cable ends. 7. Baking soda and water mixture: A baking soda and water mixture can be used to neutralize any battery acid spills or drips. 8. Wire cutters: Wire cutters are necessary if the cable needs to be replaced entirely. 9. New battery cable: If the existing cable is damaged, having a new battery cable on hand will be necessary for the replacement. Now that you’ve identified and gathered all the necessary tools, you’re ready to proceed with changing the battery cable. With the right tools in hand, you’ll be able to complete the task efficiently and effectively. Don’t forget to follow proper safety precautions while working with batteries to ensure a smooth and accident-free process.
Credit: m.youtube.com
Preparing For The Replacement
When preparing for the replacement of a battery cable, taking the necessary precautions is crucial to ensure a safe and successful operation. This step-by-step guide will walk you through the process, starting with the essential safety measures to follow.
Ensuring Safety Measures
- Wear protective gloves and safety goggles before starting the replacement.
- Ensure the engine is turned off and the key is removed from the ignition.
- Disconnect the negative (-) battery terminal first to avoid electrical hazards.
- Never touch both battery terminals with your tools simultaneously.
Locating The Battery And Cable
- Open the hood of the vehicle and locate the battery near the engine compartment.
- Identify the battery cable that needs replacement, usually connected to the terminals.
- Inspect the cable for any signs of damage or corrosion that may require immediate replacement.
Removing The Old Cable
When removing the old battery cable, the first step is to
Disconnect The Negative Terminal
. This is crucial to prevent any accidents.Next,
Remove The Old Cable
by following these simple steps:- Locate the negative terminal and loosen the nut using a wrench.
- Gently wiggle the terminal to detach it from the battery.
- Inspect the old cable for any signs of damage such as corrosion or wear.
- Once the cable is free, carefully trace it to its other end.
Remember to handle the old cable with care to avoid any injuries or damage to the battery or vehicle.
Installing The New Cable
Now that you have successfully removed the old battery cable, it’s time to install the new one. This is an essential step in ensuring proper electrical connections and maximizing your car’s performance. Follow these steps carefully to attach and secure the new cable:
Attaching The New Cable
- Locate the battery terminals: Identify the positive (+) and negative (-) terminals on your car battery. The positive terminal is usually marked with a plus sign or a red cover, while the negative terminal is marked with a minus sign or a black cover.
- Prepare the new cable: Ensure your new battery cable is the correct length and has the appropriate connectors for your car’s battery terminals.
- Connect the positive cable: Attach the positive cable to the positive battery terminal. Make sure the connection is tight and secure.
- Connect the negative cable: Attach the negative cable to the negative battery terminal. Again, ensure a tight and secure connection.
Securing The Connections
Once you have attached the new battery cable, it is important to secure the connections properly. This helps prevent any vibrations or movements that may loosen the cables over time. Follow these steps to secure the connections:
- Tighten the cable clamps: Use a wrench or pliers to tighten the cable clamps securely onto the battery terminals. This will ensure a snug fit and minimize the chance of any disconnection.
- Inspect the connections: Double-check that both the positive and negative cable connections are secure and properly fastened. Ensure there are no loose or exposed wires.
- Test the electrical system: Before closing the hood, start your car and check if all electrical components are functioning correctly. If you notice any issues, recheck the connections and tighten them if necessary.
- Close the hood: Once you are satisfied with the new cable installation and all electrical systems are working properly, close the hood of your vehicle.
Testing The Replacement
Once you have replaced the old battery cable with a new one, it is essential to test the replacement to ensure that it is functioning properly. There are a few steps to follow to ensure that the replacement is effective and reliable.
Ensuring Proper Fit
First, you need to make sure that the new battery cable fits properly in place. Ensure that it is the correct length and that the connectors fit snugly onto the battery terminal. A loose or ill-fitting cable can cause connectivity issues and prevent the proper flow of electricity to the vehicle’s electrical system.
Checking For Functionality
Once the cable is in place, it’s important to check for functionality. Start the car and verify that the new cable allows the engine to start smoothly and run without any issues. You can also use a multimeter to measure the voltage across the cable to make sure it is conducting electricity efficiently.
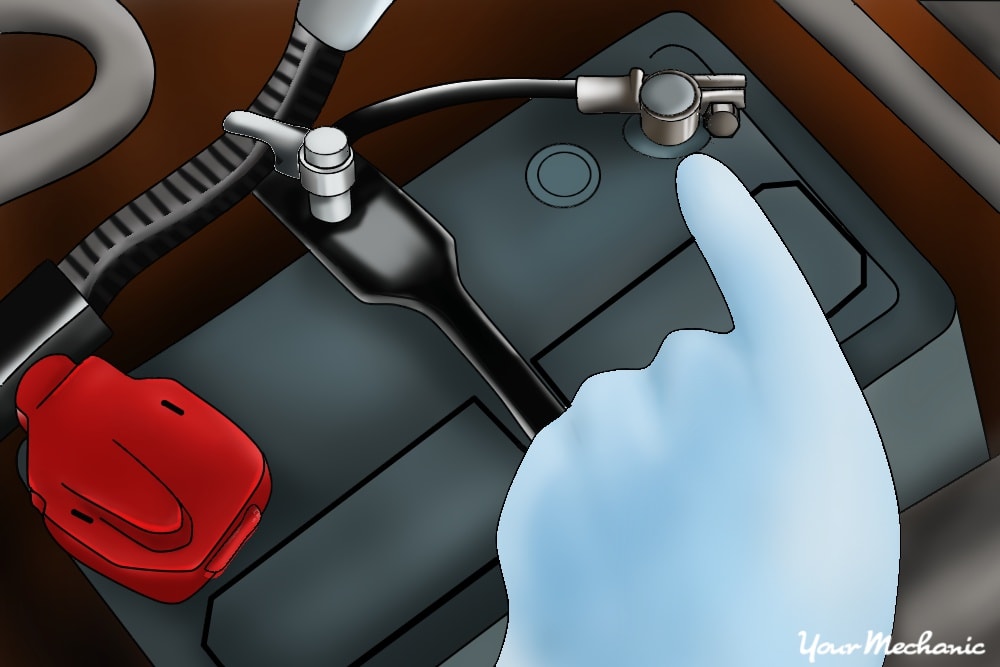
Credit: www.yourmechanic.com
Frequently Asked Questions On How To Change A Battery Cable
Is It Easy To Replace Battery Cables?
Yes, replacing battery cables is generally easy. Just disconnect the old cables, clean the battery terminal, and connect the new cables securely. It’s important to follow safety precautions and consider seeking professional help if you’re unsure. Overall, it’s a simple process to ensure proper battery function.
How Much Does It Cost To Replace A Battery Cable?
The cost to replace a battery cable typically ranges from $50 to $200 depending on the vehicle model and labor fees.
Which Battery Cable Do You Take Off First?
Always disconnect the negative battery cable first to prevent electrical hazards and accidents.
How Do You Remove Battery Cables?
To remove battery cables, follow these steps: 1. First, ensure the engine is off and battery is disconnected. 2. Use a wrench to loosen the terminals by turning them counterclockwise. 3. Gently pull the cable ends away from the battery posts.
4. To reattach, connect the positive cable first and tighten it in a clockwise direction. 5. Repeat the process for the negative cable.
What Signs Indicate A Faulty Battery Cable?
If you notice corrosion, fraying, or a loose connection, it’s likely your battery cable needs attention.
How Often Should Battery Cables Be Checked?
It’s recommended to inspect battery cables during regular maintenance or if experiencing electrical issues.
Can I Change A Battery Cable Myself?
Yes, changing a battery cable is a manageable DIY task with the proper tools and safety precautions.
Conclusion
Changing a battery cable is a simple yet vital task for maintaining your vehicle’s electrical system. By following the step-by-step guide provided in this blog post, you can confidently replace your battery cable without any hassle. Taking care of this aspect of your car’s maintenance will ensure smooth functionality and prevent potential electrical issues down the line.
Remember, proper maintenance is key to preserving your vehicle’s longevity and performance. So, don’t hesitate to change your battery cable when needed.