10 Simple Car Diagnostic Tips for Brake Problems
When diagnosing brake problems, check brake fluid level, listen for squealing or grinding noises, and inspect brake pads. Look for leaks, inspect brake lines, and test the brake pedal for softness or vibrations.
Check brake warning lights, test drive for any unusual stopping behavior, and consult a professional mechanic for further assistance. Introducing some simple car diagnostic tips for brake problems can help you address potential issues in a timely manner, ensuring your vehicle’s safety and performance.
By following these steps, you can quickly identify common brake problems and take appropriate action to maintain your car’s braking system in optimal condition. Let’s explore 10 essential tips to diagnose and potentially resolve brake issues, enabling you to drive confidently and securely on the road.

Credit: www.ebay.com
Common Brake Problems
Experiencing brake problems with your car? Here are 10 simple diagnostic tips to help identify common issues. From squeaking noises to soft brake pedals, this guide will assist you in diagnosing and addressing potential brake problems before they become costly repairs.
Every car owner should be familiar with common brake problems to ensure their safety on the road. Ignoring or delaying brake maintenance can compromise the effectiveness of your vehicle’s braking system, putting you and others at risk. To help you diagnose brake issues before they worsen, we’ve compiled a list of 10 simple car diagnostic tips. In this section, we will focus on two common brake problems: Squeaking or Grinding Noises and Soft or Spongy Brake Pedal.Squeaking Or Grinding Noises
If you notice squeaking or grinding noises when you apply the brakes, it is vital to take immediate action. These noises can indicate that your brake pads are worn or damaged, requiring prompt replacement. Ignoring this problem can lead to further damage, such as metal-to-metal contact, which can be expensive to repair. Follow these steps to diagnose the source of the noise and determine the necessary steps for rectification. 1. Visual Inspection: Start by visually inspecting your brake pads through the wheel spokes. Check for signs of excessive wear, such as thin pads or metal scraping against the rotor. Also, ensure that there is no debris or foreign objects stuck in the braking system. 2. Pad Thickness: Measure the thickness of your brake pads using a ruler or caliper. Most brake pads have a minimum thickness specified by the manufacturer. If your pads have worn beyond this limit, they need replacement. 3. Pad Material: Consider the type of brake pads you are using. Some materials, like metallic pads, can produce more noise than ceramic pads. If noise is a persistent issue, you may consider switching to a quieter pad material. 4. Rotor Inspection: Inspect the brake rotor for any signs of damage or warping. Excessive wear or uneven surfaces on the rotor can cause noise when the brake pads make contact. 5. Lubrication: Apply appropriate brake lubricant to the contact points of the brake pads where they meet the caliper. Lubrication can reduce friction and minimize noise. Remember, if you are unsure about the source of the noise or how to proceed with the necessary repairs, it is always recommended to consult a professional mechanic.Soft Or Spongy Brake Pedal
Another common brake problem that requires immediate attention is a soft or spongy brake pedal. This issue can signify air in the brake lines or a problem with the hydraulic system. Follow these steps to diagnose and potentially rectify this problem. 1. Brake Fluid Level: Check the brake fluid reservoir to ensure it is filled to the recommended level. Low brake fluid can cause a soft pedal due to air being drawn into the system. 2. Brake Fluid Quality: Inspect the color and consistency of the brake fluid. If it appears dark or contaminated, it may be necessary to flush and replace the fluid. 3. Brake Lines: Visually inspect the brake lines for any signs of leaks or damage. Even a small leak can cause air to enter the hydraulic system, resulting in a soft brake pedal. 4. Bleeding the Brakes: Bleeding the brake system can remove air bubbles and restore proper pedal feel. This procedure is best performed by a skilled technician. 5. Master Cylinder: In some cases, a faulty master cylinder may be the cause of a soft pedal. Inspect the master cylinder for any signs of leakage or malfunctions. By addressing these common brake problems promptly, you can ensure the safety and reliability of your vehicle’s braking system. However, if you are uncertain or would rather leave these diagnostic and repair procedures to professionals, don’t hesitate to consult a trusted mechanic for expert assistance. Remember, maintaining your brakes is an essential part of responsible car ownership, and it can save lives on the road.Diy Brake Checks
Regular brake inspections are crucial for safe driving. By performing easy DIY brake checks, you can catch potential issues early. Below are essential tips for conducting your own brake inspections:
Visual Inspection
- Check brake pads and rotors for wear and tear.
- Look for any leaks around the brake calipers or brake lines.
- Inspect brake hoses for cracks or signs of damage.
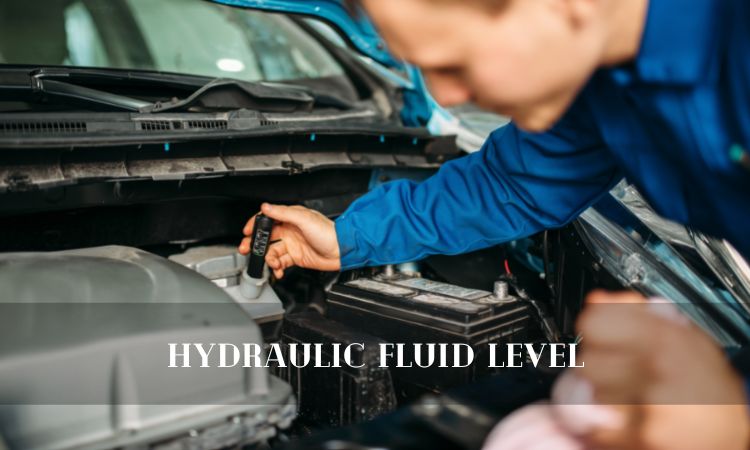
Brake Fluid Levels
- Locate the brake fluid reservoir under the hood.
- Ensure the fluid level is between the minimum and maximum marks.
- If low, top up with the recommended brake fluid type.
Keep your vehicle and yourself safe by regularly checking your brakes. By taking these simple steps, you can maintain optimal brake performance and prevent potential hazards on the road.
Brake Pad And Rotor Inspection
Ensure your brakes are working efficiently with a brake pad and rotor inspection. Here are 10 simple car diagnostic tips to identify and tackle any brake problems.
Inspecting your brake pads and rotors regularly is crucial for maintaining the safety and performance of your vehicle. By following these simple diagnostic tips, you can ensure that your brakes are in top condition. Let’s delve into the Wear and Tear Signs and Measuring Rotor Thickness.Wear And Tear Signs
– Look for uneven wear patterns or thinning of the brake pads. – Listen for squealing or grinding noises when applying the brakes. – Check for vibrations or pulsating sensations while braking. – Observe any warning lights on your dashboard related to the brake system.Measuring Rotor Thickness
– Measure the rotor thickness using a micrometer or caliper. – Compare the thickness to the manufacturer’s specifications for minimum thickness. – Check for any signs of warping or scoring on the surface of the rotor. – Ensure the rotors are within the recommended thickness range for safe braking.
Credit: us.amazon.com
Identifying Brake Fluid Leaks
Spotting brake fluid leaks in your car is crucial for early detection of brake issues. Look for wet spots under the vehicle or near the wheels, which could indicate a leakage problem that needs immediate attention. Regularly inspecting your brake system can help prevent potential safety hazards on the road.
Brake fluid leaks can be potentially dangerous and compromise the effectiveness of your vehicle’s braking system. It is crucial to identify and address any leaks promptly to ensure your safety on the road. In this section, we will discuss two essential aspects of identifying brake fluid leaks: locating leaks and examining fluid color and consistency.Locating Leaks
When it comes to locating brake fluid leaks, a systematic approach is vital to pinpoint the source accurately. Follow these steps to identify the leak:- Start by inspecting the brake lines and connections. Look for any visible signs of fluid seepage or wet spots around the lines.
- Check the brake calipers, which are responsible for applying pressure to the brake pads. Ensure there are no visible signs of leakage around the calipers.
- Inspect the master cylinder, located near the brake pedal, for any signs of fluid around the reservoir or the cylinder itself.
- Examine the brake booster, found on the firewall, for any indications of fluid leaks around the sealing surfaces.
- Lastly, check the wheel cylinders or brake drums in vehicles equipped with drum brakes. Look for any signs of fluid seepage or wetness around these components.
Fluid Color And Consistency
Examining the color and consistency of the brake fluid can provide valuable insights into the condition of your braking system. Here’s what you need to know:| Fluid Color | Fluid Consistency | Possible Issues |
|---|---|---|
| Bright Clear or Amber | Thin and Watery | Normal |
| Dark Brown or Black | Thick or Sludgy | Possible contamination or overheating of the brake fluid |
| Milky or Light Gray | Thin and Foamy | Possible presence of water or air in the brake system |
Understanding Abs Warning Light
Understanding ABS Warning Light is crucial for diagnosing brake problems in your car. When the Anti-lock Braking System (ABS) warning light comes on, it indicates that there is a potential issue with the ABS system. If this light illuminates, it is important to take immediate action to diagnose and address the problem to ensure the safety of your vehicle and passengers.
Interpreting Warning Signals
The ABS warning light usually appears as a yellow circle with “ABS” written inside. It can be found on the dashboard and signifies a problem with the Anti-lock Braking System. When this light comes on, it signifies that there might be a malfunction with the ABS system, and it is essential to promptly address this warning signal.
Possible Causes
Several potential causes could trigger the ABS warning light. These include issues such as a faulty wheel speed sensor, damaged ABS module, or low brake fluid. Additionally, a malfunctioning ABS pump or a worn-out brake pad sensor could also lead to the activation of the ABS warning light. Identifying the specific cause is essential for effectively rectifying the issue and ensuring safe operation of the braking system in your vehicle.

Credit: www.ebay.com
Frequently Asked Questions For 10 Simple Car Diagnostic Tips For Brake Problems
How Do You Diagnose A Brake System Problem?
Diagnose brake problems by listening for strange sounds, feeling for vibrations, checking brake fluid levels, and inspecting brake pads.
What Is One Safe Way To Test Whether A Braking Problem?
To safely test for a braking problem, find a safe and open area with no other vehicles or pedestrians nearby. Drive at a moderate speed and apply the brakes gently. If the brakes feel soft or produce squeaking or grinding noises, there may be a problem.
What Is A Common Test To Check If Your Brakes Are Working?
A common test to check if your brakes are working is to listen for squeaking or grinding noises when braking. If your car doesn’t stop smoothly or pulls to one side when braking, it may indicate brake problems. It’s important to have your brakes inspected regularly by a professional.
What Is Always The First Step To Diagnosing The Braking System?
The first step to diagnosing the braking system is to perform a visual inspection of the brake components for wear and damage. This includes the brake pads, rotors, calipers, and brake lines. Regular inspection ensures proper functioning and safety.
Conclusion
To keep your car’s brakes in good working condition, these 10 simple diagnostic tips can save you time and money. By paying attention to warning signs like squeaking, grinding, or reduced braking power, you can address issues early on. Regular maintenance and inspections are crucial for ensuring your safety on the road.
Don’t hesitate to seek professional help if you’re unsure about any brake problems. Remember, prevention is better than cure when it comes to your vehicle’s braking system.