How To Put a Trolling Motor on a Kayak
Acquiring the most suitable electric trolling motors from store for the job in and of itself is not enough. You have to know how to mount and fix it firmly in place. This is a feat you may achieve only upon receiving the necessary insight to that end. We are here to offer that very insight on how to put a trolling motor on a kayak.
In our conversations hereunder, we shall look into the tools you need for the job, the step-by-step procedures you have to follow and the safety measures you have to take to guarantee the best possible outcomes. Take time and read through long while you are at home for your own inspiration.
Assemble A Trolling Motor On A Kayak
Tools Required
- Drill Machine
- Hand saw
- Measuring tape
- Wire snips crimps
- Gloves to protect your hands
- Glasses to protect the eyes
Believe you alraedy have above list in your home.If not you can buy from Amazon.
Step By Step Processes
# Attach the propeller to the motor
Kick start the exercise by attaching the propeller to the motor. How you go about this largely depends on the kind of motor in question here.
You have to read through the instructions manual to find out the peculiarities of your own motor as well as how it may be handled and fit.
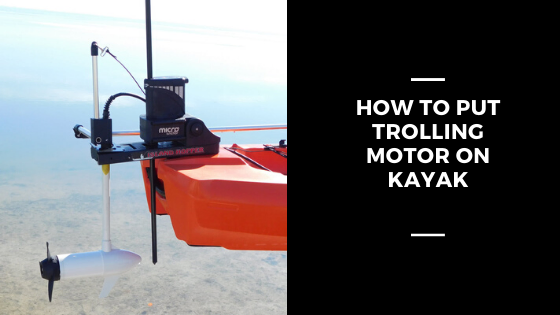
# Mounting the motor
In the next step, you have to mount the motor to the kayak. Like fitting the propeller above, this is a step that varies significantly from kayaks to kayaks.
In many models though, you have to acquire and make use of a stand. A stand of this kind typically has four drill holes at the back.
You basically slot in the motors in these four drill holes and fasten appropriately. check the mount accuracy
Then, place the stand together with the motor at that place that is designated for the same. Fasten again tightly in such a way as to make the entire structure less inclined to fidget.
# Link the steering wheel
Upon connecting the propeller to the motor, you now have to activate the steering wheel.
To be able to accomplish this, you have to drill two holes that measure a quarter inches each. These ought to happen at the back of the boats and using a boring tool for the job.
Space the holes at around one and a half inches away from the depressions that are found at the back of the kayak. Place a plastic tube inside these holes.
The size of the tube has to depend mainly on the size of the kayak itself. This is to seal the holes firmly to prevent any possibilities of fidgeting or falling off.
# Slot in the wires to the ‘Minn Kota Plug’
Now, slot the wires to the ‘Minn Kota Plug.’ To do this, remove the motor’s head to reveal the wires that come off from there.
Then, go ahead cut off the red and the yellow wires from the terminal. Tape the two to avoid the possibility of short-circuiting.add more if require.
You may have to drill a hole at the back of the boat to allow for this. This hole has to be located some 3 inches away from the lid of the storage compartment that exists at the rear of the kayak.
The hole, needless to say, has to be big enough for the ‘Minn Kota Plug.’
Finish off by adding a receptacle to see to it that the structure is waterproof. Finish off by plugging the white and the black wires in and then insulating the same by use of a pipe.
# Interlink the steer lineage with the paddles
Having successfully slotted the wires to the ‘Minn Kota Plug,’ time has now come to interlink the steer lineage with the paddles.
Do remove the rudder system to start off the exercise. However, do not dismount the rail that is attached to the kayak.
Place a set of new paddles to the system and drill the holes in each of the paddles. The holes should be one at the top and one at front of the paddle. Slot in the wires through the front hole and then detain a pin to the other hole. Thereafter, attach some wires to the detain pins.
# Fix the circuit with some Reverse polarity Switch
Attaching the circuit directly with the battery at the single press of a button in and of itself would still not be sufficient. This arrangement would make your kayak move in one direction at a time only.
To be able to move your kayak in either direction, you have to install a reverse polarity switch.
# Test the system & speed
You are almost good to go now to travel to catch fish . But before you go, you now have to test the system. Ignite the motor power to note how it behaves or responds to the various prompts. Give it a lot of jerk to measure it is tighten enough.
Then, you also have to see to it that the weight is evenly distributed. Ensure that the kayak balances firmly on the water body to allow for easy steering and proper rides with diffrent speed & thrust setting in log distance journey.Always keep a tool kit in the boat to check periodically.
Safety Measures
- Always put on a face mask before proceeding
- Do not touch naked wires as they might electrocute you
- Keep all water away from the electrical components to avoid electrocution
- Read and adhere to every bit of instruction
- Consult a trained expert to guide you through the entire process
Conclusion
Finally, we expect that you can do a great job. Why not move with haste and implement the instructions we have generously provided? Even though this is a task you can do single handedly, we caution against adopting such an approach.
The tasks involved are potentially risky and prone to many errors. You do not want to subject yourself to any such issues, would you? If in doubt, kindly bring in the intervention of a trained expert or any other person who has some experience in this.