How to Make Tires Look New
To make tires look new, clean them with a tire cleaner and apply a tire shine product. Enhance the appearance of your tires by following these simple steps.
Regular maintenance and cleaning not only improve the looks of your tires but also extend their lifespan. By using appropriate products and techniques, you can easily restore the shine and black color of your tires. From cleaning off dirt and grime to applying a quality tire dressing, you can make your tires look brand new with minimal effort.
Following these steps will ensure your tires look fresh and well-maintained for a long time.
Choosing The Right Cleaner
Making your tires look new again doesn’t have to be a daunting task. With the right cleaner, you can easily restore their shine and give your vehicle that fresh-off-the-lot appearance. However, with so many options available, it can be overwhelming to choose the best cleaner for your tires. Understanding the different types and finding one that is safe for all tire materials is key to achieving the desired results.
Understanding The Different Types
There are several types of tire cleaners available on the market, each with its own unique formulation and purpose. Here’s a breakdown of the most common types:
- All-Purpose Cleaner: This type of cleaner is versatile and can be used on a variety of surfaces. It is typically effective at removing dirt, grime, and stains from tires, making it a popular choice for many car enthusiasts.
- Gel Cleaner: Gel cleaners are thicker in consistency, which helps them adhere to the tire surface for a longer period. They are great for removing tough stains and providing a longer-lasting shine.
- Foaming Cleaner: As the name suggests, foaming cleaners produce a rich foam that clings to the tire surface, allowing the cleaning agents to penetrate and dissolve dirt and grime more effectively. They are ideal for deep cleaning and restoring the natural shine of tires.
- Water-based Cleaner: These cleaners are formulated with water as the base ingredient, making them safe for all types of tire materials. They provide a gentle yet effective cleaning action without causing any damage.
Safe For All Tire Materials
When choosing a cleaner, it’s essential to opt for one that is safe for all tire materials to avoid any potential damage. Some cleaners contain harsh chemicals that can cause discoloration or dry out the rubber, leading to cracking and premature wear. Look for a cleaner that specifically mentions being safe for all tire materials, including rubber, vinyl, and plastic.
By selecting the right cleaner, you can ensure that your tires not only look new but also remain in optimal condition. Remember, understanding the different types of cleaners and finding one that is safe for all tire materials is the key to achieving remarkable results. So, invest in a high-quality cleaner and give your tires the care they deserve!

Credit: m.youtube.com
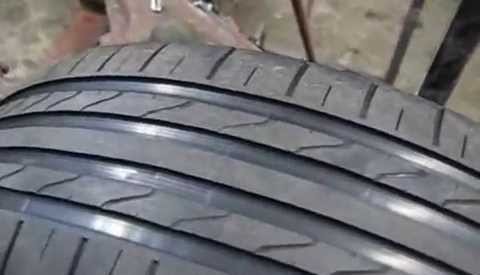
Cleaning And Scrubbing The Tires
When it comes to making your tires look new, one essential step is cleaning and scrubbing them.
Removing Dirt And Grime
Start by removing dirt and grime from your tires to give them a fresh, clean look.
Using The Right Tools
Make sure to use the right tools to effectively clean and scrub your tires for the best results.
Applying Tire Dressing
Understanding Different Types of Tire Dressing:
Tire dressings come in various types such as gel, spray, or foam. Each type offers distinct benefits and effects on the tires.
Check the label or product description to determine which type of tire dressing is most suitable for your needs.
Proper Application Techniques:
Follow these simple steps to apply tire dressing effectively:
- Clean the tires thoroughly with a tire cleaner to remove dirt and grime.
- Dry the tires completely before applying the dressing to ensure better adhesion.
- Apply the tire dressing using a detailing applicator pad or a sponge for even coverage.
- Spread the dressing evenly across the tire surface, avoiding excess buildup.
- Allow the dressing to dry completely according to the product’s instructions.
- Check for any streaks or uneven application and touch up as needed for a polished look.
Credit: www.linkedin.com
Maintaining The Shine
When it comes to your vehicle’s appearance, one of the most important factors is the condition of your tires. Having clean and shiny tires can instantly enhance the overall look of your car. However, to keep your tires looking new, it’s necessary to establish a regular cleaning schedule and take measures to protect them from environmental factors.
Regular Cleaning Schedule
Cleaning your tires on a regular basis not only removes dirt and grime but also helps maintain their shine. By following these simple steps, you can keep your tires looking fresh:
- Start by rinsing your tires with water to remove any loose dirt or debris.
- Apply a mild tire cleaner specifically designed for the type of tires you have. Be sure to read the instructions and follow them carefully.
- Using a soft bristle brush or sponge, scrub the tires in a circular motion to effectively remove dirt and grime. Pay special attention to the sidewalls.
- Rinse off the cleaner thoroughly with water.
- Dry the tires using a clean microfiber cloth to prevent water spots and create a polished finish.
- Apply a tire protectant or dressing to enhance the shine and protect against fading and cracking. Use a foam applicator for an even application.
Protecting Against Environmental Factors
Various environmental factors, such as sunlight, heat, and harsh chemicals, can cause damage to your tires and diminish their appearance. To minimize these effects and preserve the shine, consider the following tips:
- Park your vehicle in a shaded area or use a car cover to shield your tires from excessive sun exposure.
- During winter, protect your tires from road salt by washing them frequently and applying a sealant specifically formulated for winter conditions.
- When cleaning your car, avoid using harsh chemicals or abrasive cleaners that can strip away the protective layer on your tires.
- Inspect your tires regularly for any signs of damage or wear. Replace them if necessary to maintain both safety and appearance.
- Consider using tire covers or dressings with UV-protection to prevent premature fading caused by sun exposure.
By following a regular cleaning schedule and taking steps to protect your tires against environmental factors, you can keep them looking new and maintain their shine for years to come. Remember, a little effort goes a long way in preserving the overall appearance of your vehicle.
Final Touches
When it comes to making your tires look like new, paying attention to the final touches can significantly enhance the overall appearance and performance of your tires. These final touches involve checking tire pressure to ensure optimum safety and performance, as well as inspecting for any signs of damage that may impact the longevity of your tires. Let’s take a closer look at these crucial final touches to achieve that fresh, showroom-worthy look for your tires.
Checking Tire Pressure
Regularly checking and maintaining the correct tire pressure is essential for both safety and tire longevity. Properly inflated tires ensure optimal fuel efficiency, prolong tire life, and improve vehicle handling. Using a reliable tire pressure gauge, measure the pressure when the tires are cold and compare it to the recommended pressure specified in your vehicle’s manual or the label inside the driver’s door.
Inspecting For Damage
Regularly inspecting your tires for any signs of wear, tear, or damage is crucial. Look for cuts, cracks, bulges, or any other abnormalities on the tire’s tread, sidewalls, or bead areas. These could be indicators of potential safety hazards or issues that may affect tire performance. Additionally, check for any foreign objects that may have become embedded in the tire, such as nails or screws, which could lead to air leakage or tire failure.

Credit: www.amazon.com
Frequently Asked Questions On How To Make Tires Look New
What Can I Put On My Tires To Make Them Look New?
You can use tire shine products to make your tires look new. Simply apply it onto the clean tires and let it dry for a glossy finish.
How Do You Make A Used Tire Look New?
To make a used tire look new, start by cleaning it thoroughly with soap and water. Then, apply a tire dressing or polish to restore its shine. You can also use a tire paint pen to cover up any scuffs or marks.
Finally, make sure to properly maintain your tires by regularly cleaning and conditioning them for long-lasting results.
How Do You Refresh Old Tires?
To refresh old tires, clean with mild soap and water, inspect for damage, apply rubber protectant, and store in a cool, dry place.
How Do You Fix Discolored Tires?
To fix discolored tires, clean with tire cleaner and a brush, then apply tire shine for a glossy finish.
How Often Should I Clean My Tires For Optimal Upkeep?
Regularly cleaning your tires with a gentle cleaner can help maintain their appearance and extend their lifespan.
What Is The Best Way To Clean Tires?
Use a mild cleanser, such as soapy water, and a soft-bristled brush to gently remove dirt and grime from your tires.
Can Tire Shine Products Damage My Tires?
Excessive use of tire shine products may cause tire discoloration and can attract more dirt, leading to a dull appearance.
Conclusion
To conclude, rejuvenating your tires and making them look brand new is not only a matter of aesthetics, but also an essential step in maintaining their performance and safety. By following the simple tips and tricks mentioned you can effectively restore their appearance and extend their lifespan.
Regular maintenance, cleaning, and protection will ensure that your tires remain in top condition, enhancing the overall look of your vehicle. So go ahead, give your tires the attention they deserve and enjoy a fresh, crisp look for your car.