
How to Remove o2 Sensor Clip – 4 Best Processes
Are you looking for a way to remove O2 sensor clip from your vehicle? If so, then this blog article is perfect for you! We’ll be unlocking the mystery of O2 sensor clip removal and providing quick and easy tips on how to do it. You’ll also learn what you need to know before taking out that O2 sensor clip as well as how to avoid damaging your vehicle during the process. Finally, we’ll provide a step-by-step guide on safely removing an O2 sensor clip.
Removing an oxygen (O2) sensor clip can be a tricky task, but it doesn’t have to be. With the right tools and some patience, you can easily remove your O2 sensor clip in no time. Here are some tips on how to do it safely and effectively:
1. Gather the necessary tools: You’ll need a pair of needle-nose pliers or a special O2 sensor removal tool for this job. If you don’t have either of these items, you can purchase them at most auto parts stores or online retailers.
2. Locate the clip: The first step is to locate where the O2 sensor clip is located on your vehicle’s exhaust system or engine block so that you know exactly what part needs to be removed before starting work on it.
Unlocking the Mystery of O2 Sensor Clip Removal
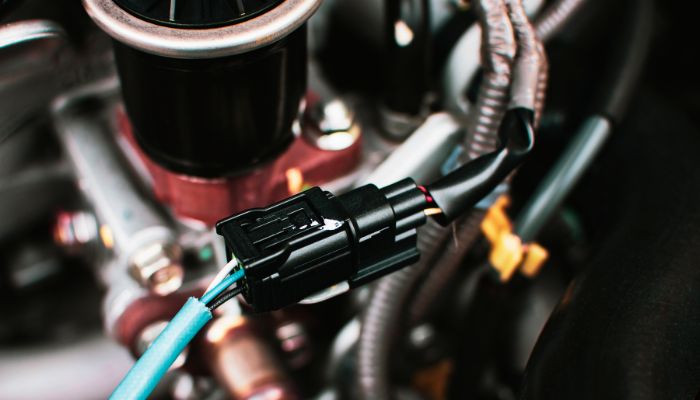
The O2 sensor clip removal can be a tricky process for many car owners. It’s important to understand the basics of how it works in order to successfully remove the clip and keep your vehicle running smoothly. The O2 sensor is responsible for monitoring the oxygen levels in your engine, so it’s essential that you take care when removing this part.
The first step is to locate where the O2 sensor clip is located on your vehicle. This will usually be near or around the exhaust manifold but may vary depending on the make and model of the car you have. Once you know where it is, use a pair of pliers or an adjustable wrench to loosen up any bolts that are holding down the clip before attempting to remove it from its place.
Once all bolts are loosened up, carefully pull outwards on both ends of the clip until they come off completely from their mounting points. Be sure not to force anything as this could damage other parts nearby! After successful removal, inspect all components for any signs of wear or corrosion before reinstalling them back into place with new clips if necessary.
Read More About Car Accessories
Quick and Easy Tips for Remove O2 Sensor Clip
Removing an O2 sensor clip can be a tricky task, but with the right tools and techniques, it doesn’t have to be. Here are some quick and easy tips for removing an O2 sensor clip that will make the job easier.
First, you’ll need to locate the O2 sensor clip on your vehicle’s exhaust system. This is usually located near the catalytic converter or in front of it. Once you’ve found it, use a pair of pliers to loosen any corrosion around the edges of the clip before attempting removal.
Next, use a ratchet wrench set to remove any bolts holding down the O2 sensor clip from underneath your car’s frame or engine bay area.
What You Need to Know Before Taking Out That O2 Sensor Clip
Before taking out that O2 sensor clip, there are a few things you should know. First and foremost, it is important to understand the purpose of the O2 sensor clip. It is designed to keep your oxygen sensors in place while allowing them to move freely when needed. This ensures that your vehicle runs smoothly and efficiently without any issues related to air-fuel mixture or emissions control systems.
Second, make sure you have all of the necessary tools for removing the O2 sensor clip before attempting this task. You will need a socket wrench set with an appropriate size socket for loosening and tightening bolts; pliers; wire cutters; electrical tape; a flathead screwdriver; and possibly some lubricant such as WD-40 or silicone spray if needed.
Additionally, be sure to wear safety glasses during this process as well as gloves in order to protect yourself from sharp edges on metal parts or other debris that may be present near where you are working on your car’s engine components.
How to Avoid Damaging Your Vehicle During O2 Sensor Clip Removal
Removing an oxygen (O2) sensor clip from your vehicle can be a tricky task. If done incorrectly, it can cause serious damage to the vehicle and even void any warranties you may have on the car. To ensure that you don’t end up with costly repairs or replacements, here are some tips for avoiding damaging your vehicle during O2 sensor clip removal:
1. Make sure you have all of the right tools before beginning – You will need a ratchet wrench set and various sockets in order to remove the clips safely without causing any damage. It is also important to make sure that all of these tools are in good condition so they do not slip or break while being used on the clips.
2. Wear protective gear – Before beginning work on your car, make sure that you wear gloves and safety glasses as well as other protective clothing such as long sleeves and pants in order to protect yourself from potential hazards like sparks or flying debris when removing clips from tight spaces around components near where sensors are located
3. Use lubricant – Applying lubricant such as WD-40 onto stubborn O2 sensor clips helps loosen them up so they can be removed more easily without causing any damage to surrounding parts or components due to excessive force being applied during removal attempts.
4. Take it slow – When attempting O2 sensor clip removal, take things slowly by using gentle pressure when loosening them instead of trying brute force which could potentially cause permanent damages if done improperly

The Step-by-Step Guide to Safely Removing an O2 Sensor Clip
Removing an O2 sensor clip can be a tricky task, especially if you don’t know what you’re doing. Fortunately, there is a step-by-step guide to safely removing the clip and ensuring that no damage is done to your vehicle in the process.
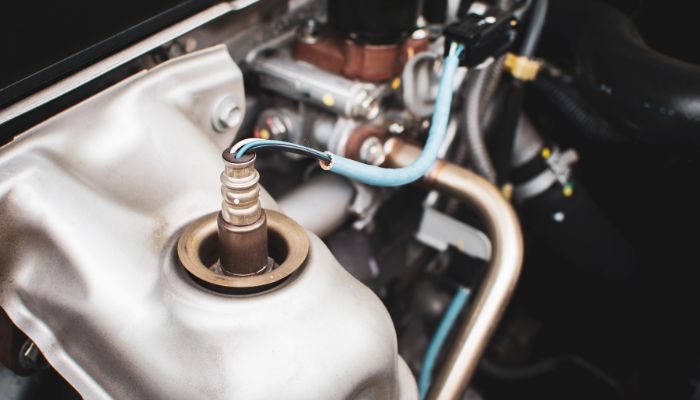
The first step is to locate the O2 sensor clip on your vehicle. It will typically be located near or around the exhaust system of your car and should look like a small metal clamp with two wires connected to it. Once you have identified it, make sure that all power sources are disconnected from the area before attempting any further steps.
Next, use pliers or another tool designed for this purpose to loosen up and remove any bolts holding down the O2 sensor clip onto its mountings. Take care not to over-tighten as this could cause damage or breakage of components within your engine bay area which would require more extensive repair work later on down the line!
Once all bolts have been removed, carefully pull outwards using gentle pressure until it comes free from its mountings – taking care not to yank too hard as this may also cause damage! After removal has been completed successfully simply discard old parts responsibly and replace them with new ones if necessary before reassembling everything back together again correctly following the manufacturer’s instructions provided by them in their manual/guidebook(s).