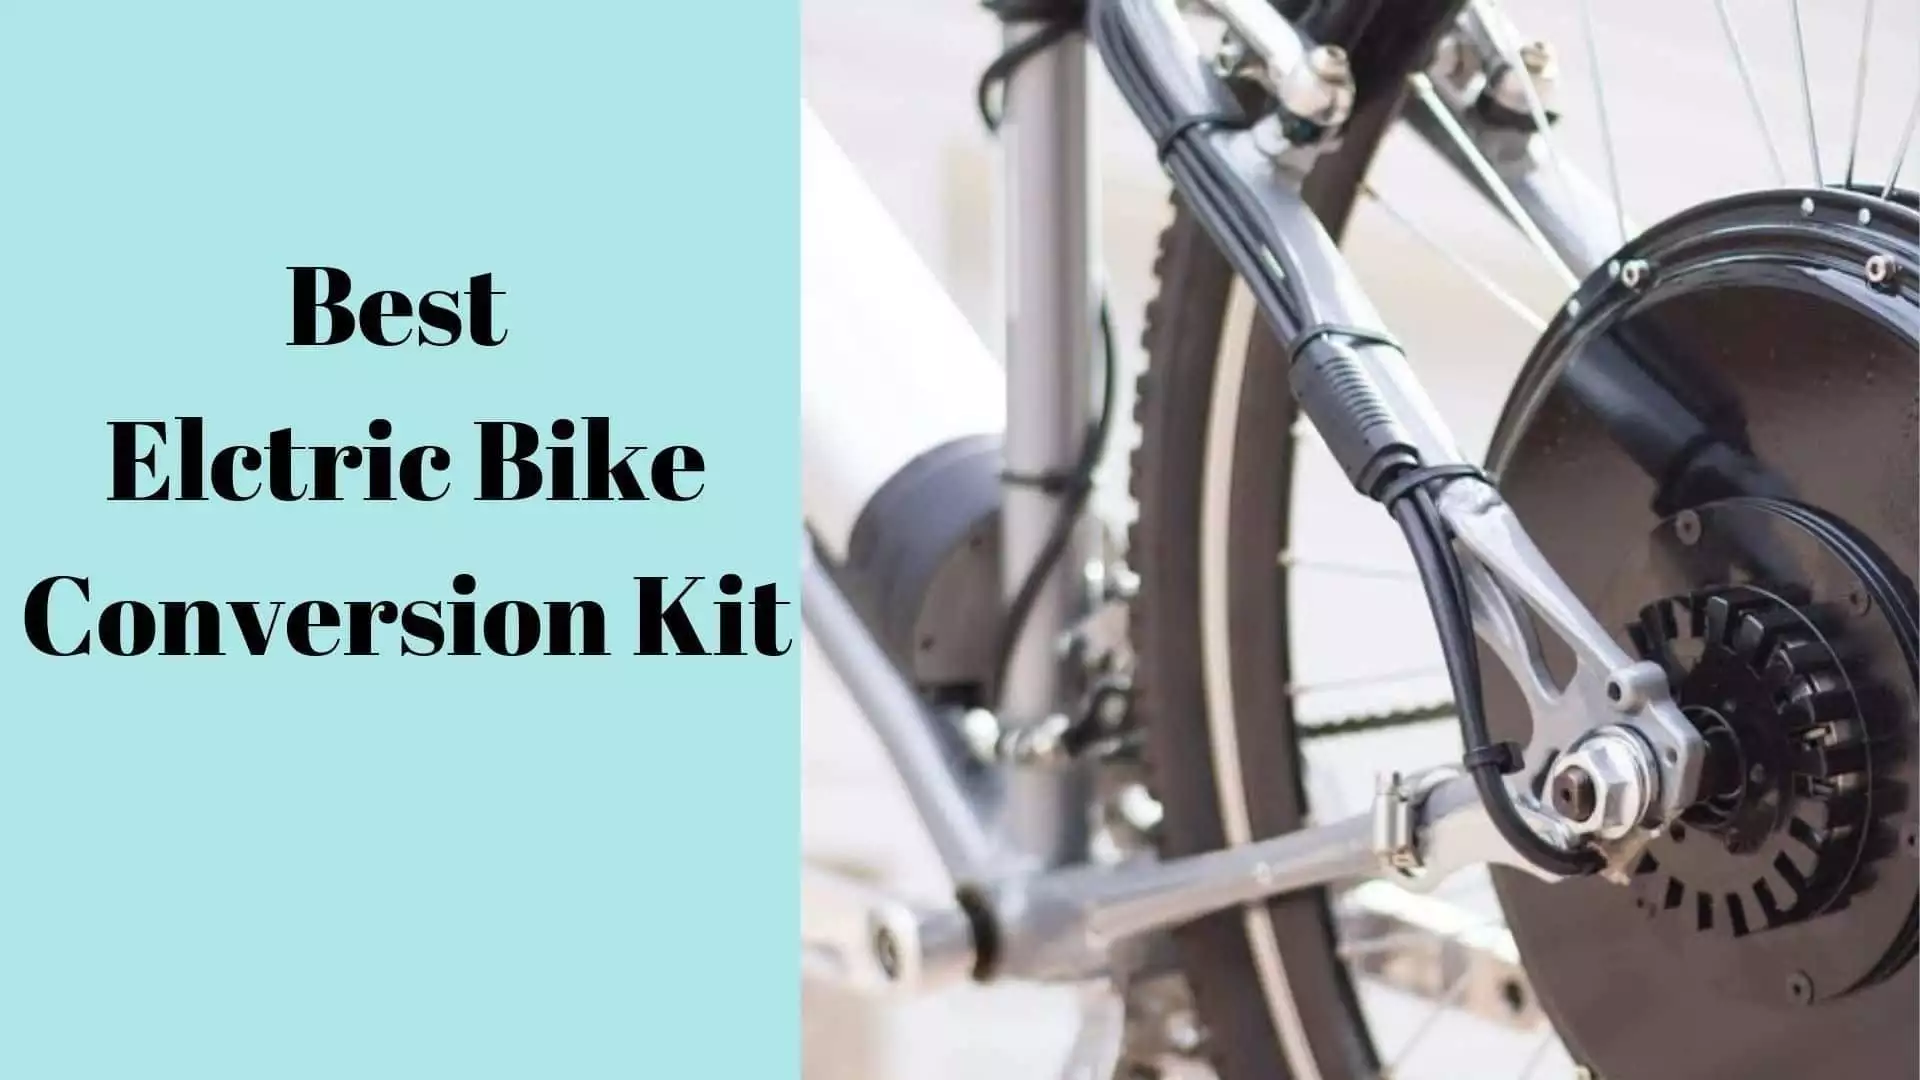
Best Electric Bike Conversion Kit 2021 |DIY Set Up At Home
As much as push pedal bikes are effective, they alone are nothing as compared to a bike that has got the best electric bike conversion kit. Well, with the manufacture of lots of electric vehicles, there has been the manufacture of quite a lot of electric conversion kits.
These involve the wheel being swapped, after which a battery and controller is attached to the base of your bike.
The push pedal bike you’ve been using daily will have plenty more power that will definitely come in handy for the steep uphill climbs.
So, here’s the thing…
What if I told you that you could actually get something that’ll give you a kick for your buck? That by the time you’re done with this post, you’ll be equipped with enough knowledge on choosing a conversion kit? That by the time we’re through, you’ll have 15 of the best just a click away?
Well, that’s exactly why we’re here today- dedicated to giving you the perfect in the market backed up with the best expert guide to set you off on the right path.
Comparison Table
Before you read on, look at the side-by-side comparison of our very best picks. Here goes.

2022’s Top Brands of the Best Bike Conversion Kit
Whether you are looking for a conversion kit for your front wheel or the rear wheel, I’m positive that either of these brands has what it takes to get you the very best
BAFANG
Being one of the top companies in the manufacture of e-mobility components and having a good reputation all over the world, BAFANG’s focus is in innovation and the satisfaction while observing utmost safety.
Clean Republic
With their main goal being to power your adventures, they aim Clean Republic at meeting the average consumer’s demands in producing the best quality conversion kits for all and in a minimalistic design while observing long-lasting quality.
L-faster
Founded back in 2008, L-faster’s focus is on the manufacture of an electric conversion kit for different vehicles. With this being their main area of focus, you’re guaranteed to get the best for your bike.
Jaxpety
Because this company they built this company only back in 2015 and based on strength, passion and hard work which altogether molded the core values of the company, JAPETY’s main goal is the provision of both affordable and valuable products.
Best electric bike conversion kit: 2022’s top 15 picks
On to the second section of our post and the main agenda it’s time we look at what it’ll mean to have the most powerful electric bike conversion kit. Here’s an expert’s review on the top-rated picks.
#1 Bafang BBS 1000W Lastest Model 48V/52V 1000W Ebike Electric Bicycle Motor Mid Drive Electric Bike Conversion Kit with 14Ah/17.5Ah/20Ah Downtube and 52V 17.5Ah Rear Rack Battery (Optional)
 More Images9.3/10 Our Score
- [Shipping & Warranty] — Shipped by FedEx. One year warranty and provide technical support & after-sales service in US. 24-hour online service.
- [Conversion Accessories] — All necessary mounting accessories are included. Please see the packing list image. Notice: Brake levers can be changed to hydraulic and mechanical brake sensor— search ASIN B07B8KNTYN, if you leave us a message about your requirements. But motors in Prime are only packed with brake levers.
- [Easy Installation] — Can be successfully installed into an electric bicycle in just a few time by only a few tools which can remove the crankset and the center shaft, as well as tools for installing this mid-drive motor.
- [Standard JIS] — Fit a standard JIS 68 – 73 mm/ 100 mm/ 120 mm bottom bracket (installing extra parts Gaskets as gifts), please see the installation image carefully. Suitable for mountain bike, road bike, commuter bike, fat tire bike. NOT recommended to apply this motor to bikes with carbon fiber frame in case of damaging the frame.
- [Two riding mode] — Electric bikes & pedal bicycle, faster traffic & physical exercise can be achieved at the same time. A wonderful choice for cycling enthusiasts and those who want faster traffic to transport or travel. This 1000W motor is from the Bafang BBSHD series, providing powerful and ideal power.
- Note: There are two versions of BBSHD 48V 1000W motor with 48 controller or 52V controller. Will send you the correct motor based on the voltage of battery you purchase. In the case of ordering a motor without a battery, if there is no request, a motor with a 52V controller will be sent.
It’s not in vain that this electric bike kit is at the top of our list. Owing to its origin from one of the best companies in the market, it comes with a battery designed to fit on most bikes. Here’s a closer look at what it packs under the hood.
Enjoy an easy installation with the included tools
Right out of the box, you’ll be getting all the tools you need to remove the crank set and center shaft and those needed for the installation of the motor.
They also include all the essential conversion accessories. These include a pair of throttle controls, lock nuts, LCD display, brake levers, the motor, chain wheel with chaining plastic guard and a pair of cranks among others. With the included installation manual, it’ll be easy enough.
Designed to be compatible with most brackets
It’s not superb enough if it isn’t compatible with your normal bike, is it? This being the case, that this kit will fit any standard JIS 68- 73/100/120 mm bottom is something that you’ll definitely appreciate.
Except for bikes that come with a carbon fiber frame, this kit is compatible with a mountain road, commuter, and a flat tire bike.
Versatile riding options
Besides the flexible compatibility and the ease of installation, yet another feature you’ll appreciate is the flexibility it offers. You can engage the motor using the thumb throttle to achieve high speeds from the 1000W motor and more so, you can pedal it at the same time to go even faster.
PROS
- Easy to install and compatible with most brackets
- Has got quiet performance
- Offers a maximum torque of 160N.m
- Includes all the essential installation tools
CONS
- Pedaling the bike is hard with the assist offIt might damage carbon fiber frames
Also Read : Best Fat Tire Electric Scooter
#2 JAXPETY 36V 500W Electric Bicycle Cycle 26″ E Bike Front Wheel Ebike Hub Motor Conversion Kit Hub Motor Wheel
More Images9.3/10 Our Score
- 🚴♀️36V 500W super power brushless gearless hub motor, Restricted to 750W and 19.88mile/h by default as a road-legal kit
- 🚴♀️Crank speed sensor for pedal assist, Brake Levers cut off the power supply to the motor safely
- 🚴♀️Nylon tire& alloy rim& stainless steel spoke, Rare-earth metal magnates are used in the motor to efficiently produce large power
- 🚴♀️Aluminum alloy powerful controller guarantee big current supply
- 🚴♀️Twist throttle has battery level display and power-cut off button
Yet another amazing brand, this package has all the essentials of a conversion kit we intend all of which to make your cruises much more fun. Despite the seclusion of a battery, it’s all you need to upgrade your bike to a whole new level.
Enjoy up to 750W of power from the 36V motor
First things first, since it’s all about the speed and power for electric bike conversion kits, this one can hit as much as 750W. With this, it’ll be possible to ride at speeds up to 19.88 mph.
Though this may not be enough to most riders, it’s because they have restricted this electric bike conversion kit to qualify as a road-legal kit.
Easy operation and functional controls
Well, one of the key features that define the is ease of use. To achieve this, you’ll be getting a twist throttle with a battery level display on it for starters. There is a single white switch wire with which you can be able to determine any issues in the motor or controller.
As for the pedal assist, there is a crank speed sensor included, and it also comes with brake levels which cut off the power supply after which you can pedal normally.
Set it up quickly and easily with the user manual included
One feature you’ll appreciate from this conversion kit is a nylon tire and alloy rim with stainless steel spokes that saves you from installation hassles. There are also cable ties and plastic coils that ensure you have neat wiring.
PROS
- Features an easy installation process
- Has got a battery level display
- Comes with cable ties and a plastic coil
- Features a 350 lb. load capacity
CONS
- Installation directions are a little unclear
#3 Voilamart Electric Bicycle Kit 26″ Rear Wheel 48V 1000W E-Bike Conversion Kit with LCD Display, Cycling Hub Motor with Intelligent Controller and PAS System for Road Bike
More Images9.3/10 Our Score
- 48V 1000W Powerful brushless gearless motor with 28mph (45km/h) speed; Restricted to 750W and 24mph (38km/h) speed by default as a road-legal pedal bike conversion kit.
- Dual Mode Controller: Motor works under Hall effect and non-Hall effect, extend life for electric bike.
- LCD display shows battery level and pedal assistance settings; Brake Levers cut off the power supply to the motor safely; Twist throttle has battery level display
- Comes with all the components you need to a full conversion, including Rear Wheel(of 7 speed sprocket), Motor Controller, Controller Bag, Pedal Assist Crank Sensor, Cable Ties & Plastic Coil, Twist Throttle, One Pair of Brake Handles, Manual, LCD Meter. (Note: Battery not included)
- CE approved; 48 Volt electrokinetic cell battery with a nominal capacity not less than 11.6Ah is required.
Designed to be safe yet functional this bike conversion kit observes a CE approval for safety, has got user-friendly controls, an extra weight limit and should be easy enough to set up and install. Here’s what you should look forward to.
Enjoy both fun and safe rides with the speed limiter
Powering up this motor is a 48-volt, 1000-watt brushless motor which is powerful. With the safety connected, it’s able to achieve 24mph whereby the motor is restricted to only 750 watts which is also the road legal requirement. When the safety is disengaged however, the bike should be able to go as fast as 28mph.
The pedal help provided by the motor allows you to cycle with the motor assisting you which comes in handy especially on the uphill climb. As for the maximum load capacity, it’s restricted to between 330 and 440 pounds.
Have the utmost controls with the included display and throttle
On to the controls, you should be able to see how fast the bike is going from the LCD, the battery level, and the pedal help to set. Speaking of the battery, the charger and battery are not included and have to purchase separately.
There is also an easy-to-use throttle control and a pair of brake handles for engaging the motor and cutting power to it at your convenience.
Observes a CE safety approval
On to the safety, I’m positive that you’ll appreciate the CE approval in which case you’ll be needing a 48-volt electrokinetic cell battery which has a nominal capacity of over 11.6Ah. This should be able to run faster than most and it will prove to be more powerful on steeper climbs.
PROS
- Has a 330-440lb load capacity
- Powered by a 48V, 1000V brushless motor
- Includes an LCD display for battery level and pedal help
- Capable of going as fast as 28mph
CONS
- It doesn’t come with a battery and charger
#4 EBIKELING Waterproof Ebike Conversion Kit 48V 1200W 700C Direct Drive (NOT 26″) Electric Bike Conversion Kit – Rear Wheel Electric Bicycle Hub Motor Kit (Rear/LCD/Twist)
More Images9.3/10 Our Score
- Easily convert your bicycle to an electric bike. Ebike Conversion Kit is ready to install with an aluminum double-walled rim and hub motor already attached. All you need to do is to transfer the original tire to the electric bike kit.
- Ebike conversion kit includes all necessary components for installation; the wheel hub motor, controller, display, throttle, brake levers, pedal-assist system, torque arm, and cable ties. In this Electric Bike Kit BATTERY & TIRE ARE NOT INCLUDED!
- Upgrade your ebike conversion kit to LCD Display. It shows all the essential information such as battery percentage, speed, total and single trip distance, wattage, PAS levels, and error codes for easier troubleshooting.
- Continue to pedal: Pedal Assist Sensor (PAS) allows you to ride your electric bike kit without a throttle response. You may operate your electric bicycle either way. Avoid uncomfortable wrist positions and simply pedal anytime, anywhere.
- Please ensure you select a specific variant from size and style. By default, the first variant of each option will be selected. We offer a 1-year warranty on hub motors and batteries. All other components are under a 3-month warranty. We provide technical support and hassle-free returns, full refund, or replacements. We strive to ensure your satisfaction with our service and products.
It features a waterproof design, packs enough power for long and high-speed rides, includes an LCD display and plenty more. Well, does it have what it takes to have your bike stand out from the rest, let’s inspect what it’s got under the hood…
Ride without throttle response with pedal assist
Included in the kit is the pedal assist sensor, which makes it possible to ride the bike without including the throttle response. This saves on battery power, since the throttle is only engaged when need be.
It is reliable for workouts.Alternatively, you could have the bike operate only on the throttle control, especially when going on a long trip or on incline terrain to avoid wrist fatigue.
Get to monitor everything via the LCD display
On to the operation, you’ll be getting an LCD display included in the kit. With the upgraded LCD display, you’ll be able to see the battery percentage, both the total and single trip distances, to know how far it can go. There is also the assist level indicator, the headlight switch, and the potential error codes which make troubleshooting relatively easy.
Features a waterproof 48V 1500W motor
Last but not least, a feature all will appreciate that on this e-bike conversion kit is the high-powered motor.
Featuring a 48V 1500W motor, you’ll be getting plenty of power for difficult climbs and a longer usage time considering there is a 35 Amp controller. With waterproofing observed from the connectors all the way to the motor, both reliability and efficiency will be at their best.
PROS
- Includes an LCD display to monitor the performance
- Has a pedal assist sensor that optimizes the throttle
- Features both a waterproof motor and wiring system
- Features two brake levers with safety switches
CONS
- Be sure to verify your bike’s compatibility
#5 Voilamart EBike Conversion Kit 26″ Rear Wheel 36V 500W Electric Bike Conversion Motor Kit with Intelligent Controller and PAS System for Road Bike
More Images9.7/10 Our Score
- 36V 500W Powerful brushless gearless motor with approx. 16-22mph (25-35km/h) speed.
- Pedal Assistance System (PAS): enjoy cycling while driving electric bike with 220-330LB / 100-150KG Max Load Capacity.
- Dual Mode Controller: Motor works under Hall effect and non-Hall effect, extend life for electric bike; Brake Levers cut off the power supply to the motor safely; Twist throttle has battery level display
- Comes with all the components you need to a full conversion, including Rear Wheel(of 7 speed sprocket), Motor Controller, Controller Bag, Pedal Assist Crank Sensor, Cable Ties & Plastic Coil, Twist Throttle, One Pair of Brake Handles, Manual. (Note: Battery not included)
- CE approved; 36 Volt electrokinetic cell battery with a nominal capacity not less than 10Ah is required.
Yet another amazing conversion kit from Voilamart is this amazing 36V, 500W conversion kit which would be the go-to choose for anyone who’s looking for cruising speed. There’s plenty to look forward to considering it’s one of the cheapest Ebike conversion kits. Here goes.
Get easygoing rides with the pedal assistance
Getting an e-bike conversion kit is all about making your cruises faster and with less effort.
Well, whereas you could engage the motor to take over your rides completely, the pedal help can be engaged in such a way that the motor will not be running in full power. However, rides that were previously difficult will now be much easier.
As for the load capacity, your bike will be more suitable for riders between 220 and 330 lb.
Monitor everything with ease via the LCD display
Since you’ll be stepping up from a push pedal bike, it’s important that you be able to know how things are going and there’s no better way to do this other than with the indicator on the throttle. On this, the battery level can always monitor with ease.
Speaking of the battery, you’ll neither be getting it or the charger, and you must get either an acid or lithium battery separately. This should be a 36V electro kinetic battery with a nominal capacity of more than 10Ah
Achieve a decent speed of 16-22mph with the brushless motor
Besides the above features, yet another appreciated feature that comes with this is the brushless motor. They rate this at 36V and 500W and you will optimize all your rides.
It’s also worth pointing out that with the brake levels, you can easily cut off the power supply to the motor for safety purposes.
PROS
- Has got a battery indicator on the throttle control
- Achieves speeds of up to 16-22mph
- Optimize your rides with the pedal assistance
- Features a powerful 36V 500W brushless motor
CONS
- The installation instructions are a little unclear.
#6 MURTISOL Electric E-Bike Motor Kit 26” Front Wheel/Rear Wheel 36V 500W/48V 1000W Bicycle Motor Conversion Kit
 More Images9.6/10 Our Score
Yet another amazing brand for the manufacture of e-bike kits, Murtisol has everything covered on this affordable e-bike conversion kit. Besides just being clean and environmentally friendly as all conversion kits are, here’s more you should look forward to…
Enjoy longer rides with the combined power
There’s over one reason to get an e-bike conversion kit with the major one being to make your rides easier.
Besides your pedaling, engaging the motor using the throttle control will get the bike going fast enough to get you where you want to be while, you’ll be using less effort.
It observes international safety standards
Safety is the top priority when on any vehicle. With electric bikes, the international standard CE EN15194. Besides the CE safety standard, it also features brake levers that cut off the power supply to the motor safely when need be.
It’s also worth mentioning that there will be a twist throttle included with which you can not only engage the motor but you’ll also be able to see the battery levels.
Get faster rides from the high-powered motor
Last but not least, and also a feature that’s guaranteed to blow your mind is the fact that it’s available in three different variations besides the 36V 500W motor.
With the 36V 500V rear wheel variant, it’s able to reach speeds of up to 27 miles per hour max and an effortless 24mph. As far as compatibility is concerned, it’s suitable for bikes that have a front fork that is 3.9” and a rear fork measuring 5.3” and as a plus, it will be environmentally friendly.
PROS
- It’s able to go as fast as 27mph
- Includes a battery indicator on the twist throttle
- Double way power combination for longer rides
- It runs on a 36V 500W motor
CONS
- The motor is a little noisy at full throttle
#7 New Version Tongsheng TSDZ2 Mid Drive Motor Conversion ebike Kit,Torque Sensor 36V 350W E Bike Motor Black
 More Images9.5/10 Our Score
- 1.XH 18 display Display
- 2.MOTOR SENT FROM CHINA
- 3.WITH TORQUE SENSOR
- 4.LIMIT SPEED 25KM/H
- 5.MAX SPEED 40KM/H
In just a simple a package that will prove easy enough for DIY installation, the TSD2 packs just enough speed and torque to give you some of the best rides you could ever get. Look below at how much you have to look forward to.
Experience utmost safety with a speed limit control
It all mostly comes down to speed for the Ebike conversion kits. This being the case, we can ride this one on either of two options- with the speed limit engaged and at the maximum speed.
Depending on where you are and whether there is a law that you have to adhere to, you can stick to the speed limit control is at 25kmph. Alternatively, you could engage the maximum speed setting and have the bike move as fast as 40kmph
Monitor the performance with the included LCD display
Since it doesn’t come with throttle control, it’s important that you keep track of how fast you are going. It’s also possible to see the battery capacity and the distance coverage on the display.
Its operation is easy, reliable, and functional.
Besides being able to see how far you go and the battery capacity you have left with and the speed you are moving at, all the operations are at the display unit.
One can be able to set the assist level on this on either of 4 different levels from 0 to 3 such that at level 0, you’ll be able to pedal with no help. The higher the assist level, the easier it will be to pedal.
Speaking of pedaling, it’s worth mentioning that even though the throttle control is not included, the motor control, when powered on, will have the power automatically cut off. As compared to other e-bike conversion kits, this saves on battery power the most.
PROS
- Features an easy and quick installation
- Has a safety 25kmph speed limit and 40kmph max
- Includes torque sensors on either side
- Comes with a functional LCD display and controls
CONS
- The torque sensor is a little insensitive.
#8 AW Electric Bicycle LCD Display Motor Kit 48V1000W 26″x1.75″ Rear Wheel E-Bike Conversion Kit Hub Motor for Bicycle
 More Images9.4/10 Our Score
- LCD Display: to show battery power, time, speed, mileage and gears
- Pedal Assistance System (PAS): let you enjoy cycling while driving electric bike
- Dual Mode Controller: Motor works under Hall effect and non-Hall effect, extend life for electric bike
- Wheel Size: 26 Inch x 1.75 Inch; Top Speed: Approx. 45 KPH
- Complete wheel set: Reinforced 25mm rim and 51mm tire
Boasting to be one of the most powerful electric bike conversion kits from AW, you’ll be getting everything except for the battery in this kit. Capable of achieving high speeds from the high-powered motor, you couldn’t ask for any more from a conversion kit.
Get the best rides with the pedal help
You don’t always have to engage the electric motors for bicycles all the time. If you’re getting this for exercise, the pedal help system will come in handy well enough since it will have you covered in uphill climbs.
Besides the workouts, that you’ll not be relying on the motor only for movement saves a little on the battery power. Speaking of battery power, let’s look at how it holds up.
Extend the life of your electric bike with the motor mechanism
With the dual mode motor operation under either the Hall and the non-Hall effect. With the hall-effect engaged, the unit can determine the motor position so it can keep pushing it around and extend on the battery life.
You can also opt for the non-hall option in which case you’ll not really be optimizing on the battery power.
Monitor the kit’s operation from the LCD display
Despite the top-notch operation of this conversion kit for electric bikes, it wouldn’t be any good if you could not monitor the controls well enough.
On the LCD display, it’ll be possible for you to see the battery capacity, the speed at which the bike is going, the time, the mileage and the gear controls.
Also…
Other than the amazing display, other accessories you’ll get from this bike include a complete wheel set that’s got a reinforced 32mm rim and a 40mm tire. For the wheel size, it’s a 26-inch x 1.75-inch size with a top speed of about 45kph.
PROS
- Get smoother rides with the pedal assistance system
- It’s capable of reaching speeds of up to 45kph
- The hall and non-hall effect extend the bike’s life.
- Capable of reaching speeds of up to 45kph
CONS
- The rear wheel motor is a little too heavy
#9 AW Electric Bicycle EBike Conversion Kit 22.5″ E-Bike Front Wheel Frame Kit 26″ 48V 1000W for Fat tire Bike Motor kit
 More Images9.4/10 Our Score
- 1000W 48V 22 1/2″ Electric Bicycle Front Hub Conversion Kit, fit for 5 5/16″ front dropout spacing and 26″x4″ tire, with a speed of 28 mile/h (45 km/h), make your bicycle an electric power moped, brushless hub motor for noiseless running, to fully enjoy the pleasure of riding
- Dual Mode Controller – Motor works under Hall effect and non-Hall effect, extend life for electric bicycle (If the components break down, controller will switch into non-hall effect mode, the motor will still be working ).
- Pedal Assist Sensor – To sense your pedal cadence and accordingly adjust motor turning rate, get power assistant without using throttle, great for a long-distance journey, avoid wrist pain from keep pressing.
- Durable Frame – Aluminum alloy frame for durability and stability. Convenient to Use – Twist Throttle makes speed control as a breeze.
- Hand brakes shut off the motor automatically to save energy and improve safety. CE certificated for safety assurance. Environmental Protection – Powered by battery, without carbon dioxide emissions.
Think of how amazing it would be to have a 1000W 48V brushless motor hub incorporated in your commuter, road or mounting bike; Mind-blowing, right? Well, read along and you’ll find what other amazing features there are to look forward to on this conversion kit from AW.
Enjoy high-speed rides from the 1000W motor
Capable of attaining speeds of up to 45 KM/H (since it’s got an amazing 470 rpm rating after all), the motor runs by a high powered 1000W 48V brushless hub motor. It’s also worth pointing out that the motor has an efficiency greater than 80% which is amazing as most of the power will push the bike.
Use the maintenance-free drive system for utmost longevity
Unlike most e bike conversion kits, this one comes with a drive system that doesn’t have any moving gears or chains while it observes a frictionless operation. You get to have a more efficient functionality and there’ll be fewer chances for it to break.
Monitor the battery capacity with ease on the thumb throttle
Like most powerful electric bike conversion kits, this one too features a thumb throttle which engages the motor and upon doing so propels the bike forwards with ease. You can also use the battery assist whereby you’ll pedal while using the motor and move with ease on inclined terrain.
Still, on the throttle, there is a low battery indicator from which it’ll be easy to monitor your battery capacity. The battery, however, is not included and you must get this separately from AW. On the bright side, however, there is a battery carrying bag included right out of the box.
PROS
- Features all-weather waterproof connections
- Includes an efficient and no-friction drive system
- Has a battery indicator on the throttle
- Run by a 1000W 48V brushless motor
CONS
- Be sure to get the exact measurements for a perfect fit.
#10 L-faster 250W Electric Conversion Kit for Common Bike Left Chain Drive Customized for Electric Geared Bicycle Derailleur(Twist Kit)
 More Images9.4/10 Our Score
If you are looking for the cheapest electric bike conversion kit, this is yet another one I’d recommend you look into. With including most of the components you’ll need for an e-bike conversion kit, the 24V36V250W will be worth the hassle.
Optimize using easy and functional controls
Considering this is a budget electric conversion kit, it’s important that the controls be as friendly as possible. This being the case, the conversion kit comes with either a twist throttle design or a thumb throttle design and despite the variant you prefer, it should be easy enough to engage the motor.
It’s easy to set up and install
Included in this kit is a customized sprocket and components and a mounting plate and bolts that make the installation process easy. What’s even more interesting is that the kit is compatible with most bikes and there is also an installation video to set it up, which makes DIY installation easy.
Keep track of the battery capacity with the indicator
Other than the twist throttle functioning to start up the motor, it has a battery indicator that lets you know the battery capacity.
Also…
Yet another feature you’ll find handy is the pedal assist which can use with the included controller such that you use less effort to pedal.
PROS
- Has a battery indicator
- It’s run by a 24V/36V 250W brush motor
- Easy to set up with included accessories
- Has a twist throttle or thumb kit for easy operation
CONS
- You might have to do some adjustments to have it fit in place.
#11 AW Electric Bicycle EBike Conversion Kit 22.5″ E-Bike Front Wheel Frame Kit 26″ 48V 1000W for Fat tire Bike Motor kit
More Images9.3/10 Our Score
- 1000W 48V 22 1/2″ Electric Bicycle Front Hub Conversion Kit, fit for 5 5/16″ front dropout spacing and 26″x4″ tire, with a speed of 28 mile/h (45 km/h), make your bicycle an electric power moped, brushless hub motor for noiseless running, to fully enjoy the pleasure of riding
- Dual Mode Controller – Motor works under Hall effect and non-Hall effect, extend life for electric bicycle (If the components break down, controller will switch into non-hall effect mode, the motor will still be working ).
- Pedal Assist Sensor – To sense your pedal cadence and accordingly adjust motor turning rate, get power assistant without using throttle, great for a long-distance journey, avoid wrist pain from keep pressing.
- Durable Frame – Aluminum alloy frame for durability and stability. Convenient to Use – Twist Throttle makes speed control as a breeze.
- Hand brakes shut off the motor automatically to save energy and improve safety. CE certificated for safety assurance. Environmental Protection – Powered by battery, without carbon dioxide emissions.
We’ve already established that AW stands out to be one of the best brands in the market and there’ are a lot of reasons that this is so. With this one, there’ll be less maintenance and it holds up well when on the road. Here’s a closer look at it…
Long lasting operation achieved by the waterproof components
Being one of the most overlooked features, this one observes complete waterproofing on the connection wires. This being the case, you won’t have to worry about cumbersome and costly maintenance procedures.
It’s also worth mentioning that besides being waterproof, the connections are more convenient and stable enough regarding their installation and maintenance.
Also…
The drive system doesn’t have any moving chains or gears hence no friction and you’ll get a more efficient drive system with fewer chances to break.
It’s powered by the 1000W 48V brushless motor
As far as the performance concerns, this bad boy stands out to be one of the best, as the motor can be able to achieve as much as 470rpm. It also has an efficiency that’s greater than 80% which is amazing since most of the battery power will run the motor which will run the 26″ fat tire single wall aluminum rim.
Easy operation with highly functional brakes and throttle
On to the operations, it comes with both the brakes and throttle. Whereas the former functions to cut off power to the motor for improved safety and to save on energy, the thumb throttle engages the motor and also have 3 LED indicators to monitor the battery power.
PROS
- Has got waterproof connections
- Maintenance-free drive system for high durability
- Comes with LED indicator lights to monitor battery power
- The 1000W 48V motor achieves speeds of up to 45kmph
CONS
- The movement is limited by the disk brakes.
#12 Theebikemotor 3000W Rear Wheel Hub Motor Electric Bike Conversion Kit + Disc Brake (26″ x 4.0 Rear Wheel + 7 Speed Gear, 48V3000W+LCD+48V26.1Ah Battery)
More Images9.3/10 Our Score
- The kit includes the motorized wheel, motor controller, brake lever, throttle, LCD or 3.2″ TFT display, Disc Brake & speed gear. No battery included!
- Top speed: 72V3000W-72-80km/h(50miles/h) goes with 26inch wheel; 60V3000W-about 60km/h(38miles) goes with 26 inch wheel; 48V3000W-50-55km/h(35miles/h) goes with 26inch wheel. Big torque:45N./M rated, 85N./M Max, good ability to climb the hill.
- 3000W DC motor with double hall sensor (150mm rear dropout for 21″motorcycle wheel and 170mm rear dropout for 4.0 fat wheel); The width of the 21″ Motorcycle rim is 42mm. Fits 2.75 width Tire. 4.0 Fat rim width: 80mm
- TFT & LCD display shows battery power level, time, speed, mileage, gear. components error checking.
- 60A controller with 24MOZ Tube in it, German quality; Disc Brake 140mm diameter plate. Extend life time for the brake, much sturdier than V-brakes
We’re almost done with our reviews and it’s been a good one so far. In 6 different options, you’ll be getting plenty of power with the 3000W 72V variant. The kit is also available in different wheel sizes and speed gears, and you’re bound to get one that’ll match your bike perfectly.
Monitor everything easily from the LCD display
Keeping track of your cruises is one of the most important things after installing it.
As we’ll find, later on, this one can achieve high-speed rides and monitoring how fast you are going should come as a priority. Available in either the LCD or the TFT option. In either case, you should be able to see the battery capacity, the time, speed, mileage, and the gear.
Get some of the fastest rides with the 3000W hub motor
Well, here’s something that you don’t come across every day. With as high a power rating as 3000W for the hub motor, the kit will get you riding as fast as 50mph.
For optimal results, it’s recommended that you get a 30AH-40AH battery.
Enjoy utmost longevity with the premium wheel design
There is a motorcycle grade rim and stainless-steel spokes or, you can get the variant with the 4.0 fat wheel both of which are durable enough.
PROS
- It’s possible to monitor everything from the LCD/TFT display.
- You can go as fast as 50mph
- Has a high-grade wheel/rim + spokes
- It’s run by a 3000W 72V motor
CONS
- Be sure to pick a wheel size that’s compatible with your bike.
#13 BAFANG Rear Wheel 500W 48V Hub Motor Electric Bike Conversion Kit for Kinds of Bicycles 20″ 26″ 27.5″ 700C Rear Wheel Ebike
More Images9.3/10 Our Score
- 【Easy to Convert】 DIY rear wheel ebike conversion kit for bicycle with rear drop out size “128-148mm” flywheel is ≦9 Speeds. Easily convert your pedal bike into a motorized bike within 1-hour.
- 【Stable Drive System】This Bafang rear-drive motor, which is compatible with the disc brake, has a rated power of 500W, providing ideal power for vehicles.
- 【Complete Accessories】 Comes with all necessary accessories. rear wheel & motor, controller, brake level or brake sensor for hydraulic brake levers, thumb throttle, controller case,Bafang LCD display (optional),extension cable,PAS,1T4 cable,LED light as a free gift, battery and charger(optional)
- 【Super Cost-Efficient】Strong and efficient, this motor greatly enhances riding comfort and is suitable for touring bikes, commuter bikes and mountain bikes. Speed up to 38-40 KMH, 470 RPM, efficiency ≥ 80%;Brake Levers cut off the power supply to the motor safely
- 【Warranty & Free Duty】1-year warranty, 100% replacement or refund if there is any quality problem,North American Service Center (Tel: 702-202-8375), providing technical support and after-sales service ; Free Duty, it is the seller who bear the duty, the buyer do not need to pay the duty
Well, despite what kind of bike you have, I’m positive that you will find one that fits yours perfectly well. There is, however, more to it than just the versatile fit. Here’s a closer look…
Enjoy high-speed rides from the 470rpm motor
There’s a high likelihood that getting high-speed rides was the motivating factor behind you opting to get an ebike conversion kit. With the high RPM, it’s able to go as fast as 38-40 km/h. the motor also has got an efficiency that’s greater than 80% and with the included brake leveler, you can cut power to it and come to a stop.
Has an LCD display to monitor the kit’s performance
As far as versatility concerns, this is definitely one of the best conversion kits for bikes you can ever get. With including the optional LCD display, it should be easy to monitor your rides, especially the speed and the pedal assist levels.
Features a high-speed drive system
Running your bike will be a 500W rear drive motor that is also compatible with the disc brake. As strong and efficient as it is, riding comfort is enhanced andit qualifies as the perfect match for commuter and mountain bikes.
It’s also worth pointing out that there is an option to get this with an electric bike conversion kit with battery
PROS
- Has got an 80%+ motor efficiency
- Capable of achieving speeds of up to 40 kmph
- Features an optional LCD display
- operates on a 500W 48V motor
CONS
- Pedal assist sensor may be too wide for some bottom brackets
#14 JAXPETY 48V 1000W Electric Bicycle Cycle E Bike 26″ Wheel Ebike Hub Motor Conversion Kit Hub Motor Wheel
More Images9.3/10 Our Score
- 48V 1000W and 750W super power brushless gearless hub motor, Restricted to 750W and 19.88mile/h by default as a road-legal kit
- Crank speed sensor for pedal assist, Aluminum alloy powerful controller
- Nylon tire& alloy rim& stainless steel spoke, Rare-earth metal magnates are used in the motor to efficiently produce large power
- Aluminum alloy powerful controller guarantee big current supply
- Twist throttle has battery level display and power-cut off button
Finishing things off, we’ve got a 48V 1000W from JAXPETY. Besides having a high-powered motor, it also includes all the essentials you need to have in an ebike conversion kit all of which boast a premium construction.
Get smoother rides with the pedal assist feature
Included in the package is a crank speed sensor that serves as the pedal assist. This allows you to pedal while using the motor help. This way, you get to have longer rides, get your workout in and have smoother rides.
Enjoy utmost flexibility with the road-legal hub motor
Despite being a 1000W motor, they restrict it to 750W to adhere to road safety. With the road safety engaged, you’ll go as fast as 19.88mph. alternatively, you could disengage it and experience much faster speeds at as much as 28mph.
Boasts a high-quality motor construction
On to build quality, it features a nylon tire and alloy rims, stainless steel spokes and rare-earth metal magnates for efficient power production from the motor. There’s also a powerful aluminum alloy controller form which the motor will get a high current supply.
PROS
- It operates on a 1000W 48V motor
- You can ride at a safe 19.88mph or a faster 28mph
- Features a battery level display on the twist throttle
- Has got the pedal assist sensor for effortless rides
CONS
- Adjust the rear cable for the wheel to fit.
16. eaysg 26 48v 1500w ebike front wheel electric bicycle motor conversion kit motor hub

Get smoother rides with the pedal assist feature
Wheel size: 26 inchFeature:1. 26in 48V 1000W super power brushless gearless wheel hub motor, limited to 1000W and 50km/h by default.2. Upgraded safety design, we added a fuse to the power line, the fuse can be used to ensure that the power supply is always protected.3. Nylon tires, Zinc magnesium alloy rims, rare‑earth metal magnets are used in the motors to efficiently generate high power.4. Easy to install, pre‑drilled disc holes can be used to install disc brakes (not included).
PROS
- It is easy to install and operate
- It is inexpensive.
- The battery lasts a long time.
- easy to charge.& repair.
CONS
- The size is too large
The difference between a front wheel and a rear wheel conversion kit
One of the biggest decisions you will have to make is choosing between the installation of either the front wheel or the rear wheel drive. How about we find out what sets these two variants apart?
It’s a matter of preference and how much you intend to get from your bike once you’ve installed the conversion kit. It’s basically a matter of having to choose between the maintenance and how good the ride feels.
The front wheel
The front wheel is quite a simple variant as far as electric conversion kits are concerned. Installed in the front wheel, the conversion kit shares the overall strain on the bike between both the rear wheel as you propel it and the front wheel. Since something separate the motor from the rest of the bicycle, it will also be much easier for you to maintain it.
The downside of getting the front wheel is that the front part becomes much heavier, making it a little difficult to control. Traction, however, becomes an issue especially on tracks that have to lose surfaces.
Rear wheel conversion kit
The difference isn’t really that huge as compared to the front conversion kit. The main advantage of having a rear wheel over the front wheel is that even at high power levels, you won’t compromise control or damaging the frame of the bike.
The downside of a rear conversion kit for your bike is that despite being more fun, it compromises the spokes because of high stress and more so, it will limit you in using gears.
36V vs 48V conversion kit- Which one should you pick?
Other than just having to decide whether you need the bike kit installed in the front or the rear wheel, something else you must decide on is how many volts the kit has. In most cases, you must pick between either a 36V or a 48V conversion kit.
So, to clear things out, let’s have a look at when either of these would be a suitable option to go with, shall we?
The 36V
These kinds of kits will normally require a battery that provides more power than it rates them at, say for instance you have a battery that supplies between 30V to 42V.
In the above scenario, the ekit will be fully charged when supplied with a 42V battery as it will hold as much energy as possible. When supplied with only 30V, it should shut down and not give any power at all.
Speaking of power, I’d recommend that you get for the 36V if your main goal of getting an ebike is only recreation. The reason for this is that a 36V ekit will have less power as compared to the 48V ekit assuming the amperage rating is the same.
The 48V
As compared to the 36V conversion kits, the 48V conversion kits will deliver more power as compared to a 36V assuming the amperage is the same. They’ll also be relatively faster, which makes them the preferable choice.
If you are looking for something, that’ll be most suitable for an uphill climb, I’d recommend that you go for the 48V electric bike conversion kits.
For more accurate results regarding the performance of the ekit you’ll want to install in your bike, I’d recommend that you pay attention to the Watt-Hour. Allow me to explain why this is so.For the battery running your ekit, you’ll want to focus on the amp hour rating it’s got which, in most cases is between 10 and 20 Ah.
The general rule of thumb when choosing a battery based on the Ah rating is that the higher it is, the better. So, let’s assume that you have a battery that is rated at 10Ah and you have both the 36V and the 48V ekits.
Now, whereas the Ah determines how many Amps a battery can sustain for an hour, the Wh enables us to know how much usable energy is present in a battery pack and it factors in the voltage. For the 48V ekit, you’ll be getting 480Wh whereas the 36V will give you just 360Wh.
It’s all about weighing out between runtime and the distance covered depending on how fast the bike will move at full speed.
Reference Read: Best Trick Scooters 2022
How to choose an electric bike conversion kit?
Before we have a look at the individual reviews, it would be a good idea to first see what really defines a conversion kit. Here’s the surest way to ensure you get the very best; Going through the reviews blindly is the last thing you want, right?
The Brand Name
I’ve already listed some of the best brands they guarantee each of which to give you a kick for your buck as far as getting the best electric conversion kit is concerned. Now, if it’s your very first time hearing about the electric conversion kits, paying attention to the brand would be the surest way to get one that won’t let you down.
The reason for this is that you’ll save yourself from having to learn about all the technical behind choosing something that’ll work best for you. Instead, going for the best brand will enable you to pick an e-bike conversion kit with battery that delivers what it promises
Durability
Just like any other component on your bicycle, the durability o the electric conversion kit should also be highly prioritized. Regarding where you’ll be using your bike, you should be able to know how well the parts used in the kit’s construction will hold up.
For a rear conversion kit, I’d recommend that you go for as durable a design as possible since the kit will most likely be doing most of the propulsion even in uphill climbs. Front ekits are for relatively flat terrain and are not subjected too much wear and tear.
The more durable it is, the more expensive it is and vice versa.
Ease of use
Yet another thing worth paying attention to is how easy it will be to operate the ekit. I’d recommend that you go for one that’s as easy to install as possible. Besides this, get one that’s easy to operate and can be disassembled and reassembled easily.
Concealment and noise
The two last things you’d want to stand out after you have installed your conversion kit, it’s important that you choose one that will have as little noise as possible. The last thing you want must put up with all that as you a cruise.
As for concealment, I’d recommend that you go for a kit that is as compact as possible since this would be the surest way to ensure that it remains hidden. You might also want to consider the fact that one that is not concealed will be more susceptible to damage as compared to one that is concealed.
In some scenarios such as racing, it would do no harm to go for an exposed conversion kit.
Other things to consider
Besides the above features, there are additional factors you’ll want to pay attention to when picking:
- The wattage: as you will find out in a short while, most of the conversion kits we’ll be looking at are rated at 250, 500 or 750 watts and so forth. This is basically the power output of the electric motors for bicycles, and the general rule of thumb is that the higher the wattage, the more the power rating.
- Battery Voltage: the bike motors normally come with a Li-Ion battery and it is important that the voltage rating matches the voltage of the ekit is why in most e-bike kits, you’re bound to find 24, 36- or 48-volt batteries.
- Speed: other than just paying attention to the amount of power your conversion kit has, speed is yet another thing you should go into. You’ll want to have good enough a conversion kit installed in your bike such that it’ll get you where you need to be fast enough.
- The Amp hours: this is the amount of energy that can be channeled from the car batterywhich otherwise known as the battery’s capacity. With a higher battery capacity, the bike can run much longer and in most conversion kits, the Amp Hours rating is normally between 8 and 20 Ah.
Setting up the electric conversion kit on your bike
We’re one with the bigger portion of today’s post but it won’t really be a full package if you don’t know how to set everything up, will it? Well, it’s not as easy to install as it is the case with other bike accessories but with this DIY guide, you’ll be set to go.
To avoid wearing out the drivetrain twice as fast, I’d recommend that you go for the hub motors (and so should you) instead of the mid-drive kits.
Choosing a battery pack
The very first thing you must do is selecting a battery pack. They should arrive the battery pack to go for at after first deciding on what you will do with the bike. However, I would recommend that you settle for one with a high voltage and an amp hour rating.
At the same time, I’d recommend that you stick to as compact a battery pack as possible; similar to your conversion kit, the battery should not stick out of your bike.
Setting up the hub motor
After settling on your preferred battery pack of choice, the next way to go would be to set up the hub motor in which case you’ll have to remove the rear wheel.
To remove the wheel, simply loosen the brake cable followed by the quick release lever on the wheel. After this, hold down the rear derailleur while lifting the wheel after which it can be easily removed.
Remove the freewheel
After removing the wheel, you’ll also have to remove the freewheel in which case you’ll want to grab a freewheel remover tool. After removing the freewheel, you’ll also want to remove the tube and tire both of which you’ll be reusing.
First of all, deflate the tire and then use a lever (s) to remove it from the wheel
Tire and wheel re-installation
You’ll be getting a new wheel within the conversion kit around which you’ll have to install the tube and tire which should be quite easy then followed by the freewheel.
You should also only use the washer that is included in the kit as a spacer to the axle. This will function to prevent the freewheel from binding on the dropout.
Set up the running wires
Since the last thing you want to deal with is a messy tangle of wires, secure the wires present with zip-ties. You should loop it around the seat tube to avoid cutting it to the battery and then connect it directly to the battery mount.
Depending on the kind of bike you are using, you may install the battery in a different position. For mountain bikes, it should be easy as there are holes pre-drilled in the water bottle holder location. For road bikes, however, you may have to drill holes in the seat tube or replace your water bottle.
Setting up the display controls
On to the handlebars, it’s time to set up the controls. First, remove the grips using an air compressor and then followed by the shifters and the brakes present. Depending on where you are most comfortable with, go ahead and mount the display; I’d advise that you do so at the center of the handlebars.
Next, install the throttle for speed and e-brake for cutting off power at your preferred side of the handlebar and the same goes for the display controls. Depending on how much space you’ll have left, you may or may not be able to re-install the shifters.
Last, re-install the grips, reconnect the brake cables and perform a little cable management (I’d recommend a zip tie) and the bike will now be ready to be taken for a test ride.
Conversion kit accessories
I’ve let you in on quite a lot of info regarding electric bike conversion kits from the DIY electric bike setup to the reviews and buying a guide of the same. As much as all this info is helpful, it’s time you know of the accessories that come in a complete electric bike conversion kit.You should avoid cheap electric bike conversion kit with battery if you desire a performance bike.
The motor
Being what propels the bike altogether, the motor will mostly be in the front or rear wheel and it’s all a matter of preference..
The battery
This powers up the motor. Sometimes, it may have an USB charging port via which you can charge up your smartphone.
The control, display and throttle control
With the throttle control, you should be able to engage the motor to take over. The controller functions to ensure the working between the electric motor, the battery, and the speed monitor.
As for the speed monitor, it may or may not be present but when available, it’s normally a wireless sensor that you attach on the spokes. With the rotation of the spokes, you should be able to see how fast you’re going on the LCD display on the handlebar
The e-tire
You’ll either be getting a whole tire or just the wheel depending on the package you buy. If you get the wheel alone, you must reuse your old tires on your new wheel and if otherwise, you’ll just have to replace the old wheel altogether.
Assembly tools
For the assembly tools, you’ll be getting these depending on the kit you’re getting. However, get an Allen wrench, adjustable wrenches, crank arm removable tools, and zip ties for cable management.
Frequently asked questions (FAQs)
Before we wrap things up and call it a day, here are some of the most frequently asked questions that you should get the answers to.
How fast can my bike go with an E-BIKE kit?
There are quite a lot of factors that determine the top speed of your electric bikes, such as the rider weight, the terrain, or the wheel size. The speed depends on the amount of power motor hub and the battery in use. For instance, a 350W geared hub motor at 36V would go at a speed of 20mph which is also what you will get from a 500w geared performance hub motor with the same battery.
How far can I be able to go with my electric bike?
-though there are a lot of factors determining how far your bike can go, the major one is the battery’s amp Hour rating. The general rule of thumb is that the most powerful electric bike conversion kit is normally that with a larger Ah rating and vice versa.
Is an electric bike suitable for going uphill?
–a hub motor that’s operating at a power above 350 watts should be able to get you a good enough uphill climb provided it has a controller that’s over 22 amps. These will provide enough power to get you where you want but depending on the steepness of the hill or the weight of the load, you may, however, have to pedal a little.
AW 22.5″ Electric Bicycle Front Wheel Frame Kit for 26″ 48V 1000W 470RPM E-Bike
Our top Choice More Images9.5/10 Our Score
- Durable Frame
- Dual Mode Controller
- Pedal Assist Sensor
Final verdict
Stepping things up from the basic push pedal bike to a high-performance electric bike is what everyone would want, right?
With either of the above listed electric bike conversion kits, you’re guaranteed to get more speed, long hours of riding, and a greater torque for uphill rides.
All the same, it’s important that before getting one, you weigh out your options to get a kick for your buck. Depending on where you’ll be doing most of your riding, be sure to pick a bike that’ll not let you down. It’s also important that you focus on the construction of your bike on features such as the wheel size or battery installation location.
It’s all about getting one that’ll be a perfect match- our top 15 reviews ought to give you quite a good head start.
![Best Flat Bar Road Bike In 2021[Reviews+Expert Buying Guide]](https://landroverbar.com/wp-content/uploads/2020/08/xbest-flat-bar-road-bike-768x384.jpeg.webp.pagespeed.ic.xaCdgQYWWr.webp)