How to Know How Many Cylinders Your Car Has
To determine how many cylinders your car has, check the vehicle’s owner’s manual or the manufacturer’s website. You can also count the number of spark plugs or look for the engine’s specifications online.
Knowing the number of cylinders in your car is essential for understanding its performance and maintenance requirements. By familiarizing yourself with this information, you can better care for your vehicle and ensure it runs smoothly for years to come. Regular maintenance and proper understanding of your car’s features contribute to its longevity and overall performance on the road.
Stay informed about your vehicle’s specifications to make informed decisions and maintain its optimal condition.
Credit: www.totalcardiagnostics.com
Why It’s Important To Know
It’s crucial to know the number of cylinders in your car as it directly impacts your driving experience, safety, and maintenance. Understanding this fundamental aspect of your vehicle ensures you can make informed decisions regarding driving habits and maintenance routines. Let’s delve into why it’s essential to be aware of the cylinder count in your car.
Knowing the number of cylinders in your car is vital for safety. Engine performance and power output are directly related to the cylinder count. Having this knowledge allows you to understand how your vehicle accelerates, maneuvers, and reacts in various driving conditions. Additionally, understanding your car’s power capabilities is essential for ensuring safe overtaking and merging on highways.
Understanding the number of cylinders in your car is crucial for maintenance purposes. It helps you select the correct engine oil, spark plugs, and other maintenance components that are specifically designed for your engine type. Furthermore, it enables you to identify and troubleshoot any issues related to specific cylinders, leading to more targeted and efficient maintenance and repairs.

Credit: m.youtube.com
Determining The Number Of Cylinders
Determining the number of cylinders in your car is essential for understanding its performance and maintenance needs. Below are the steps you can take to accurately identify the number of cylinders your vehicle has.
Engine Specifications
Check your car’s manual for detailed information on the engine specifications, including the number of cylinders. You can also search online by entering your car’s make, model, and year to find the specific engine details.
Visual Inspection
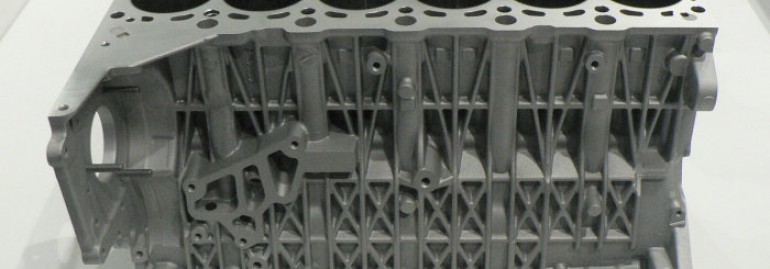
One of the simplest ways to determine the number of cylinders is through a visual inspection of your car’s engine. Open the hood and locate the engine block, which is usually located towards the front of the vehicle. Count the number of spark plugs, as each cylinder typically corresponds to one spark plug.
- Step 1: Open the hood of your car.
- Step 2: Locate the engine block.
- Step 3: Count the number of spark plugs.
If you are having trouble identifying the number of cylinders in your car, consult a mechanic or refer to a repair manual for further assistance.
Understanding Engine Cylinders
Understanding Engine Cylinders: The cylinders in your car’s engine play a crucial role in the combustion process, determining your vehicle’s power and performance.
Function
The cylinders are where the fuel and air mixture is compressed and ignited, generating the power needed to move your car.
Types Of Engines
1. Inline Engine – Cylinders are arranged in a straight line, commonly found in smaller vehicles.
2. V-Shaped Engine – Cylinders are set in a V shape, often seen in larger and performance vehicles.
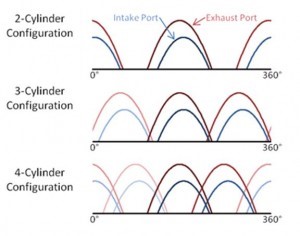
Common Cylinder Configurations
A car’s cylinder configuration refers to the arrangement of the engine’s cylinders, which play a crucial role in the vehicle’s performance. By understanding the common cylinder configurations, you can better comprehend your car’s capabilities and maintenance needs.
Inline
Inline engines, also known as straight engines, have their cylinders arranged in a single line along the length of the engine. This configuration often results in a more compact design and facilitates easier access for maintenance tasks such as spark plug replacements.
V-shaped
V-shaped engines, also called V engines, feature cylinders arranged in two separate banks set at an angle to form a ‘V’ shape. This configuration allows for smoother operation and balanced weight distribution, contributing to improved performance and reduced vibration.
Flat
Flat engines, sometimes referred to as horizontally opposed engines, have their cylinders arranged in two banks located opposite each other. This layout results in a lower center of gravity and helps enhance stability and handling, making it a popular choice for performance-oriented vehicles.
Implications Of Cylinders On Performance
Knowing the number of cylinders in your car is crucial to understanding its performance. With more cylinders, your car can generate more power and acceleration, resulting in a faster and smoother ride.
The number of cylinders in a car engine can have significant implications on its performance. Let’s explore two key aspects affected by the cylinder count: power output and fuel efficiency.
Power Output
The number of cylinders directly influences a car’s power output. Generally, more cylinders in an engine result in higher power output.
The power output of an engine is determined by the combustion happening within each cylinder. Each cylinder contains a piston that moves up and down, creating the necessary force to produce power.
Table: Comparison of Cylinder Counts and Power Output
| Number of Cylinders | Power Output (Example Only) |
|---|---|
| 4 | 125 horsepower |
| 6 | 200 horsepower |
| 8 | 300 horsepower |
| 12 | 500 horsepower |
As demonstrated by the table above, engines with more cylinders tend to have higher power outputs. This is because the more cylinders an engine has, the more combustion events it can generate, resulting in more power being produced.
Fuel Efficiency
The number of cylinders also affects a car’s fuel efficiency. In general, engines with fewer cylinders tend to be more fuel-efficient.
When an engine has fewer cylinders, it requires less fuel to operate because there are fewer combustion events happening. This means that engines with fewer cylinders can achieve better fuel economy.
However, it’s important to note that advancements in technology have allowed manufacturers to optimize engines with more cylinders for improved fuel efficiency. Factors such as turbocharging, direct injection, and variable valve timing can help reduce fuel consumption in engines with a higher cylinder count.
Table: Comparison of Cylinder Counts and Fuel Efficiency
| Number of Cylinders | Fuel Efficiency (Example Only) |
|---|---|
| 4 | 30 miles per gallon |
| 6 | 25 miles per gallon |
| 8 | 20 miles per gallon |
| 12 | 15 miles per gallon |
The table above illustrates that engines with fewer cylinders typically achieve better fuel efficiency. However, advancements in technology have narrowed the gap between fuel efficiency in engines with different cylinder counts.
To summarize, the number of cylinders in a car engine directly impacts its power output and fuel efficiency. Engines with more cylinders tend to produce higher power output, while engines with fewer cylinders generally offer better fuel economy. However, it’s important to consider that advancements in technology have allowed for improved performance in engines with different cylinder counts.
Credit: www.totalcardiagnostics.com
Frequently Asked Questions For How To Know How Many Cylinders Your Car Has
Is My Car A 4 Or 6-cylinder?
To determine if your car is a 4 or 6-cylinder, check the vehicle’s manual or look under the hood for the engine’s cylinder count.
How Do I Find How Many Cylinders My Car Is?
Check your car’s engine bay or owner’s manual to locate the cylinder count. It’s usually specified on the engine block or in the vehicle documentation.
How Do You Tell If A Car Is A V6 Or V8?
You can tell if a car is a V6 or V8 by checking the number of cylinders in the engine. V6 engines have 6 cylinders, while V8 engines have 8 cylinders. Look under the hood for the cylinder layout to determine the engine type.
Is A 2.4 Liter Engine A 4-cylinder Or 6-cylinder?
A 2. 4 liter engine is typically a 4-cylinder engine.
How Do I Determine The Number Of Cylinders In My Car?
To find out the number of cylinders your car has, you can check the vehicle owner’s manual or the manufacturer’s website for specifications.
Why Is It Important To Know The Number Of Cylinders In My Car?
Knowing the number of cylinders in your car is essential because it helps you understand the engine’s power, performance, and fuel efficiency.
Can I Determine The Number Of Cylinders By Looking At The Car’s Hood?
Unfortunately, you cannot determine the number of cylinders just by looking at the car’s hood. It is best to consult the owner’s manual or manufacturer specifications.
Conclusion
Understanding your car’s cylinders is essential for maintenance and performance. By following the steps outlined in this guide, you can easily determine how many cylinders your car has. Knowing this information will help you communicate effectively with mechanics and make informed decisions about your vehicle’s care.
Stay empowered and informed as you continue to maintain your car.